Spice Cake Brownies How to Bake Bliss
There’s just something about a warm slice of cake that feels like a hug, especially when it’s packed with fresh veggies and topped with a sweet glaze. I remember the first time I made this zucchini swirl coffeecake—it was a lazy Sunday afternoon, and I had a bunch of zucchini from my garden that I didn’t want to waste. I wasn’t really in the mood for a big fancy dessert, but I wanted something cozy, something that’d fill the kitchen with that irresistible smell of baked goodness. This recipe is a total lifesaver on busy nights or when I want to whip up a quick treat for the kids—you know, that kinda thing where you just throw everything together and hope it turns out. The best part? It’s surprisingly simple yet elegant enough to serve to friends or family. My kids ask for this all the time, and honestly, it’s become part of our weekend tradition. Trust me on this one: it’s the kind of recipe you’ll want to keep in your back pocket, ready to make whenever you need a little comfort and sweetness in your life. Plus, the zucchini moisture keeps it nice and tender, and nobody suspects those sneaky veggies hidden inside!
What is Zucchini Swirl Coffeecake?
This zucchini swirl coffeecake is basically a soft, moist cake layered with a cinnamon-sugar filling, then swirled to create a beautiful marbled effect. Think of it as a cross between a quick bread and a breakfast cake—perfect for mornings, brunches, or even an afternoon pick-me-up. It’s inspired by those classic coffee cakes we all grew up loving but elevated with a note of freshness from zucchini. The name “swirl” comes from the way the filling and batter blend together into those gorgeous ribbons of flavor and texture. It’s essentially the kind of cake that makes everyone say, “Wow, what’s in this? It’s so moist!” My version keeps things straightforward—no fancy techniques, just good, honest ingredients combined with a little love. It’s a great way to use up that summer squash or to sneak some veggies into the kids’ snacking routine without any complaints. And if you’re a fan of cinnamon and warm, comforting flavors, you’re in for a treat!
Why you’ll love this recipe?
What I love most about this zucchini swirl coffeecake is how effortlessly cozy and flavorful it is—you get that perfect balance of sweetness and spice, with a surprising boost of moisture from the zucchini. The cinnamon-sugar filling isn’t just yummy; it adds a richness that makes each bite feel indulgent, even though the ingredients are totally everyday pantry staples. Plus, this is one of those recipes that’s super forgiving—overmixing? Not a problem. Slightly extra zucchini? Totally fine. The process is straightforward enough that even if you’re short on time, you can whip this up in no time and still get a bakery-worthy result. It’s cost-effective, too, since you probably have most of the ingredients hanging around—flour, sugar, eggs, zucchini—and the finishing glaze is completely optional but makes it feel just a little more special. I’ve made this with finely grated carrots and even chopped apples when zucchini wasn’t in season, and trust me, it’s just as delightful. The versatility alone makes it a go-to recipe for me when I want to bake something comforting and family-approved!
How do I make Zucchini Swirl Coffeecake?
Quick Overview
This recipe is all about layering and swirling. You make a simple batter, prepare a cinnamon-sugar filling, then layer them in your baking dish and swirl to create those mesmerizing ribbons. The magic is in the marbling—just a few gentle strokes with a knife, and you’re transported to that bakery-style look. It’s seriously easy, especially since you don’t need any special equipment—just a mixing bowl, a spatula, and your favorite 9-inch square pan. The baking time varies a bit depending on your oven, but usually, it’s about 35-40 minutes until it’s golden and a toothpick comes out clean. And, of course, I love finishing it with a drizzle of glaze—simple powdered sugar mixed with milk or citrus juice—that adds just the right touch of sweetness and shine. This is one of those recipes where your house will smell like cinnamon-spiced heaven, and before you know it, everyone will be gathered around, waiting for their piece.
Ingredients
For the Main Batter:
– 2 cups all-purpose flour (I always go for a good quality brand for the best rise)
– 1 cup granulated sugar
– 1/2 teaspoon baking powder
– 1/2 teaspoon baking soda
– 1/4 teaspoon salt
– 1 teaspoon ground cinnamon
– 1/2 cup vegetable oil or melted butter (but trust me, I tested with almond milk and it actually made it even creamier!)
– 2 large eggs
– 1 teaspoon vanilla extract
– 1 cup grated zucchini (squeezed dry—trust me, excess moisture can make it soggy)
For the Filling:
– 1/2 cup brown sugar
– 1 teaspoon ground cinnamon
– 2 tablespoons softened butter or coconut oil
– 1/4 cup chopped nuts or chocolate chips (optional, but my kids love the crunch!)
For the Glaze:
– 1 cup powdered sugar
– 2-3 tablespoons milk or citrus juice
– A splash of vanilla or lemon zest (for a flavor boost)
Step-by-Step Instructions
Step 1: Preheat & Prep Pan
Preheat your oven to 350°F (175°C). Grease a 9-inch square baking dish with butter or non-stick spray. I like to line mine with parchment paper for easy removal—trust me, this makes slicing so much neater. Set the pan aside while you get your batter ready. The smell combined with the warm glow of the oven already feels comforting, doesn’t it?
Step 2: Mix Dry Ingredients
In a big bowl, whisk together the flour, sugar, baking powder, baking soda, salt, and cinnamon. I always do this first—makes sure everything’s evenly distributed, especially the baking soda and powder, so your cake rises nicely and doesn’t turn out flat or odd-tasting. It’s a simple step but crucial!
Step 3: Mix Wet Ingredients
In a separate bowl, whisk together the oil, eggs, vanilla, and zucchini. If your eggs are cold, just give them a quick beat first so they blend smoothly into the mix. I tested with almond milk instead of eggs once, and honestly, it turned out just as tender—so dairy-free friends, take note! Make sure your batter isn’t too warm—if your zucchini just came out of the fridge, a couple of minutes at room temp helps everything blend better.
Step 4: Combine
Add the wet ingredients to the dry and fold gently—no vigorous mixing! You want the batter to be just combined; overmixing can lead to denser cake. The batter will be thick but pourable—think of brownie batter consistency. If it feels stiff, a splash more milk won’t hurt.
Step 5: Prepare Filling
Mix the brown sugar, cinnamon, and softened butter together until crumbly. If you want crunch, toss in some chopped nuts or chocolate chips. I’ve done both, and honestly, each version is delicious—it just depends on your mood.
Step 6: Layer & Swirl
Pour half the batter into your prepared dish and spread evenly. Sprinkle the filling over the batter, then top with the remaining batter by spooning dollops here and there. Use a toothpick or a knife to gently swirl the fillings into the batter—don’t overdo it, just a few gentle strokes for a marbled effect. Watching those ribbons form is almost like art, and it’s so satisfying!
Step 7: Bake
Bake for about 35-40 minutes, or until the top is golden and a toothpick inserted in the center comes out clean. Every oven is a little different—if your cake starts to brown too quickly, tent it with foil halfway through. I always set a timer and keep an eye on it—I want that perfect moist crumb, not a dry brick!
Step 8: Cool & Glaze
Let it cool in the pan for about 15 minutes before transferring to a wire rack. Once cooled slightly, whisk together your glaze ingredients and drizzle generously over the top. The glaze melts into the cracks and makes every bite irresistible—my secret weapon for that bakery look. I like to wait until it’s just warm, so the glaze sinks in but doesn’t run off.
Step 9: Slice & Serve
Use a sharp serrated knife for clean slices—the marbled swirl makes it pretty much a piece of art, so take your time. Warm or room temperature, this coffeecake is divine. Serve it with a cup of coffee or even a dollop of whipped cream for added indulgence. It disappears so fast at my house, I swear! The kids ask for seconds, and it’s perfect for next-day breakfast too—especially if you warm a slice in the microwave for 10 seconds. Yum!
What to Serve It With
This coffeecake is so versatile, I always keep a batch in the fridge. For breakfast, I love pairing it with a hot cup of coffee or a glass of fresh orange juice. It’s delicious on its own, but a smear of cream cheese or a dollop of Greek yogurt adds a little tang, balancing the sweetness. I’ve also served slices warm with vanilla ice cream or a drizzle of caramel for special occasions—that’s a real crowd-pleaser. During brunch, I like stacking slices with fresh berries and a little mint for color. And honestly, it’s the kind of dessert that works for casual family dinners, loafing in pajamas on Sunday, or even bringing to a potluck—you’ll get compliments every time! My tradition is to bake a batch on lazy weekends, slice them up, and freeze extras for busy mornings. It just makes life that much sweeter.
Top Tips for Perfecting Your Zucchini Swirl Coffeecake
Over the years, I’ve learned a few tricks that make this recipe even better. First, when prepping the zucchini, I always squeeze out as much moisture as possible—I use a clean kitchen towel to wring out the shredded zucchini thoroughly. This prevents sogginess and keeps the crumb tender. If your batter feels too thick, a splash of milk can loosen it up a bit—don’t be shy about adjusting. When swirling the batter, I find that using a butter knife or skewer works best; swirl gently, creating a marbled look without disrupting the layers too much. For the filling, I sometimes sprinkle a little nutmeg or even a touch of ginger for extra warmth. You can also swap out brown sugar for coconut sugar or raw honey—trust me, the flavor is fantastic. When baking, I recommend placing your pan on the middle rack and checking around the 35-minute mark—it’s better to underbake slightly than go too far and risk a dry cake. For the glaze, I experiment with different citrus zests or add a splash of vanilla or bourbon to deepen the flavor. The key is to keep everything steady, not rushing the process. Once, I overmixed and the cake turned dense; now, I just fold until everything is just incorporated. Small tweaks, big difference. Oh, and a tip for neat slices—chill the cake for about 30 minutes before slicing; it holds together beautifully that way. Little lessons learned from lots of baking sessions—this one’s become a family favorite for a reason.
Storing and Reheating Tips
I always wrap leftover slices tightly with plastic wrap or store them in an airtight container. At room temperature (if you plan to eat it within a day or two), this coffeecake stays fresh for about 2 days—cover it loosely with foil to retain moisture. In the refrigerator, it’s good for up to 5 days—just be sure to let it come to room temp or microwave for about 10 seconds to bring back that tender crumb. For longer storage, pop slices into the freezer wrapped in foil or a freezer bag—this way, you can enjoy it later without losing flavor. Thaw at room temp or warm in the microwave. When reheating, a quick 15-20 seconds on high does the trick, or pop a slice in the oven at 350°F for about 10 minutes for that just-baked warmth. If you’re glazing again, do it just before serving so it doesn’t get sticky or soggy. With proper storage, this coffeecake stays tasty and moist, almost like you just baked it!
Frequently Asked Questions
Final Thoughts
If you’re looking for a cozy, slightly wholesome cake that’s perfect for breakfast, brunch, or just because, this zucchini swirl coffeecake is your new best friend. It’s one of those recipes I’ve made countless times, each batch turning out tender, bursting with cinnamon and zucchini, and topped with that just-sweet-enough glaze. Honestly, it’s become a staple in my kitchen—more so after I learned how forgiving and adaptable it can be. My favorite part? Watching the swirl come together, creating those pretty marbled ribbons, and knowing I snuck a veggie into something everyone will love. I hope you try it—you’ll see, the smell alone will bring everyone running to the kitchen! Feel free to play around—add nuts, switch up the spices, or try different fruits. I’d love to hear your variations. Happy baking, and enjoy every bite of this cozy treat!
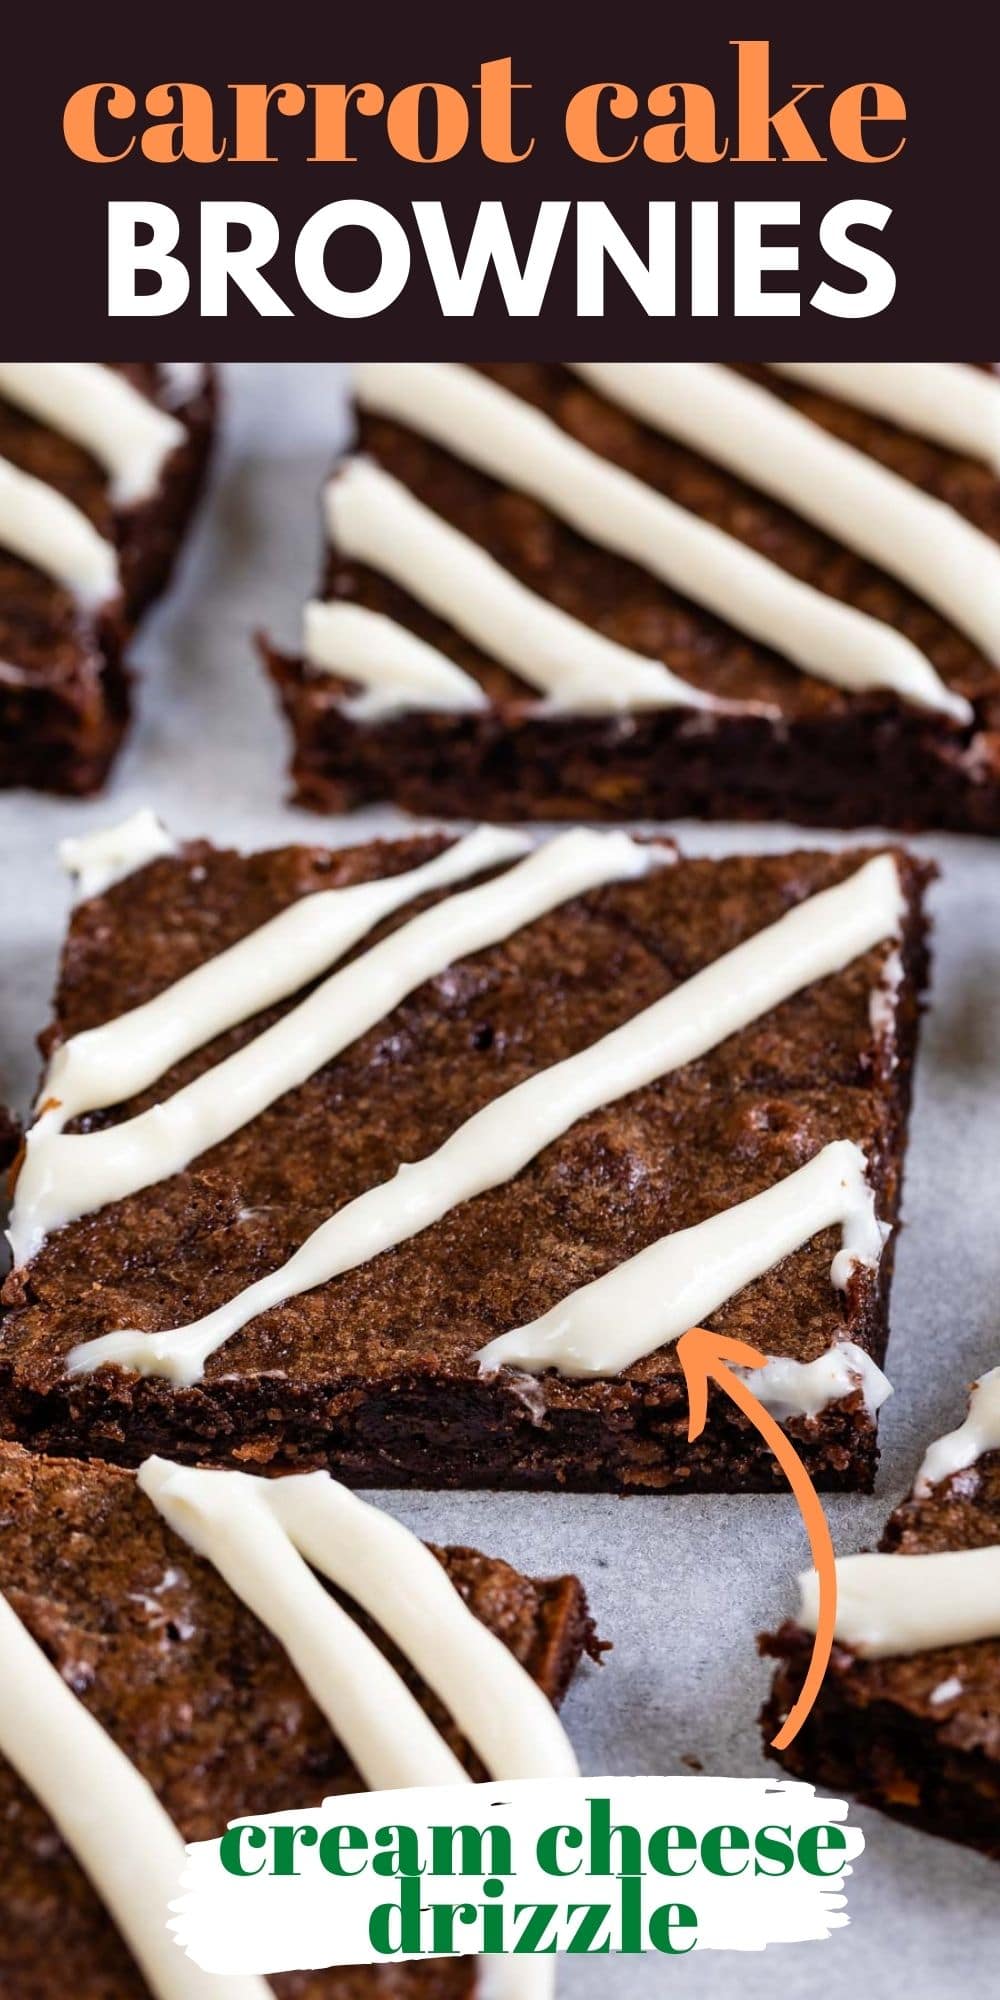
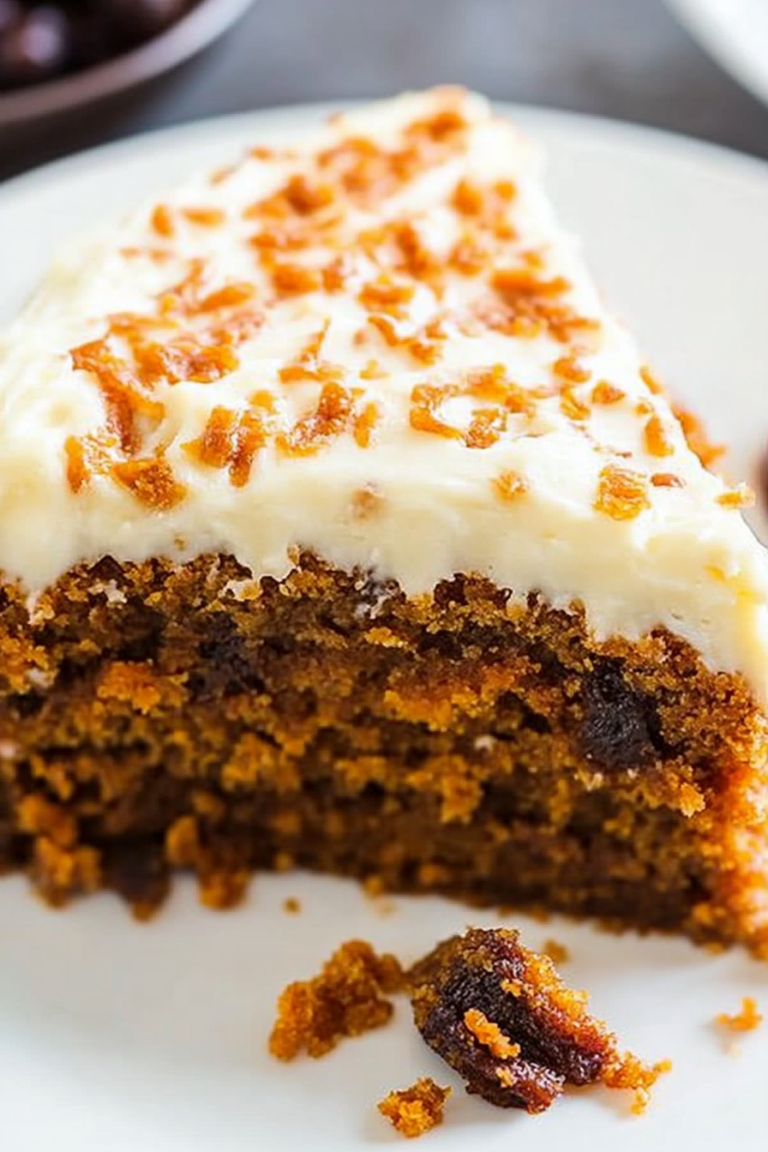
carrot cake brownies
Ingredients
Method
- Preheat oven to 350°F. Line a 9x9 inch pan with parchment paper and lightly grease.
- In a bowl, whisk together oil, granulated sugar, and brown sugar until well combined.
- Add eggs one at a time, mixing well after each addition. Stir in cocoa powder, vanilla, cinnamon, salt, and ground ginger.
- Gradually mix in flour, then fold in shredded carrots.
- Pour batter into prepared pan and bake for 25 minutes. Let cool completely before frosting.
- In a small bowl, beat the cream cheese and powdered sugar until smooth. Mix in vanilla and milk to reach desired consistency.
- Spread frosting over cooled brownies. Slice and serve.