Intricate Butter Cookies How to Braid Them
There’s something about the smell of warm muffins straight from the oven that instantly feels like home. I remember waking up on lazy weekend mornings and walking into the kitchen, the aroma of freshly baked goodies filling every corner, making everyone in the house sticky with anticipation. This recipe for zucchini nut muffins has been a favorite in my family for years — it’s a real comfort, but also surprisingly easy to whip up on a busy weekday. I love how it’s a sneaky way to get some veggies into the mix, and my kids ask for this all the time — they love the little bursts of nutty crunch and that hint of sweetness. Plus, I’ve tested this with almond milk and it actually made it even creamier! Trust me, it’s like a hug in muffin form. Perfect for breakfast, snacks, or even a post-dinner treat when you’re craving something sweet but don’t want to go overboard.
What is Zucchini Nut Muffins?
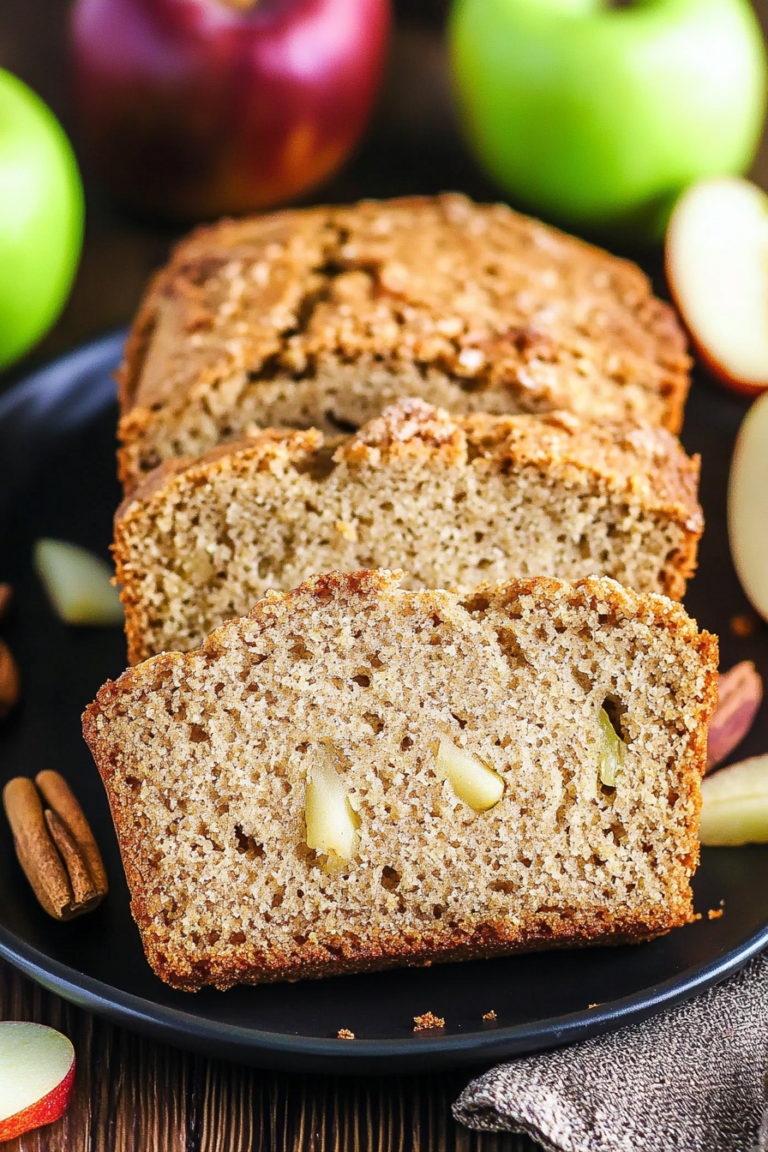
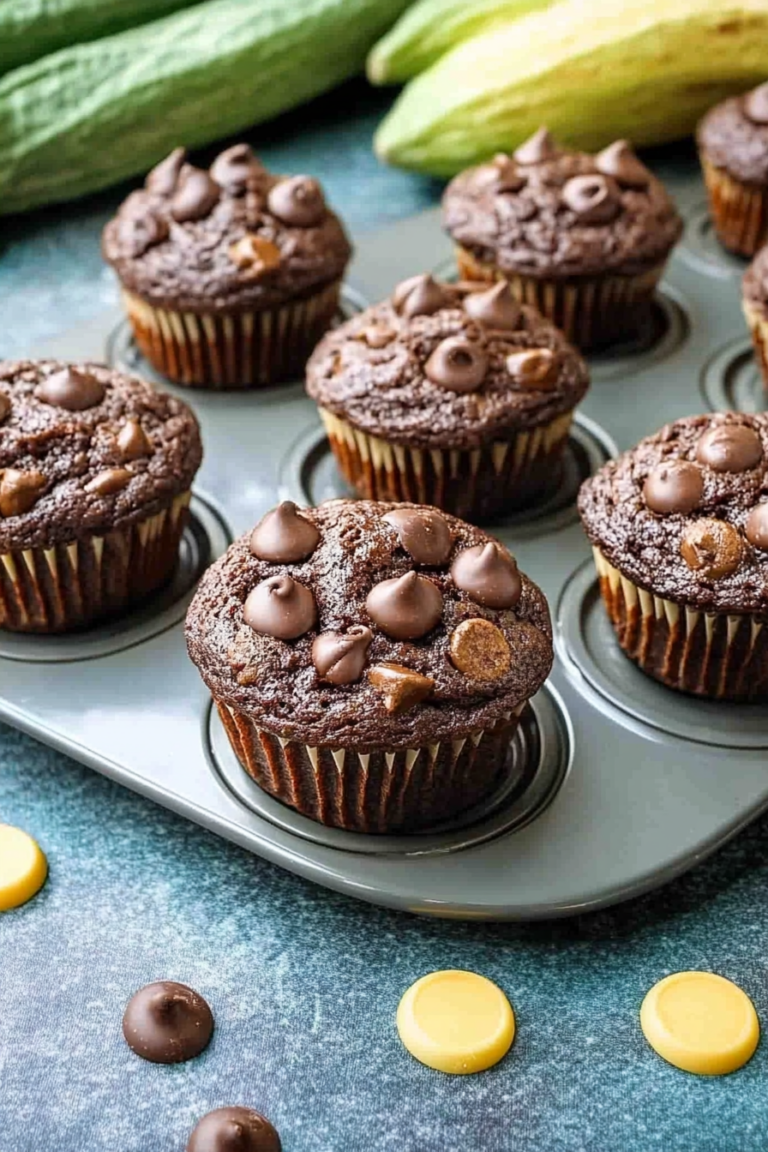
Think of these zucchini nut muffins as a happy marriage between a sweet treat and a veggie-packed snack. They’re essentially moist, tender muffins infused with freshly grated zucchini, which keeps them super soft and juicy. The “nut” part comes from a mix of walnuts or pecans folded into the batter, adding that irresistible crunch and earthy flavor. The name might make you think they’re complicated, but the truth is, they’re a quick and forgiving recipe that combines pantry staples with fresh produce. The idea actually comes from traditional quick breads, usually made with bananas or carrots, but I prefer zucchini because it’s mild and takes on flavors beautifully. Plus, the grated zucchini gets almost silky inside the muffin, creating a delicate crumb that melts in your mouth. It’s the kind of recipe you’ll want to make over and over — because every bite is cozy, satisfying, and just a little fancy, even if you’re just whipping them up on a Tuesday afternoon.
Why you’ll love this recipe?
What I love most about these zucchini nut muffins is how versatile and forgiving they are. They’re perfect whether you want a quick breakfast, a snack for the kids, or a sweet treat with your afternoon coffee. The flavor? Oh, it’s subtle but complex — a warm, nutty aroma interwoven with a gentle sweetness that isn’t overpowering. The grated zucchini adds moisture that makes every bite so tender, almost like a little bit of cake in muffin form. And the best part? They’re budget-friendly. You likely already have everything you need — flour, eggs, maybe a handful of nuts — which makes them a real lifesaver on busy nights or when unexpected guests drop by. My friends have requested this at potlucks, and I swear, it disappears in minutes at my house. Plus, you can switch up the mix-ins: throw in some dried cranberries, replace walnuts with pecans, or even sneak in a pinch of cinnamon if you’re feeling cozy. It’s the kind of recipe that invites creativity and comfort all in one.
How do you make Zucchini Nut Muffins?
Quick Overview
This recipe is straightforward and flexible, perfect for when you want something homemade but don’t want to spend hours in the kitchen. I start by grating the zucchini and squeezing out excess moisture (a trick I learned after too many soggy muffins), then whisking together the dry ingredients. The wet ingredients get combined separately, and then everything is folded gently together, avoiding overmixing — that way, the muffins stay light and fluffy. Toss in the nuts and grated zucchini, transfer the batter into muffin tins, and bake until golden. The smell alone will make you smile. Once out of the oven, a quick glaze adds just the right touch of sweetness — but trust me, they’re delicious even without it. I usually make a double batch, because these disappear fast!
Ingredients
For the Main Batter:
– 2 cups all-purpose flour (I use unbleached for a bit more flavor)
– 1 teaspoon baking powder
– ½ teaspoon baking soda
– ½ teaspoon salt
– ¾ cup granulated sugar (can reduce slightly if you prefer less sweet)
– ½ teaspoon cinnamon (optional but makes everything cozy)
– ½ cup vegetable oil or melted coconut oil
– 2 large eggs
– 1 teaspoon vanilla extract
– 1 cup grated zucchini (squeeze out excess moisture)
For the Filling:
– ½ cup chopped walnuts or pecans
– 2 tablespoons shredded coconut (optional but nice for texture)
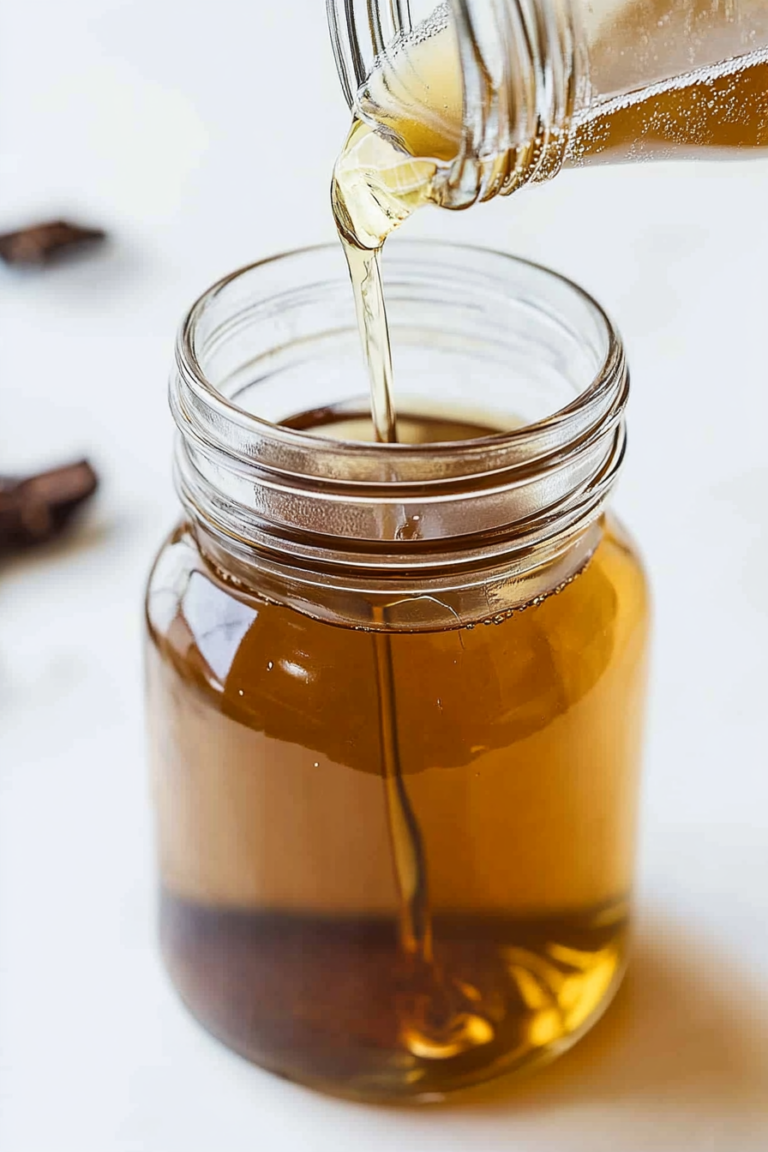
For the Glaze:
– ½ cup powdered sugar
– 1-2 teaspoons milk (or cream, apple juice if you want it tangy)
– A pinch of vanilla or lemon zest for flavor
Step-by-Step Instructions
Step 1: Preheat & Prep Pan
Set your oven to 375°F (190°C). Line a muffin tin with paper liners or grease it well. I always do this first so I don’t have to scramble later. If you want a slightly crisp edge, don’t forget to toast your nuts lightly in a dry skillet for a few minutes — the aroma is divine.
Step 2: Mix Dry Ingredients
In a big bowl, whisk together the flour, baking powder, baking soda, salt, sugar, and cinnamon. Mixing these first is crucial — it evenly disperses the leavening agents and spices, ensuring your muffins rise beautifully and taste balanced.
Step 3: Mix Wet Ingredients
In a separate bowl, beat the eggs lightly, then add the oil and vanilla. Whisk until everything is combined and slightly frothy. I like to do this before adding the zucchini because it helps everything mix smoothly. If your eggs are straight from the fridge, give them a quick whip to bring them to room temperature and prevent clumping.
Step 4: Combine
Pour the wet mixture into the dry ingredients and stir gently with a spatula just until combined — don’t overmix or your muffins could turn out dense. Carefully fold in the grated zucchini and chopped nuts. A few streaks of flour are okay; the batter should be thick but manageable.
Step 5: Prepare Filling
If you’re adding extra nuts or shredded coconut, sprinkle them into the batter now, or save some to sprinkle on top before baking for a pretty finish. You want the nuts evenly distributed but not overwhelming.
Step 6: Layer & Swirl
Divide the batter evenly into your muffin tins. For a fun swirl effect, I sometimes add a spoonful of fruit jam or a dusting of cinnamon sugar on top and swirl gently with a toothpick. But honestly, just filling them all the way to the top makes for a beautiful, domed muffin.
Step 7: Bake
Pop them in the oven for 20-25 minutes. The tops should be golden and spring back slightly when pressed. I often check with a toothpick—if it comes out clean, they’re done. Every oven is different; mine sometimes takes a few minutes longer, so start checking at the 20-minute mark.
Step 8: Cool & Glaze
Let the muffins cool in the pan for about 5 minutes, then transfer to a wire rack. While they’re still warm, drizzle with your prepared glaze — the heat helps it sink in gently. If you prefer, skip the glaze for a more straightforward snack, but trust me, it makes everything feel special.
Step 9: Slice & Serve
These are best enjoyed slightly warm or at room temperature. I like slicing them in half and adding a little smear of butter or cream cheese. They’re great on their own or served with fresh fruit. A cup of coffee, a glass of milk — whatever your heart desires — these muffins make the perfect companion.
What to Serve It With
For breakfast, I love pairing these muffins with a steaming cup of coffee or a tall glass of freshly squeezed orange juice. Sometimes, I toast them lightly and spread a bit of honey or jam — it’s such a cozy start to the day. When I serve these at brunch, I might arrange a platter with sliced fruit, a dollop of Greek yogurt, and some extra nuts sprinkled on top for crunch. They are also fantastic as a dessert on their own, especially with a scoop of vanilla ice cream or a drizzle of honey. On casual days, I cut them into smaller pieces to set out as snacks with tea or milk — they’re just so comforting, I almost feel like I’m giving my family a little hug every time I serve them.
Top Tips for Perfecting Your Zucchini Nut Muffins
The first tip? Never skip squeezing out the zucchini’s excess moisture. I learned this trick after weeks of soggy muffins — it’s simple but life-changing. I use a clean kitchen towel or paper towels to press out as much water as possible, which keeps the muffins tender and not wet inside. When mixing, be gentle! Overmixing leads to dense muffins, and we want light and fluffy, right? For the swirl effect, I’ve tried adding fruit preserves or even melted chocolate—both work wonderfully for a visual and flavor boost. Ingredient swaps are easy too; I’ve made these with spelt flour for extra fiber, or swapped out walnuts for hazelnuts when I had some in the pantry. The baking time can vary based on your oven and tin size — my oven tends to be a little temperamental, so I always start checking early. The glaze? You can experiment with lemon juice, cream cheese frosting, or a dusting of powdered sugar. I tested adding a dash of cinnamon to the glaze and loved how it complemented the muffin’s earthy flavors. Over time, I’ve learned to trust my senses — if the tops are golden and the smell pulls you into the kitchen, they’re probably perfect.
Storing and Reheating Tips
I usually store these muffins in an airtight container at room temperature for up to two days — they stay moist and fresh that way. After that, I pop them into the fridge, where they’re good for about a week. To keep them soft and tasty, I like to layer baking paper between layers if stacking. For longer storage, freezing works beautifully: wrap each muffin tightly in plastic wrap and stash them in a zip-top bag. They’ll keep well for up to 3 months. When you’re ready to enjoy one, just thaw at room temperature or warm in the microwave for about 20 seconds. If you want to add the glaze, do so once the muffin has cooled slightly so it doesn’t melt away. Reheating in the oven at 350°F for 5 minutes is my favorite — it freshens them up like they just came out of the oven. Honestly, they still taste great cold, but warming them makes that cozy aroma come alive again. These muffins are resilient and forgiving, which makes baking them even more joyful.
Frequently Asked Questions
Final Thoughts
Honestly, these zucchini nut muffins have become my go-to recipe whenever I want something homemade that’s a little special but still easy. The combination of moist zucchini and crunchy nuts makes every bite exciting, and I love how adaptable it is — whether I have walnuts on hand or want to add a handful of shredded coconut. They’re great for breakfast, a quick snack, or even a simple dessert. Plus, the aroma alone will make your entire house smell fabulous — a little bakery magic in your own kitchen. Once you’ve tried this, I bet it’ll quickly become one of your favorites too. Don’t be surprised if they become a family staple or if friends start asking for the recipe. Happy baking! And I’d love to hear how yours turn out — leave a comment below or share your twists on this classic. Enjoy!
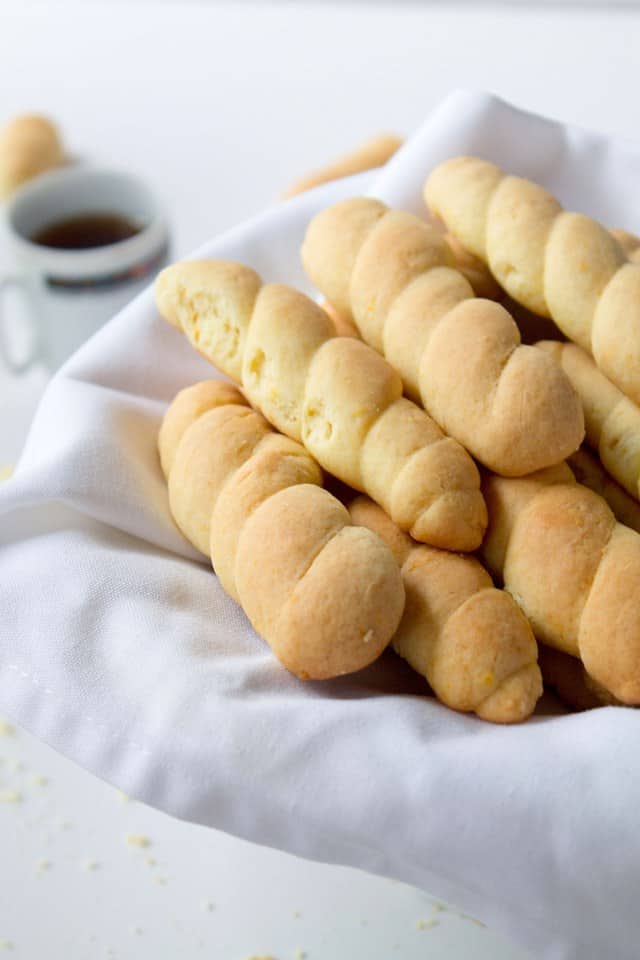
braided cookies
Ingredients
Method
- Using a stand mixer with the paddle attachment, beat the butter and sugar until fluffy. Add vanilla extract and orange zest, then slowly add eggs and egg yolks one at a time.
- In a mixing bowl, whisk together the flour, baking powder, and salt. In a separate bowl, combine orange juice and baking soda. Gradually add the dry ingredients to the wet mixture, alternating with milk and orange juice, mixing until just combined.
- Check the dough consistency; add more flour if it's too sticky. Cover and let rest at room temperature for 30 minutes.
- Preheat oven to 400°F. Line baking sheets with parchment paper.
- Divide dough into golf ball-sized portions. Roll each into about 8-inch ropes, form into U-shapes, braid, and seal ends. Place on prepared baking sheets.
- Prepare egg wash by whisking egg yolks with water. Brush atop each cookie.
- Bake for 20-30 minutes until golden brown. Rotate trays halfway through.
- Cool cookies on wire racks before serving.