Cool Mint Chocolate Cake How to Bake It
Have you ever had that moment where you’re craving something sweet, but the idea of turning on the oven feels like just too much effort? That’s me all the time, especially during busy weeks when my kids ask for a treat after school and I want something quick, comforting, and (let’s be honest) a little bit nostalgic. This zucchini walnut swirl cake is exactly that. It’s one of those recipes I’ve baked so many times — I almost have it memorized — and yet it feels just fancy enough to wow everyone in the family. Plus, it’s a sneaky way to get some veggies in without even noticing! I always do this when I want a slice of something warm and homemade, especially on chilly evenings when the house smells like cinnamon and toasted nuts. Honestly, I’ve made this with different fillings and glazes, and it never fails to bring a smile — maybe because it’s so easy, or maybe because it tastes just like a piece of cozy happiness in every bite. Trust me, once you try this, it’ll become a staple that you’re whipping up on busy mornings or lazy weekends.
What is Zucchini Walnut Swirl Cake?
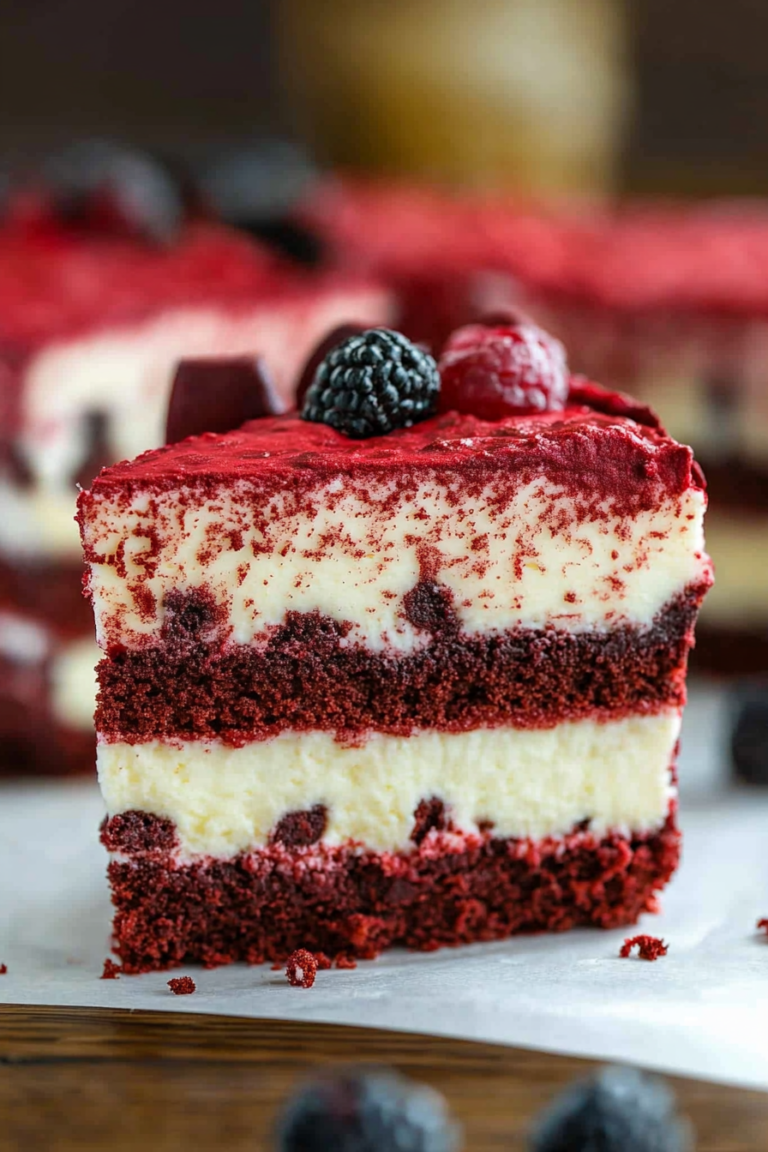
Think of this as a cozy, moist cake laden with shredded zucchini and crunchy walnuts, swirled with a cinnamon-spiced cream cheese filling. It’s essentially a hybrid between a quick bread and a cake, with a pretty marbled look that makes it feel special. The name “swirl cake” comes from the beautiful patterns you create when mixing the filling into the batter — it’s almost like a mini art project you get to eat afterward! This dish has roots in old-fashioned baking, where using zucchini — a humble summer vegetable — became a way to add moisture and sweetness without extra sugar or fat. It’s a labor of love that’s simple enough for beginners but special enough for family gatherings or weekend baking. The best part? The ingredients are accessible, and you probably already have most of them in your pantry and fridge. Think of it as a warm hug in dessert form that’s perfect when you want something homemade but don’t want to spend hours in the kitchen.
Why you’ll love this recipe?
What I love most about this zucchini walnut swirl cake is how it balances so many lovely textures and flavors — moist yet tender, sweet but not overly sugary, with that satisfying crunch from toasted walnuts. The aroma that fills your kitchen when it’s baking is pure comfort, with hints of cinnamon, nutty richness, and just a whiff of zucchini’s freshness. It’s honestly incredible how stealthy the zucchini is; I mean, my kids ask for second helpings and have no idea there’s a vegetable hiding in there! Plus, this recipe is a lifesaver on busy nights. You can prep the batter in 10 minutes, swirl in the filling, and pop it in the oven. No fuss, no stress. I’ve tested this with different variations — sometimes I toss in a handful of chocolate chips or swap walnuts for pecans — and it always comes out delicious. It’s budget-friendly, flexible, and so satisfying: what’s not to love? And, honestly, I keep a stash of extra zucchini ready to go just for this cake. It’s become my secret weapon when I want something homemade, quick, and deeply comforting.
Another reason I hold this recipe close is because it feels like a rescue dish — you know, that one you can make when the pantry’s a little bare but you still want something special. It’s perfect for coffee dates, brunches, or those lazy Sunday mornings when you want something warm and sweet to start the day. And I promise, once you get the swirl technique down, it’s almost impossible to mess up. The visual effect is so pretty, too, making it a winner for both presentation and flavor. My friends often ask for the recipe after trying it, and I always tell them, “Keep this one in your back pocket — it’s a game changer!”
How do I make Zucchini Walnut Swirl Cake?
Quick Overview
This cake comes together so easily, I almost feel like I’m cheating! You start by prepping your pan and shredding zucchini — no need to squeeze out every drop of moisture, I’ve tested it both ways. Then, mix your dry ingredients in one bowl and your wet in another. Combine them gently, pour half of the batter into your baking pan, spread your cinnamon cream cheese filling over, and swirl it in with a knife. Top with a sprinkle of walnuts and bake until golden. The scent alone is enough to make everyone gather around the kitchen. When it’s done, let it cool slightly, then glaze if you like, slice, and enjoy — warm or at room temperature. It’s foolproof and forgiving, which is why I love it for last-minute guests or Sunday treats.
Ingredients
For the Main Batter:
- 1 ½ cups all-purpose flour (trust me, use good quality or even half whole wheat for extra nutrition)
- 1 teaspoon baking powder
- ½ teaspoon baking soda
- ½ teaspoon salt
- 1 teaspoon ground cinnamon (my secret weapon for that cozy aroma)
- ¾ cup granulated sugar (or coconut sugar for a healthier twist)
- ½ cup vegetable oil (or melted coconut oil for flavor)
- 3 large eggs
- 1 teaspoon vanilla extract
- 1 ½ cups grated zucchini (about 2 small zucchinis, no need to peel)
For the Filling:
- 4 oz cream cheese, softened
- ¼ cup granulated sugar
- 1 teaspoon ground cinnamon
- ½ cup chopped walnuts, toasted until fragrant
For the Glaze:
- 1 cup powdered sugar
- 2-3 tablespoons milk or cream
- ½ teaspoon vanilla (or lemon zest for a zing!)
Step-by-Step Instructions
Step 1: Preheat & Prep Pan
Set your oven to 350°F (175°C), and give your baking pan a quick grease with butter or non-stick spray. Line the bottom with parchment paper if you like, just to make removing the cake easier. I usually use a 9-inch round pan or a loaf pan — whatever’s easy to handle. While that’s heating up, shred your zucchini using a box grater. I always do this last because I find zucchini releases water quickly, but honestly, I’ve learned to just shred, toss it in, and move on. No need to squeeze out every drop — the moisture actually helps keep the cake super moist.
Step 2: Mix Dry Ingredients
In a big bowl, whisk together the flour, baking powder, baking soda, salt, and cinnamon. This ensures everything is well combined and light, so the batter rises evenly. I always do this first to get it out of the way and to avoid overmixing later, which can make the cake dense.
Step 3: Mix Wet Ingredients
In a separate bowl, beat together the sugar, oil, eggs, and vanilla until smooth and slightly frothy — about 2 minutes. The mixture should look slightly creamy. Then, fold in the shredded zucchini until evenly distributed. I’ve tested this with almond milk, and while I love the dairy richness, almond milk made it even creamier — so feel free to experiment!
Step 4: Combine
Add the wet ingredients to the dry bowl and fold gently until just combined — don’t overmix or the cake can turn rubbery. A few lumps are okay; you want a moist, batter-like consistency. When I first learned to do this, I used to overmix and end up with a dense cake. Now, I fold just until everything looks uniform but still light.
Step 5: Prepare Filling
In a small bowl, mix softened cream cheese, sugar, and cinnamon until smooth. Fold in chopped walnuts last, so they stay intact and crunchy. This filling gives the cake that gorgeous marbled swirl — I love making little spoonfuls of it and watching how it creates beautiful patterns as I swirl it through the batter.
Step 6: Layer & Swirl
Pour half the batter into your prepared pan, spreading it evenly. Drop spoonfuls of the cream cheese mixture over the batter, then add the remaining batter on top. Using a butter knife or skewer, gently swirl through the layers, creating a beautiful marbled effect. It’s like a little art project — I always think it looks so pretty before it goes into the oven.
Step 7: Bake
Pop it into the oven and bake for about 45-50 minutes, or until a toothpick inserted in the center comes out clean. Ovens vary, so start checking around 45 minutes. If the top is browning too fast, tent it loosely with foil — no burnt edges in my kitchen, please! The smell that wafts out during baking is heaven — cinnamon, nuts, and a hint of zucchini freshness.
Step 8: Cool & Glaze
Let the cake cool in the pan for 15 minutes, then transfer to a wire rack to cool completely. When it’s just slightly warm, whisk together your glaze ingredients and drizzle generously over the top. I like a slightly thicker glaze — it’s easier to spread and looks pretty and glossy. If the cake has cooled completely, just warm it slightly in the oven before glazing for best results.
Step 9: Slice & Serve
Use a sharp serrated knife to cut through the swirl — it’ll look so pretty with the cinnamon swirls and nut bits peeking through. I love serving it warm with a dollop of whipped cream or a scoop of vanilla ice cream. Or, for breakfast, it’s fabulous plain with my morning coffee. The texture stays moist for days, and honestly, it’s even better the next day once the flavors meld. Trust me, this disappears in minutes at my house!
What to Serve It With
This cake is so versatile. For breakfast, pair it with a steaming cup of good black coffee or a frothy latte — the cinnamon and zucchini make it a perfect morning treat. If you’re brunching, serve it sliced with fresh berries and a dollop of Greek yogurt, maybe sprinkled with a little extra walnut crunch. As a dessert, I like to heat a slice and top it with vanilla ice cream or a drizzle of caramel — the crunchiness of the walnuts combined with the moist crumb is heaven. On cozy afternoons, it’s a great snack with hot tea and a good book. I’ve also made mini muffins from this batter — cute and portable when I want a quick sweet fix without the leftovers. It’s honestly a recipe I turn to often because it’s just so satisfying, and I love how it can be dressed up or kept simple.
Top Tips for Perfecting Your Zucchini Walnut Swirl Cake
Having baked this quite a few times, I’ve learned some tricks I’d love to share. First, when shredding zucchini, I prefer to grate it directly into the measuring cup, then give it a quick toss before adding it to the batter — I want moisture, not excess water, but I’ve found a little moisture actually keeps the cake super tender. If your zucchini is extra watery, just toss it in a paper towel for a quick squeeze — but honestly, I rarely bother now. Overmixing the batter is the biggest mistake people make; just gently fold and you’ll get a light, fluffy crumb.
When swirling the filling, don’t overdo it — just a few zigzags with the knife creates perfect marbling. If you want to add a splash of lemon zest to the glaze, it brightens everything up — or try a dash of orange extract if you’re feeling fancy. Toasting the walnuts beforehand makes all the difference; it enhances their flavor and adds that irresistibly crunchy texture. I’ve also experimented with swapping walnuts for pecans, or even adding a handful of mini chocolate chips — trust me on this one, the variations are endless, and each version feels just a little special. If your cake seems to brown too quickly, tent it with foil after 35 minutes. And finally, don’t skip the glaze if you want that extra touch of sweetness and shine — it really elevates the whole thing.
Storing and Reheating Tips
This cake is surprisingly sturdy. Keep leftovers wrapped tightly in plastic wrap or stored in an airtight container at room temperature for up to 2 days. After that, I like to pop it in the fridge — it stays fresh for about 4 days. Just keep it covered to prevent it from drying out. To reheat, slice and microwave for about 20 seconds, or warm in a low oven for 10 minutes. The glaze softens nicely and the cake stays moist. If frozen, wrap slices in plastic, then foil, and store for up to 3 months. Thaw at room temperature or pop in the microwave to enjoy it just as good as freshly baked. I usually add a fresh drizzle of glaze after reheating if needed — the moisture keeps it from feeling dry, and the flavors stay vibrant. Honestly, this cake makes an easy, impressive treat for days, and I love knowing I can keep some in the freezer and just thaw when needed.
Frequently Asked Questions
Final Thoughts
This zucchini walnut swirl cake has truly become one of my kitchen staples. It’s the kind of comfort-food treat that feels fancy but is utterly practical — perfect for last-minute gatherings, weekend baking, or just sneaking a little dessert into any day. Every time I make it, I’m reminded of how simple ingredients can come together to create something that warms the heart and the belly. The swirl pattern always gets a little “wow” from guests, and the taste — moist, cinnamon-spiced, with crunchy walnuts — keeps everyone coming back for more. I’ve even hidden it from my kids once, and they found it — they called it “the best cake ever,” so that’s a good sign, right? If you give this a try, I’d love to hear how it turned out. Feel free to add your own twists or share photos — this cake just gets better with a little personalization. Happy baking, friends — I can’t wait to see your beautiful swirl masterpieces!
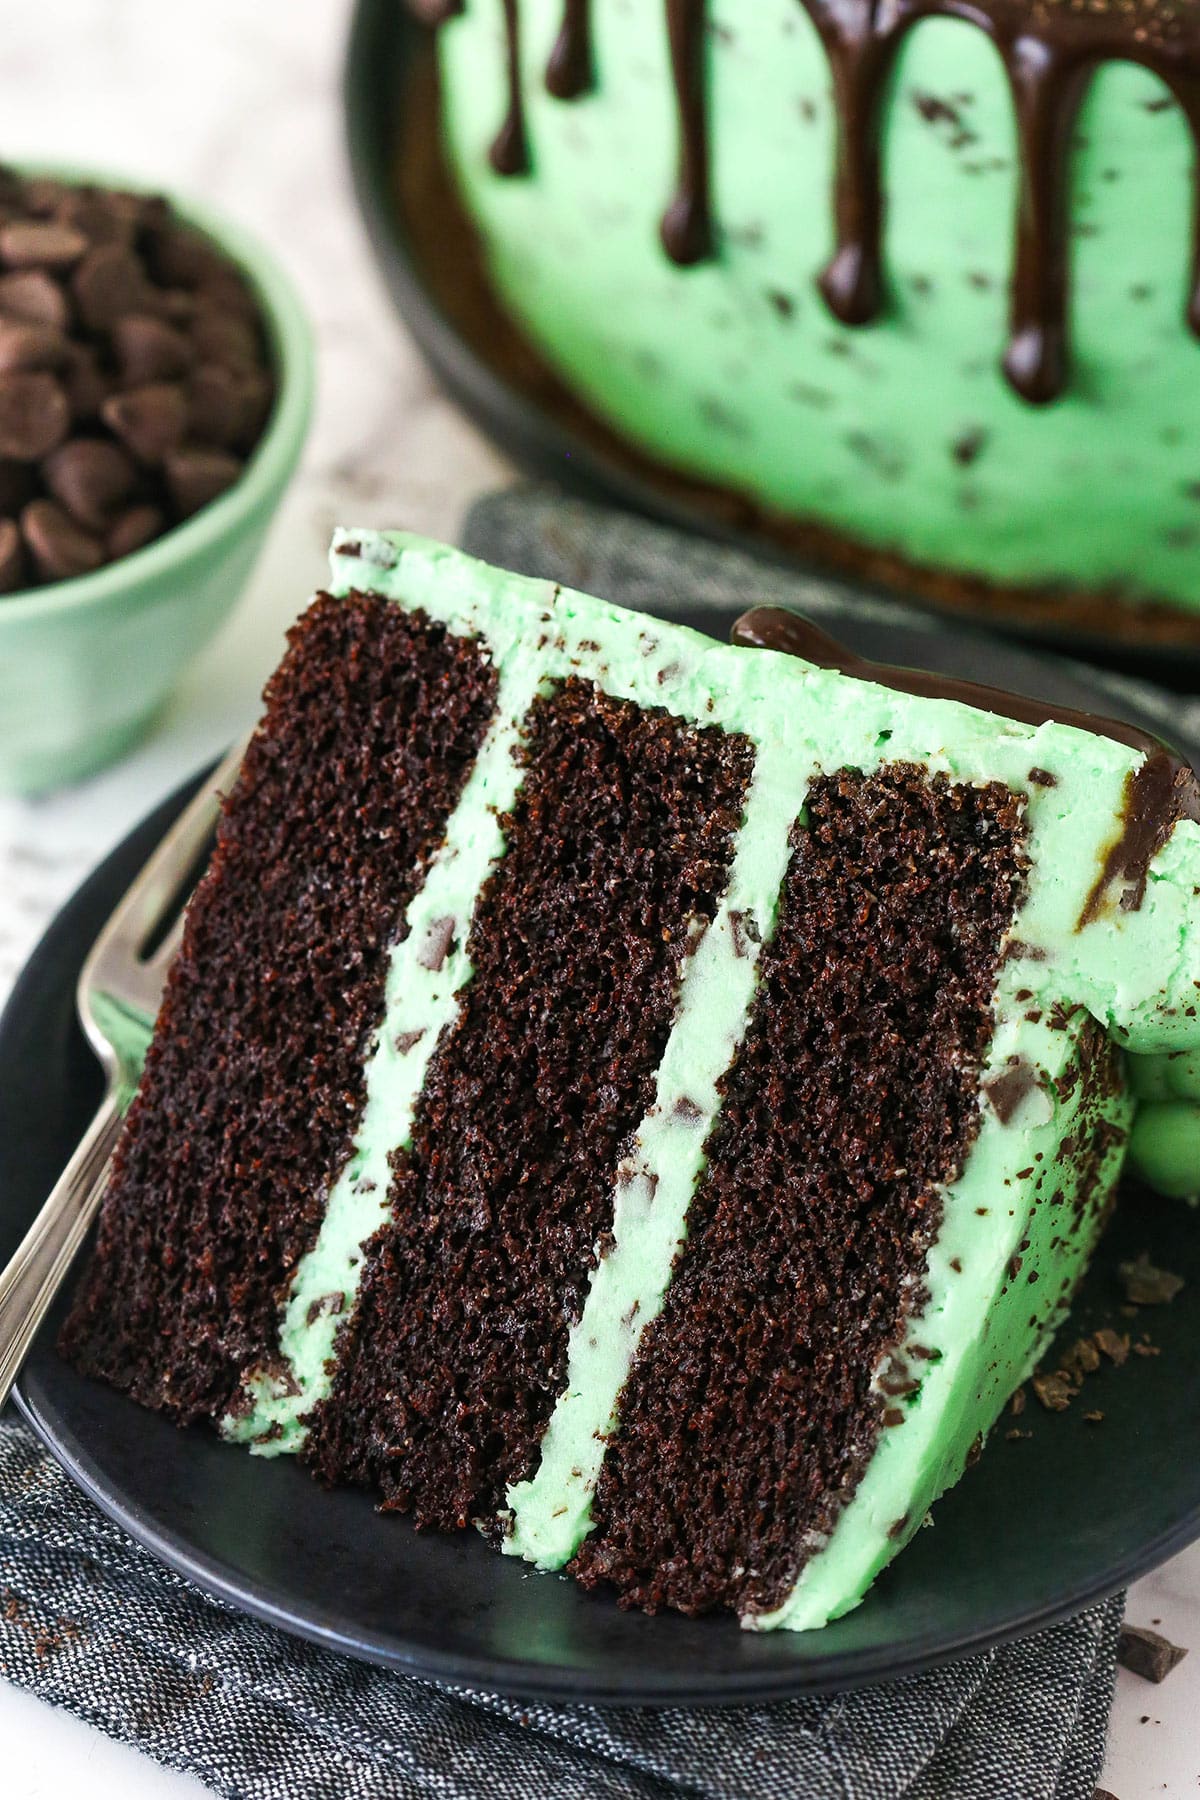
mint chocolate cake
Ingredients
Method
- Preheat oven to 300°F. Prepare three 8-inch cake pans with parchment paper circles and grease the sides.
- Add flour, sugar, cocoa powder, baking soda, and salt to a large bowl and whisk together.
- Add eggs, milk, and vegetable oil to the dry ingredients and mix until well combined.
- Add vanilla to the hot water, then pour into the batter. Mix until well combined. The batter will be very thin.
- Divide batter evenly between cake pans and bake for 30-33 minutes, or until a toothpick comes out with a few crumbs. Cool completely.
- Make the buttercream: Beat butter until smooth, then gradually add powdered sugar, mixing well. Add heavy cream, vanilla, and mint extract, mixing until smooth. Color the buttercream with gel icing color.
- Stir in finely chopped chocolate chips into the buttercream.
- Assemble the cake layers with buttercream, then frost the outside of the cake. Drizzle melted chocolate ganache over the top and around the edges. Chill as needed before serving.