Autumn Spice Donuts How to Bake Them
There’s something about pulling a warm, fragrant cake from the oven that instantly makes me feel like I’m back in my grandmother’s kitchen, even when I’m just sneaking a quick bake after a long day. This moist zucchini snack cake is one of those recipes—simple, comforting, and just a little bit special. My kids love it, and honestly, I keep making it because it’s a sneaky way to get some greens in without a fuss. Plus, the smell alone—richer than any candle—fills the whole house and makes the afternoon feel cozy and calm. I always do this when I need a dessert that feels indulgent but is actually pretty good for us, and trust me on this one: the lemon glaze takes it right over the top. It’s like a little hug in every bite—perfect for breakfast, snacks, or a casual dessert that’s anything but boring.
What is a Moist Zucchini Snack Cake?
Think of this moist zucchini snack cake as a cross between a quick bread and a fluffy cake, but with a sneaky veggie twist. It’s essentially shredded zucchini folded into a sweet batter—kind of like a carrot cake but brighter and a little more refreshing because of the lemon glaze. The cake’s name is pretty straightforward: it’s moist, tender, and perfect for snacking or munching with coffee. The zucchini keeps the texture wonderfully soft, almost like a tender crumb—without making the cake heavy or dense. Originally, folks in my family would call it “hidden veggie cake,” because your kids don’t even realize they’re eating something nutritious. It’s a classic from a time when baking meant making the most out of what you had, and honestly, it’s become a real staple in my kitchen because it’s forgiving, flavorful, and hits that sweet spot of comfort food with a healthy spin.
Why you’ll love this recipe?
What I love most about this zucchini snack cake is how it manages to feel both fancy and totally down-to-earth. The flavor is bright and lively from the lemon, paired with the natural sweetness of honey or maple—you can even swap in coconut sugar if you’re feeling it—and the zucchini keeps the cake super moist and tender without adding any fat. It’s a lifesaver on busy nights when I want something sweet but don’t want to fuss over complicated baking. Plus, it’s budget-friendly too, since zucchinis are usually pretty cheap and I always have a few lying around in summer. I even tested this with almond milk, and it made it even creamier—trust me, it’s worth trying! Also, the versatility of this cake is a winner. You can dress it up with fresh berries, dust it with powdered sugar, or keep it plain. Honestly, it’s become a family favorite because it’s so forgiving and practically foolproof. My kids ask for this all the time, especially when I add an extra drizzle of lemon glaze—you should see their faces when they spot the shiny, sweet topping. It’s perfect whether I’m feeding a crowd or just craving a sweet little treat after dinner.
How do I make Zucchini Snack Cake?
Quick Overview
This cake comes together in just a few easy steps. Start by shredding your zucchini and squeezing out excess moisture—trust me, this is the secret to such a tender crumb! Mix together the wet ingredients, then fold in the dry ingredients until just combined—no overmixing, or you’ll end up with tough cake. Pour the batter into a prepared pan, swirl in your favorite jam or fruit if you want, then bake until a toothpick comes out clean. The smell during baking is intoxicating—citrusy and warm—and once cooled, drizzle with a simple lemon glaze. It’s an effortless process that rewards you with a beautifully moist, flavorful treat that actually gets better the next day.
Ingredients
For the Main Batter:
– 2 cups shredded zucchini, about 2 medium zucchinis (I always use fresh, organic if I can, for the best flavor)
– 1 1/2 cups all-purpose flour (or a 1:1 gluten-free blend if needed)
– 1 teaspoon baking powder
– 1/2 teaspoon baking soda
– 1/2 teaspoon salt
– 1 teaspoon ground cinnamon (because everything’s better with a little spice)
– 1/2 teaspoon ground ginger (optional, but I love that little warmth)
– 1/2 cup honey or maple syrup (for natural sweetness and moisture)
– 1/3 cup vegetable oil or melted coconut oil
– 2 large eggs
– 1 teaspoon vanilla extract
For the Filling (if you want a surprise swirl):
– 1/2 cup fruit preserves or jam (raspberry or apricot work beautifully)
– 1 tablespoon lemon zest (optional, for extra zing)
For the Glaze:
– 1 cup powdered sugar
– 2-3 tablespoons fresh lemon juice
– A little extra lemon zest for garnish (if you like)
Step-by-Step Instructions
Step 1: Preheat & Prep Pan
Preheat your oven to 350°F (175°C). Grease a 9-inch round cake pan or line it with parchment paper. Trust me, lining the pan helps prevent sticking and makes clean-up so much easier. Also, set out your zucchini so it’s ready to go—shredded and moisture-squeezed. That extra moisture removal? It’s a game changer for that tender crumb.
Step 2: Mix Dry Ingredients
Grab a big bowl and whisk together the flour, baking powder, baking soda, salt, cinnamon, and ginger. Doing this first helps ensure everything’s evenly distributed, giving you that perfectly baked, uniform crumb. I always do this before anything wet—it’s a habit I swear by now.
Step 3: Mix Wet Ingredients
In a separate bowl, whisk together honey or maple syrup, oil, eggs, vanilla, and lemon zest if you’re using it. The mixture should be smooth and slightly frothy by the time you’re done. When adding the zucchini, I like to fold it in gently after the wet ingredients are mixed—they carry that moisture into the batter, which keeps everything super soft and moist.
Step 4: Combine
Next, pour the wet mixture into the dry ingredients and fold gently—no vigorous stirring! Overmixing is the enemy here because it can toughen the cake. Just stir until everything is barely combined, with a few streaks of flour still visible. That’s perfect. If you want to swirl in your jam or fruit preserves, now’s the time—spread a layer over the batter and swirl with a butter knife for a marbled effect.
Step 5: Prepare Filling (Optional)
If you’re adding a fruit swirl, spread the preserves or jam over the batter, then swirl slightly with a toothpick or skewer. This creates a beautiful trail of flavor through each slice, and I promise it’s a crowd-pleaser. Otherwise, just pour the batter straight into the pan.
Step 6: Layer & Swirl
If you’re feeling fancy, pour half the batter, spread your jam, then top with the remaining batter. Use a toothpick to make gentle swirls for that marbled look. This part makes it look as beautiful as it tastes, and it’s surprisingly easy to do!
Step 7: Bake
Pop it into the oven and bake for about 35-40 minutes. Start checking around 35 minutes—insert a toothpick in the center, and if it comes out clean, you’re done. The top should be golden and slightly springy to the touch. If your oven tends to run hot or cold, keep an eye on it—baking times can vary a little.
Step 8: Cool & Glaze
Let the cake cool in the pan for about 10 minutes, then transfer it to a wire rack. While still slightly warm, drizzle with your lemon glaze. The warmth helps the glaze seep into the cracks, making every bite extra juicy and bright. The glaze is optional, but honestly, it’s the perfect finishing touch. Trust me on this one!
Step 9: Slice & Serve
Once completely cooled, slice with a serrated knife. For neat edges, wipe the knife clean between cuts. Serve with a dusting of extra lemon zest or fresh berries if you’re feeling fancy. It’s lovely at room temperature, but I like it chilled the next day—more flavor melds, and it’s perfect for packing in lunchboxes too.
What to Serve It With
This cake is versatile enough to serve pretty much anytime. For breakfast, I love a slice with a steaming cup of coffee or tea, maybe with some Greek yogurt on the side to add a bit of creaminess. It’s also fantastic as a brunch centerpiece—pair it with fresh fruit, a drizzle of extra lemon glaze, or even a dollop of whipped cream for that “oh wow” factor. After dinner, I often slice it up as an easy dessert—nothing too heavy, just bright and satisfying. If you’re just craving a cozy snack, this cake is perfect on its own, maybe alongside a glass of milk or a cup of herbal tea. I’ve even tossed some fresh mint leaves on top for a little extra pop of flavor—my kids ask for seconds every time! It’s one of those recipes that just seems to get better with age, so I usually make extras and wrap slices for later—trust me, the next day, the flavors really deepen, and it’s even more irresistible.
Top Tips for Perfecting Your Moist Zucchini Snack Cake
After making this recipe dozens of times, I’ve picked up quite a few tricks. First, always squeeze out as much moisture as possible from your zucchini—use a clean kitchen towel or cheesecloth. I learned this the hard way when my first batch was a bit too watery, and the cake turned out dense. Trust me, that extra step makes a huge difference in that tender crumb. When mixing the batter, fold gently—overmixing stiffens the texture and can lead to a crumbly cake, which nobody wants. If you want more flavor, try adding a pinch of nutmeg or some chopped nuts into the batter; I’ve made this with walnuts or pecans, and it adds a lovely crunch. For visual appeal, layer your batter with a spoonful of jam and swirl it in—this gives the cake a pretty marbled look and a punch of fruity flavor. Ingredient swaps are simple, too—swap honey for maple syrup, or coconut sugar for a richer, caramel-like sweetness. Baking times can vary based on your oven—start checking at 35 minutes, and don’t forget, a toothpick inserted in the center should come out clean when it’s ready. And for the glaze, I prefer adding a splash of vanilla or a little grated lemon zest—it really brightens the flavor.
Storing and Reheating Tips
This cake stores beautifully, which is a bonus when you want a stash ready for when cravings hit. Keep it at room temperature, covered lightly with foil or a cloth, for up to two days—after that, it’s best in the fridge for about 4-5 days. Wrap slices tightly in plastic wrap or store in an airtight container to prevent it from drying out. When you’re ready to enjoy leftovers, a quick reheat in the microwave for 10-15 seconds does the trick, or just serve it cold—it’s equally delicious either way. If you want to freeze it, wrap slices individually in plastic wrap, then place them in a freezer bag for up to 3 months. Thaw at room temp or briefly microwave. If you’ve added the glaze, wait to do so until serving—freezing and thawing can make the glaze a little runny. For best flavor, add the glaze fresh when serving, but you can also drizzle over a cold slice before serving later.
Frequently Asked Questions
Final Thoughts
This moist zucchini snack cake with lemon glaze has seriously become a staple in my household. It’s a recipe I turn to when I want something homemade that feels both nourishing and indulgent at the same time. The combination of tender zucchini, fragrant spices, and tangy lemon glaze is just irresistible—my family devours it every single time, and I love knowing I’m giving them a treat with hidden veggies in it! Plus, it’s so forgiving; I’ve made this with last-minute improvisations, and it’s never failed me. If you’re looking for a go-to recipe that’s easy, versatile, and utterly cozy, give this a shot. I promise, once you bake it, you’ll be making it over and over—as will your family. Happy baking! I can’t wait to hear how yours turns out, so leave a comment or share your variations—I love hearing from fellow home cooks who are making magic in their kitchens too.
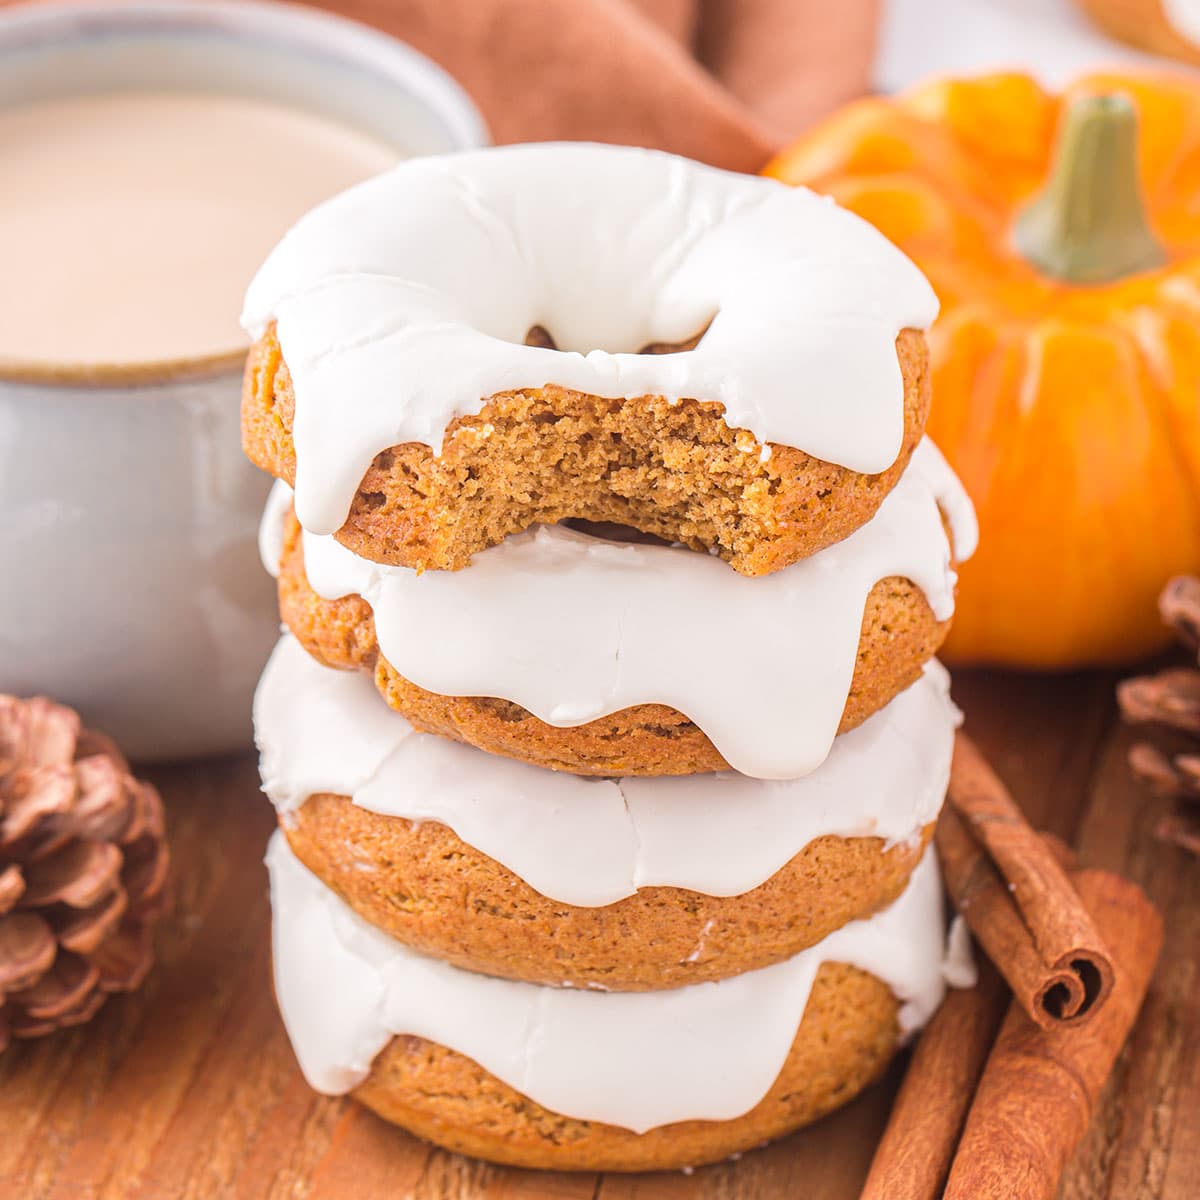
pumpkin donuts
Ingredients
Method
- Preheat the oven to 350°F and spray a donut pan with non-stick spray.
- Mix together the cake mix, pumpkin puree, and heavy cream in a large bowl until well combined. The batter will be thick.
- Pipe the batter into the donut wells, filling each about halfway.
- Bake for 12-15 minutes or until a toothpick inserted in the center comes out clean. Let donuts cool slightly before removing from pan.
- While donuts are cooling, whisk together powdered sugar and maple syrup in a bowl to make the glaze.
- Gradually add heavy cream, one tablespoon at a time, until the glaze reaches your desired consistency.
- Dip the cooled donuts into the glaze and place on a wire rack to set. Serve immediately.