Autumn Delight A Simple Pumpkin Lush
Have you ever cooked up something and it turns out even better than you imagined? That’s exactly how I feel every time I whip up these zucchini crumble bars. Honestly, I wasn’t even planning to share this recipe — it’s one I’ve been making for years, mostly because my kids adore the sweet-spicy contrast and because it’s just so darn easy to throw together after a busy day. The smell alone, when these are baking, fills my kitchen with this warm, comforting scent—like a cozy hug. Plus, it’s a sneaky way to get my family to eat more veggies without hearing the usual protests. Think of it as a cookie and a zucchini bread all wrapped into one delightful, portable treat. Whether you’re craving something sweet at 10 p.m., need a quick dessert for unexpected guests, or just want a leeway from the usual snack routine, these zucchini crumble bars are your new best friend. Trust me, once you try this recipe, it’ll become a permanent fixture in your baking lineup. My kids ask for seconds, and I always do this when I need a little bit of comfort with a lot of flavor. Let’s dive into how to make these irresistible bars — they’re that good, I swear!
What is a Zucchini Crumble Bar?
Think of zucchini crumble bars as a marrying of the classic crumble topping with a soft, slightly dense zucchini cake layer. It’s essentially a layered treat: a buttery, crisp oat crust, topped with a moist, flavorful zucchini batter, finished off with a crunchy crumble topping. The name might sound fancy or complicated, but it’s just a cozy, homey dessert that uses that humble zucchini to great effect. These bars get their name because of that all-important crumble topping—think of streusel, but with oats, nuts, and a hint of cinnamon. It’s kind of like a cross between a coffee cake and a cake bar, but with a sneaky vegetable lurking in the middle. The whole idea started with me wanting to use up my garden zucchini in a way that doesn’t feel like eating your vegetables at all — more like a treat. And honestly, I think the zucchini is what makes this so moist and tender without feeling heavy or dense like traditional baked goods. It’s a win-win: a healthful twist with all the indulgence of something sweet.
Why you’ll love this recipe?
Oh wow, where do I even begin? First off, the flavor—this combination of sweet, tangy lemon glaze and the earthy, slightly sweet zucchini just hits all the right notes. The lemon glaze adds brightness and a little zing that perfectly cuts through the richness of the crumble. What I love most about this is how incredibly easy it is to make. No fancy equipment or complicated techniques — just straightforward mixing and layering. It’s perfect for a quick weekend bake or a last-minute dessert that still impresses. Plus, it’s super budget-friendly with pantry staples like oats, flour, and sugar, and the zucchini. I’ve tested this with almond milk instead of regular milk, and it actually made the crumb even more tender — so feel free to experiment! The versatility doesn’t end there; these bars taste just as fabulous warmed up with a scoop of vanilla ice cream or as-is with a cup of coffee in the morning. My family asks for these all the time, and I’ve taught a few friends who couldn’t believe how simple and delicious they are. They’re that one dessert that feels fancy but is really just a baked hug — moist, crunchy, tangy, and sweet all at once. This recipe’s a keeper, I promise you’ll fall in love with it too.
How do you make Zucchini Crumble Bars?
Quick Overview
In a nutshell, making these zucchini crumble bars is as straightforward as mixing your dry ingredients, blending in your wet, and layering everything in a baking dish. The process starts with a buttery oat crust that forms a sturdy base. Then, you whisk together a moist zucchini batter seasoned with vanilla and a touch of cinnamon. After pouring this over the crust, you sprinkle on that signature crumble topping—think coarse crumbs packed with oats and a hint of brown sugar. Into the oven, and in about 45 minutes, you’ve got a golden, bubbling masterpiece. Once cooled just enough, a quick drizzle of lemon glaze amplifies the flavor and adds a touch of tartness that balances the sweetness perfectly. Honestly, I’ve made this in less than an hour from start to finish — it’s one of those recipes that feels like a warm hug on a busy night. The best part? You don’t even need special tools—just a mixing bowl, a spatula, and a square baking pan. Trust me, once you try this, you’ll be reaching for the recipe over and over again.
Ingredients
For the Main Batter:
- 2 cups grated zucchini (about 2 medium zucchinis; I always do this when my garden’s overflowing)
- 1 cup all-purpose flour (or gluten-free blend if needed)
- 1/2 cup granulated sugar
- 1 teaspoon baking powder
- 1/2 teaspoon baking soda
- 1 teaspoon ground cinnamon
- 1/2 teaspoon salt
- 1 teaspoon vanilla extract
- 1/2 cup vegetable or almond milk (I tested this with almond milk and it’s creamy perfection!)
- 2 large eggs (or flax eggs for a vegan option)
For the Filling (if you want an extra layer of richness):
- Optional: 1/4 cup chopped nuts (walnuts or pecans work beautifully)
- Optional: 1/4 cup raisins or dried cranberries for a touch of tartness
For the Crumble Topping:
- 1 cup all-purpose flour
- 1/2 cup rolled oats
- 1/3 cup light brown sugar
- 1/2 teaspoon ground cinnamon
- 1/4 teaspoon salt
- 1/2 cup unsalted butter (cold, cut into small pieces, I always do this before starting so I don’t forget)
For the Lemon Glaze:
- 1 cup powdered sugar
- 2-3 tablespoons freshly squeezed lemon juice (more if you like it really tangy)
Step-by-Step Instructions
Step 1: Preheat & Prep Pan
I always start by preheating my oven to 350°F (175°C). Then, I line a square 9×9-inch baking dish with parchment paper—this makes for easy removal and clean-up. Lightly butter or spray the parchment for extra non-stick magic. Cool trick: I do this while I grate the zucchini, so everything’s ready to go as soon as the batter’s mixed.
Step 2: Mix Dry Ingredients
In a large bowl, whisk together the flour, sugar, baking powder, baking soda, cinnamon, and salt. I like to do this first because it ensures even distribution of leaveners and spices—trust me, clumping is not your friend here. Your dry mixture should look fluffy and uniform, which means your baked bars will be evenly textured.
Step 3: Mix Wet Ingredients
In another bowl, whisk together the eggs, milk, vanilla, and grated zucchini. I always squeeze out any excess moisture from the zucchini with a clean kitchen towel — too much moisture can mess with the structure, and no one wants a soggy middle. Mix until smooth and combined. I love how the zucchini gives this batter a vibrant green speckle and a soft, tender crumb once baked.
Step 4: Combine
Pour the wet mixture into the dry ingredients and gently fold everything together with a spatula. Be careful not to overmix — just enough until the flour disappears. Overmixing can make the bars dense instead of tender. The batter will be thick but pourable, almost like a thick pancake dough.
Step 5: Prepare Filling (if using)
If you want that extra texture or flavor boost, fold in chopped nuts or dried cranberries. I sometimes do this in the batter itself. It adds just the right crunch and sweetness, but it’s totally optional—these bars are amazing on their own.
Step 6: Layer & Swirl
Pour the batter into your prepared pan, spreading it out evenly. If you like, sprinkle some additional nuts or a few more cranberries on top for a pretty look. I like to do a gentle swirl of extra zucchini or jam on top before adding the crumble — it creates a lovely pattern and more flavor pockets.
Step 7: Bake
Bake for about 40-45 minutes, or until the top is golden and a toothpick inserted in the center comes out clean. Keep an eye on it near the end — every oven is different. I always check around the 40-minute mark and cover loosely with foil if the top is browning too fast. That golden crust, with bits of oats and cinnamon on top, is just irresistible.
Step 8: Cool & Glaze
Allow the bars to cool in the pan for at least 15 minutes. They’re easier to cut when slightly warm but waiting just a bit prevents mushy edges. Mix your powdered sugar with lemon juice to create a glossy glaze — it should be pourable but not runny. Drizzle it over the bars once they’re just cooled and watch the magic happen.
Step 9: Slice & Serve
Cut into squares using a sharp knife, wiping between cuts for clean edges. I love serving these slightly warm with a scoop of vanilla ice cream or a dollop of Greek yogurt for breakfast or dessert. And trust me, they’re just as good the next day, stored in an airtight container in the fridge. Reheat in the microwave for just a few seconds to bring back that fresh-baked feel.
What to Serve It With
This recipe isn’t just a dessert — it’s versatile enough to serve any time of day. For breakfast, pair a warm square with a cup of hot coffee or tea. I always do this when I need a slow, relaxing morning and want something sweet but wholesome. My kids love grabbing one on their way out the door, especially because they think it’s a special treat — and I love that I’ve slipped some vegetables into it without a fuss.
For brunch, serve these alongside fresh fruit or a light mixed green salad with a lemon vinaigrette — the flavors really complement each other. When it’s dessert-time, a scoop of vanilla ice cream or a dollop of whipped cream turns these bars into a showstopper. Or, opt for a drizzle of extra lemon glaze or caramel sauce for a richer finish. If you’re just craving a cozy snack, they’re perfect served plain with a hot cup of coffee or cooling glass of milk. I’ve made these for potlucks and school parties, and they disappear in minutes. Honestly, everyone asks for the recipe!
Top Tips for Perfecting Your Zucchini Crumble Bars
After making these dozens of times, I’ve picked up a few tricks that take them from good to irresistible. First, always squeeze out excess moisture from your zucchini — too much can make the batter soggy or heavy. Grating finely helps distribute the zucchini more evenly so every bite is tender. I learned this trick after a batch came out a little denser than I wanted. Second, don’t overmix the batter — it’s tempting to stir vigorously, but gentle folding keeps the bars light and moist. When mixing the crumble topping, I like to use my fingers to rub the butter into the dry ingredients until it forms coarse crumbs — that’s the secret to a crunchy, buttery topping! For variations, try swapping out walnuts for pecans, or add a spoonful of lemon zest into the batter for an extra zing. I also tested baking these in muffin tins, and they transformed into tasty, portable mini-bars — perfect for kids or on-the-go snacking. For baking, I position my rack in the middle of the oven and always check for doneness around the 40-minute mark—every oven is a little different. If the top starts browning too quickly, a loose foil tent prevents burning. Remember to cool the bars completely before glazing — it sets the glaze beautifully and gives you clean slices.
One lesson I learned the hard way: don’t skip the cooling time before adding the glaze. If you pour the glaze on too hot, it melts right in and turns sticky instead of beautifully glossy. Also, for a dairy-free version, coconut oil or vegan butter works wonderfully in the crumble. This is a flexible recipe, so don’t hesitate to make it your own—sometimes I add a splash of orange juice or a pinch of cardamom for extra depth. And honestly, when you get it just right, it’s like biting into a cloud of buttery, spicy, sweet goodness with a little zing of lemon — addictive doesn’t even cover it.
Storing and Reheating Tips
For leftovers (if you’re lucky enough to have any!), store these bars in an airtight container in the fridge for up to 3 days. I find that the flavors deepen overnight, making them even more delicious the next day. Just cover the pan tightly with foil or transfer to a plastic container. To reheat, microwave for about 15-20 seconds—just enough to warm through without making them soggy. If you prefer them cold, they’re just as tasty straight from the fridge with a cup of tea. For longer storage, these freeze beautifully wrapped in plastic wrap and then in a zip-top bag. They should be good for up to 3 months. Thaw at room temperature or in the fridge before enjoying. If you’ve added glaze, wait until they’re fully thawed to reapply — glazing fresh keeps everything shiny and tempting. A quick reheat or fresh glaze can bring these bars back to life in minutes. I always say, a well-stored bar is almost like a new treat—moist, flavorful, and just as delightful as when freshly baked.
Frequently Asked Questions
Final Thoughts
Honestly, these zucchini crumble bars have become a staple in my house — they’re a true comfort food that sneaks in vegetables and still hits that sweet spot. I love that they’re simple enough for a weeknight dessert, but fancy enough to impress guests. Every time I make them, I’m reminded of cozy family weekends and spontaneous baking sessions, with my kids eagerly waiting for the smell to fill the house. Plus, they’re endlessly adaptable — I’ve added lemon zest, swapped in different nuts, and even played with the glaze flavor. The key is that they’re moist, crunchy, tangy, and layered with love. I hope you give this recipe a try and make it your own. I can’t wait to hear how yours turns out! Feel free to share your variations or pictures in the comments — I love seeing how others make recipes their own. Happy baking!
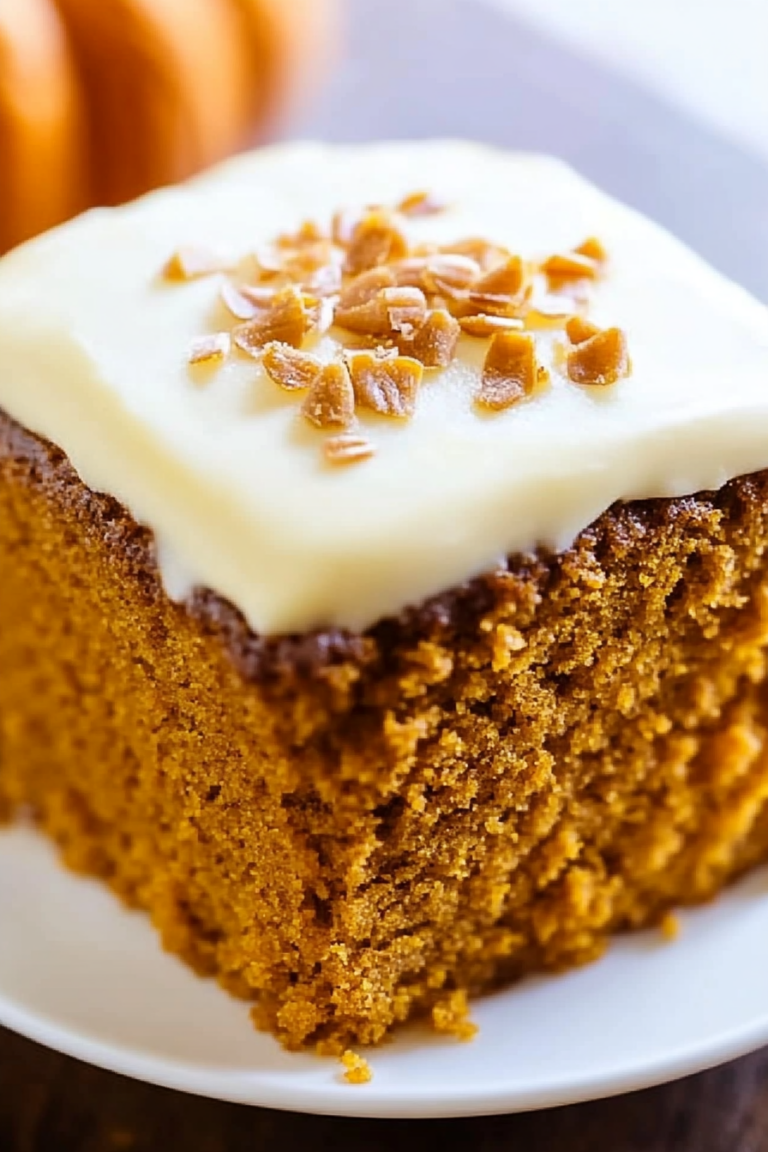
Pumpkin Lush
Ingredients
Method
- Preheat oven to 350F. Line a 9-inch square baking pan with aluminum foil, spray with cooking spray.
- Melt the butter in a large microwave-safe bowl, about 1 minute.
- Add graham cracker crumbs and toss to coat evenly.
- Press the mixture into the prepared pan to form an even crust.
- Bake for about 10 minutes until set, then cool.
- Beat the softened cream cheese and confectioners' sugar until smooth.
- Spread the cream cheese mixture over the cooled crust.
- Mix pudding mix with cold milk until thickened, about 3 minutes.
- Add pumpkin puree and pumpkin pie spice to pudding, mix well.
- Fold in half of the whipped topping into the pumpkin pudding.
- Spread the pumpkin mixture over the cream cheese layer.
- Top with remaining whipped topping, chocolate chips, and toffee bits.
- Cover and refrigerate for at least 4 hours before slicing and serving.