Crispy Fried Pickles How to Make Them
There’s something about the scent of fresh zucchini baking that immediately transports me back to childhood summers at my grandma’s house. I remember sneaking bites of this moist, subtly sweet cake, tasting hints of lemon and spice, while the warm kitchen filled with laughter and the smell of cinnamon. Over the years, I’ve tinkered with that old recipe, adding my own twist — a beautiful swirl of tender zucchini and a zesty lemon glaze that keeps everyone coming back for seconds. Honestly, this dish has become a staple in my household, especially on busy mornings or when family drops in unexpectedly. It’s one of those recipes that feel humble yet impressive, simple yet utterly delicious. Plus, it’s packed with veggies, so I like to think of it as a sneaky way to get my kids to eat more greens without a fuss. If you’re craving something sweet with a touch of freshness, trust me on this one — it’s a total game-changer in the best way.
What is Zucchini Swirl Cake?
Think of this as a cozy, homey cake that’s more than just your average quick bread. It’s essentially a tender, moist loaf with shredded zucchini tucked inside, sneaked in to keep it extra soft and a little healthier. The name “swirl” comes from the way I gently layer or swirl the batter with cinnamon or berries before baking — creating beautiful marbled patterns inside that look almost too pretty to cut. The cake is subtly sweet, with a faint citrus undertone from the lemon glaze, making it perfect for breakfast, brunch, or a comforting afternoon treat. It’s inspired by classic zucchini bread but elevated with a luscious swirl and shiny glaze that turns it into a real showstopper. Think of it as a love letter to all those afternoons you want something delicious, nourishing, and impressive without tons of fuss.
Why you’ll love this recipe?
What I love most about this zucchini swirl cake is how versatile and forgiving it is. It’s the kind of recipe that you can make on a whim with ingredients already in your pantry. The flavor—the perfect marriage of slightly sweet, tender zucchini and a bright touch of lemon—never fails to impress anyone who takes a bite. Plus, it’s ridiculously simple to put together. I always do this when I need a dessert that feels fancy but is actually super straightforward. Budget-wise, it’s fantastic because the main ingredients are pantry staples and a garden’s worth of zucchini (which is so cheap right now). This cake is also a real chameleon — serve it warm with a dollop of cream, or let it cool completely and drizzle it with that punchy lemon glaze. My kids ask for this all the time, and honestly, I don’t mind making it whenever I can sneak in a little extra veggie love.
And let’s be honest, the swirl pattern? It’s just so pretty, and every time I slice into one, I feel like I’m unveiling a little treasure inside. The flavor combo hits all the right notes: subtle sweetness, citrus tang, and warm cinnamon. It’s perfect for breakfast, brunch, or even a quick snack with your afternoon coffee. Honestly, it’s a lifesaver on busy nights when I want something homemade and comforting but don’t want to spend hours in the kitchen. My kitchen smells incredible while it’s baking, and it’s made with love — you can taste that in every single bite.
How do I make Zucchini Swirl Cake?
Quick Overview
This cake comes together in just a few easy steps. You start by quickly mixing the dry ingredients, then blending wet ingredients — including grated zucchini — and combining everything gently. I like to swirl in a cinnamon-spiked batter for that pretty marbling effect, then bake it until golden. While it’s cooling, I whisk up a bright lemon glaze. The whole process takes around 50 minutes from start to finish, and the aroma alone will have your family lining up at the oven. Trust me, this is one of those recipes where you’ll feel like a pro but actually did very little prep — perfect for those days when time’s tight but you still want that homemade touch.
Ingredients
For the Main Batter:
– 2 cups grated zucchini (squeezed dry)
– 1 1/2 cups all-purpose flour (or a 1:1 gluten-free blend)
– 1 teaspoon baking powder
– 1/2 teaspoon baking soda
– 1 teaspoon ground cinnamon
– 1/2 teaspoon salt
– 1/2 cup granulated sugar
– 1/2 cup brown sugar (or honey for a different touch)
– 1/2 cup vegetable oil (or melted coconut oil)
– 3 large eggs
– 1 teaspoon vanilla extract
For the Filling (optional but recommended):
– 1/4 cup brown sugar mixed with 1 teaspoon cinnamon (to sprinkle and swirl)
For the Glaze:
– 1 cup powdered sugar
– 2-3 tablespoons fresh lemon juice
– Lemon zest (for extra zing, optional)
Step-by-Step Instructions
Step 1: Preheat & Prep Pan
Set your oven to 350°F (180°C) and line a loaf pan with parchment paper or grease it well. I always do this early because the batter comes together so quickly. A little spray of non-stick and a sprinkle of flour keeps the cake from sticking, especially along the sides. Don’t skip this — trust me, sticking is no fun!
Step 2: Mix Dry Ingredients
In a large bowl, whisk together flour, baking powder, baking soda, cinnamon, and salt. This ensures even distribution of the leavening and spices, and it avoids clumps. I learned this trick after a few failed bakes—dry ingredients need love just as much as wet ones!
Step 3: Mix Wet Ingredients
In a separate bowl, combine sugars, oil, eggs, and vanilla. Whisk until smooth and slightly frothy. Then, gently fold in the grated zucchini (make sure to squeeze out excess moisture — too much liquid can make the batter dense rather than fluffy). I tested this with different zucchinis and found that squeezing them out really makes a difference in texture.
Step 4: Combine
Add the wet mixture to the dry ingredients gently, folding just until combined. Do not overmix — a few lumps are okay! Overmixing can make the cake dense; this batter is tender and moist because of that. If you want, swirl in some extra cinnamon sugar now for that layered look.
Step 5: Prepare Filling
If you’re using the cinnamon sugar filling, sprinkle it on top of the batter and then swirl it in with a toothpick or skewer, creating beautiful marbling. This is the part that makes the cake look fancy and special. I’ve learned that a gentle swirl, rather than a harsh mixing, gives the best look and keeps the layers distinct.
Step 6: Layer & Swirl
Pour the batter into your prepared loaf pan. Use a spatula to smooth out the top, then give a gentle swirl with a skewer or knife to create pretty patterns. The swirl will bake right into the cake, giving it incredible visual appeal and texture.
Step 7: Bake
Pop it in the oven for about 40-45 minutes. Check for doneness by inserting a toothpick into the center — if it comes out clean, it’s ready. Depending on your oven, baking time can vary a bit, so start checking at 40 minutes. The top should be golden and slightly cracked, and your whole kitchen will smell amazing!
Step 8: Cool & Glaze
Let the cake cool in the pan for about 15 minutes, then transfer to a wire rack. While it cools, whisk together your lemon glaze. Once cake is completely cool, drizzle generously. The glaze will set into a shiny, tangy topping that balances the sweetness beautifully. I sometimes add a little lemon zest or a splash of orange juice to jazz it up.
Step 9: Slice & Serve
Use a serrated knife to cut neat slices — patience pays off for that perfect presentation. Serve with a hot cup of tea or coffee, and enjoy that first bite — crispy edges, moist crumb, zingy glaze. It’s one of those moments where I always thank myself for making a batch. Honestly, this cake disappears fast in my house and sometimes I make an extra loaf just for myself — you should see me sneaking slices when no one is looking!
What to Serve It With
This cake is such a *chameleon* — it works for so many occasions.
For Breakfast: Pair it with a strong cup of black coffee or a milky latte. I love slicing a warm piece and spreading a little butter or cream cheese on top. The kids like a drizzle of honey or even a dollop of Greek yogurt alongside.
For Brunch: Serve alongside fresh fruit like strawberries or blueberries to add a burst of color and freshness. A touch of whipped cream or mascarpone makes it feel a little more indulgent. I’ve even added toasted nuts for crunch — perfection!
As Dessert: After dinner, it’s a crowd-pleaser with a scoop of vanilla ice cream or a dollop of lemon curd. The tangy glaze and moist crumb make it extra special as a dessert.
For Cozy Snacks: Simply slice and enjoy with a hot cup of tea or herbal infusion. This cake is a true comfort food, especially when the days get cooler. Sometimes I wrap slices in parchment and freeze for a quick sweet fix on busy mornings.
Top Tips for Perfecting Your Zucchini Swirl Cake
Once I made this cake a dozen times, I picked up some tricks to make it even better. Here are the best tips I can share:
Zucchini Prep: Always squeeze out excess moisture from the grated zucchini. I use a clean dish towel or paper towels because watery zucchini can turn your batter soupy. This little step keeps the cake light and fluffy.
Mixing Advice: Gently fold the wet and dry ingredients — overmixing is the enemy here. If you see a few lumps, don’t stress. Overmixing causes gluten development, and no one wants dense cake.
Swirl Customization: To get the marbling just right, barely drop spoonfuls of batter and swirl with a skewer. Too much mixing blurs the pattern, but a gentle swirl creates beautiful, distinct layers.
Ingredient Swaps: Want to make it healthier? Substitute half the oil with applesauce — it keeps the texture moist. Or swap sugar for maple syrup for a richer flavor. I’ve tested a zucchini-carrot combo, which is equally delicious.
Baking Tips: Oven temperature varies, so keep an eye on that first batch. If the top browns too quickly, loosely cover with foil. You want that perfect golden crust without burning or drying out the cake.
Glaze Variations: For a different twist, add a splash of orange liqueur to the glaze or sprinkle some finely chopped pistachios or fresh herbs on top before serving. The glaze should be thick enough to coat but still pourable — if it’s too runny, add a little extra powdered sugar.
Honestly, I’ve learned that patience is key — waiting for the cake to cool completely before glazing prevents sliding and ensures that shiny, beautiful finish you see in pictures. And trust me, those little tips make a big difference when you want that bakery-quality look and taste at home.
Storing and Reheating Tips
This cake keeps really well, so I often make a batch on the weekend to enjoy all week. Here’s how I store and reheat:
Room Temperature: Wrap the loaf tightly with plastic wrap or keep it in an airtight container. It stays fresh for about 2 days, and I find the flavors actually deepen after a day or so — almost like a bread pudding!
Refrigerator Storage: For longer shelf life, pop it in a container and keep it refrigerated for up to 5 days. The glaze might harden a little, but it’s easy to warm up in the microwave for 10 seconds or so. Just avoid leaving it out overnight — the zucchini can start to lose its freshness.
Freezer Instructions: Slice the cooled cake, wrap individual pieces tightly in plastic wrap and slide into a zip-top bag. It’ll last up to 3 months. Thaw at room temp or warm slices gently in the microwave. I actually prefer this because the cake stays moist and fresh, and I can grab a slice whenever the craving hits.
Glaze Timing Advice: If freezing, wait to drizzle the glaze until just before serving to keep it shiny and vibrant. But honestly, the cake is tasty even without glaze — that lemon drip just elevates it to a whole new level.
Frequently Asked Questions
Final Thoughts
This zucchini swirl cake is one of those recipes that feels like a warm hug from the kitchen. It’s cozy, comforting, and just a little special — perfect for when you want something homemade that doesn’t require a ton of fuss. I’ve made this countless times, tweaking small details, and it never fails to bring a smile to everyone’s face. Whether you’re baking it for a weekend brunch, a quick snack, or to surprise friends, I promise it’s worth every second. Plus, it’s a sneaky way to get more greens into your day without fuss or fussiness. The combination of tender zucchini, lemony glaze, and that lovely cinnamon swirl just hits all the right notes. Happy baking! And I’d love to hear how yours turns out — leave a comment or share your fun variations. Nothing beats a homemade cake made with love, right?
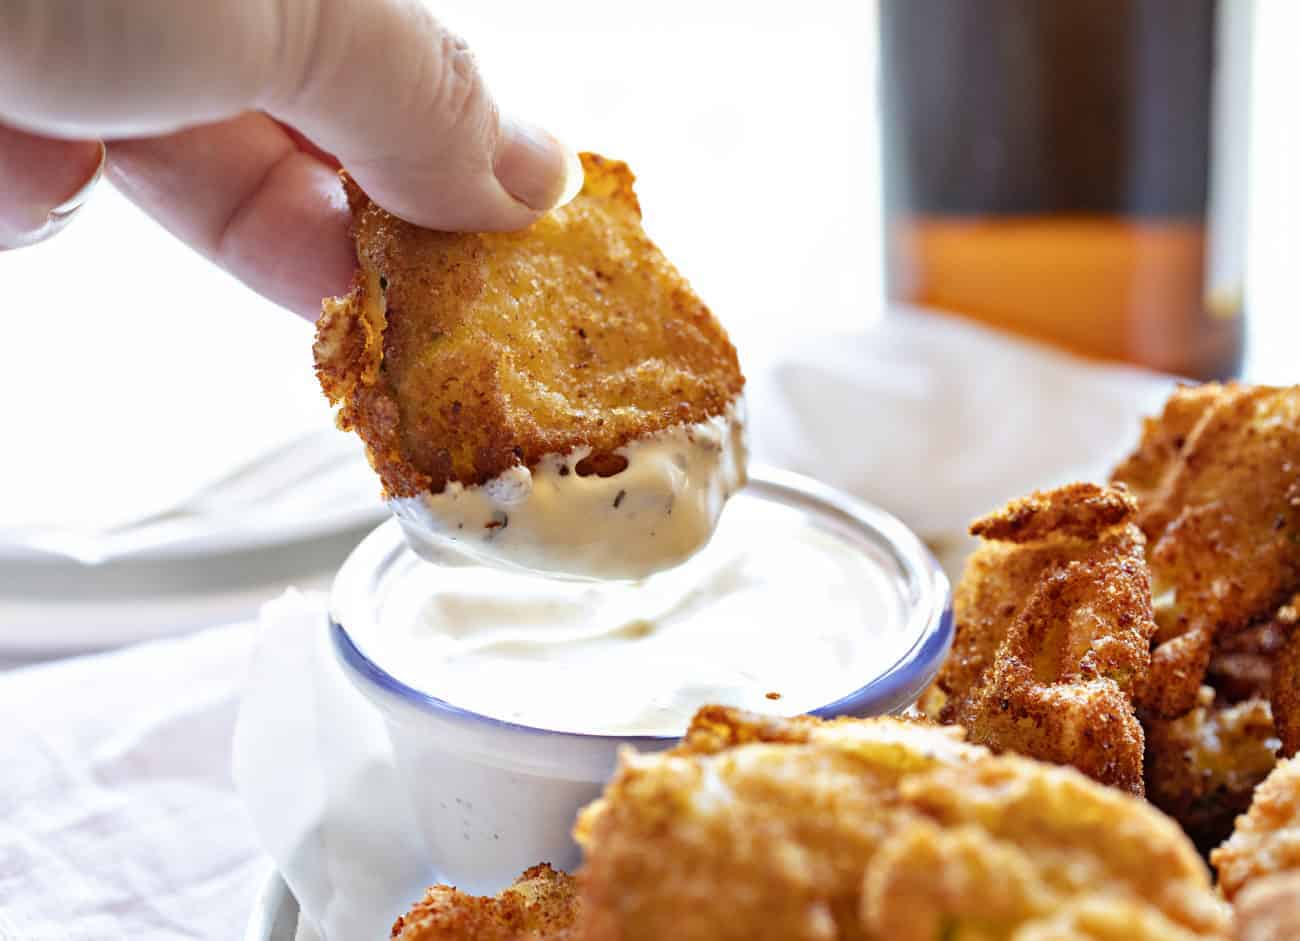
fried pickles
Ingredients
Method
- In a small bowl, add 0.5 cup of flour. Set aside.
- In a medium bowl, whisk together 1 cup of flour, cornmeal, baking powder, salt, pepper, cayenne, and beer until smooth. Set aside.
- Place bread crumbs in a shallow dish. Set aside.
- Heat canola oil in a large pot to 350°F. Maintain temperature throughout cooking.
- Dip each pickle chip in flour, then coat with batter, then roll in bread crumbs.
- Carefully place coated pickles in hot oil and fry until golden brown, about 1 to 2 minutes per side.
- Remove pickles from oil and drain on paper towels. Serve hot.