Easy Burger Casserole Recipe
There’s something about the smell of freshly baked bread that just feels like a warm hug, isn’t there? I remember my grandma’s kitchen, with the oven humming softly as she pulled out her always-perfect banana bread. Over the years, I’ve tweaked that recipe a little to include a secret ingredient — zucchini. Yes, zucchini! It sounds odd at first, but trust me on this one. It makes the bread so moist and tender, and you can hide those little green specks from the kids… or sneak in some extra veggies for yourself. This zucchini swirl banana bread is my go-to when I want something comforting but fresh, and it’s honestly become a family favorite that I make at least once a week. It’s incredible how easy it is to whip up, and the smell alone brings everyone to the kitchen. Best part? It’s practically foolproof, so perfect whether you’re a seasoned baker or just starting out. Once you try this, I’m pretty sure it’ll become a regular in your house too!
What is Zucchini Swirl Banana Bread?
Think of this zucchini swirl banana bread as a mashup of classic comfort and sneaky nutrition. It’s essentially a moist, tender loaf made with ripe bananas that lend a natural sweetness and depth. The twist? Swirling in grated zucchini not only adds a delightful texture, but it also keeps the bread amazingly moist—especially if you like your baked goods soft and fluffy. The name might sound a bit fancy, but it’s really just a simple loaf with a beautiful marbled swirl of zucchini and banana — like those fancy marble cakes but *way* easier and with about 100 times more comfort. I love sharing this with friends, especially when I want to impress them with something homemade that doesn’t require fancy ingredients or hours in the kitchen. Plus, it’s perfect for breakfast, a snack, or even dessert — really, it’s good anytime you want something cozy, sweet, and a little healthy.
Why you’ll love this recipe?
Honestly, what I love most about this zucchini swirl banana bread is how versatile and forgiving it is. It’s the kind of recipe that makes you feel like a kitchen wizard, even if you’re still learning the ropes. The flavor? Pure banana goodness with a subtle vegetable twist, which really enhances the bread’s moisture and adds a gentle, vegetal sweetness. The zucchini’s mildness makes it almost undetectable, but the benefits are huge — extra fiber, vitamins, and, let’s face it, a secret way to get a few more greens into your day. Plus, this recipe is super budget-friendly: you probably already have most of the ingredients lying around, especially if you’re a banana leftover champion like me. And the best part? It’s endlessly adaptable. Want to add walnuts? Cinnamon? Chocolate chips? Go for it! What I love most about this is how it’s a little bit special but also perfect for busy mornings or lazy weekends. It’s my “reward yourself” kind of baking, and I promise once you try it, it’ll be on repeat at your house too.
How do you make Zucchini Swirl Banana Bread?
Quick Overview
This zucchini swirl banana bread comes together in just a few simple steps. First, you grate your zucchini and set it aside to drain a little (moisture’s the enemy in baking, trust me). While that’s happening, you mash ripe bananas, mix your dry ingredients, and then combine everything with some melted butter or oil. The swirl part is easy: you layer the batter and grated zucchini in your pan and give it a gentle swirl with a knife or skewer. The magic is in the oven — about 50-60 minutes at 350°F (175°C), until a toothpick comes out clean. Once out, I like to let it cool completely before glazing or slicing. It’s honestly a one-bowl wonder, and I always do this when I want something quick but impressive. The texture is soft but sturdy enough to hold a beautiful swirl and a little crunch from the walnuts or nuts if you add any extras. Trust me — once you get the hang of it, you’ll be baking this nonstop!
Ingredients
For the Main Batter:
– 3 ripe bananas, mashed (the browner, the better; they mash easier and are so sweet)
– 1/2 cup melted butter or oil (I tested with coconut oil and loved it! But regular veggie oil works too)
– 1/2 cup brown sugar (or honey if you want to go a little healthier)
– 2 large eggs
– 1 teaspoon vanilla extract
– 1 1/2 cups all-purpose flour (or a mix of spelt for a slightly nuttier vibe)
– 1 teaspoon baking soda
– 1/2 teaspoon salt
– 1 teaspoon cinnamon (optional but highly recommended!)
For the Filling:
– 1 cup grated zucchini (try to squeeze out some excess moisture after grating, it helps keep the bread from getting soggy)
– A sprinkle of lemon juice (to keep it bright and prevent browning; optional)
For the Glaze:
– 1/2 cup powdered sugar
– 1-2 teaspoons milk or lemon juice
– A dash of vanilla (if you’re feeling fancy)
Step-by-Step Instructions
Step 1: Preheat & Prep Pan
Set your oven to 350°F (175°C) and grease your loaf pan with butter or spray. I like lining mine with parchment paper — makes it easier to lift out without crumbling. Give the pan a light dusting of flour if you prefer, just to avoid sticking. While that’s happening, grate the zucchini and squeeze out any excess moisture with a clean kitchen towel — the drier, the better. Trust me, moist zucchini can turn this into a soggy mess if you’re not careful.
Step 2: Mix Dry Ingredients
In a small bowl, whisk together the flour, baking soda, salt, and cinnamon. Doing this first ensures even distribution of the leavening agents and prevents clumps when you add it to the wet ingredients. It’s a small step but makes a big difference in how fluffy your bread turns out.
Step 3: Mix Wet Ingredients
In a larger bowl, mash those bananas until smooth — I always do this with a fork or a potato masher. Add the melted butter, sugar, eggs, and vanilla. Mix until it’s a smooth, fragrant mixture. It’s gooey and lovely, and your kitchen will smell like a dream.
Step 4: Combine
Pour the dry ingredients into the wet and gently fold everything together. Be careful not to overmix; just stir until everything is combined and the batter is a little lumpy. Overmixing can make the bread dense, and nobody wants that.
Step 5: Prepare Filling
In a small bowl, toss the grated zucchini with a squeeze of lemon juice. If you like, you can stir in a handful of chopped nuts or chocolate chips here—whatever makes your heart happy. The zucchini should be moist but not pool at the bottom.
Step 6: Layer & Swirl
Pour half the batter into the prepared loaf pan. Spread half of the grated zucchini on top, then add the remaining batter. Using a skewer or knife, make gentle swirls—don’t overdo it, but a few careful zigzags will create a pretty marbled effect once it bakes. The visual contrast is so pretty, and it shows off that hidden zucchini surprise.
Step 7: Bake
Pop it in the oven and bake for about 55-60 minutes. Check for doneness with a toothpick inserted in the center; it should come out clean or with just a few moist crumbs. Every oven is different, so start checking at around 50 minutes. If it darkens too much on top but isn’t done inside, tent it with foil and keep baking.
Step 8: Cool & Glaze
Let the bread cool in the pan for about 15 minutes, then transfer it to a wire rack. Once it’s completely cooled, whisk together the powdered sugar and milk for the glaze. Drizzle it over the loaf—if you want a more rustic look, just splash it on with a spoon. The glaze sets quickly and takes this simple bread to next-level pretty.
Step 9: Slice & Serve
Use a serrated bread knife for clean slices. Serve it warm with a pat of butter, or enjoy it cold with a cup of tea. Honestly, I’ve eaten this for breakfast, snack, and dessert — it’s versatile that way. This is perfect with a dollop of yogurt or a few fresh berries for that extra touch of freshness.
What to Serve It With
This zucchini swirl banana bread is so friendly, it pairs with pretty much everything. For breakfast, I love slicing it thick and serving with a steaming cup of coffee or black tea — the aroma alone wakes up my whole house. It also makes a lovely brunch centerpiece, maybe with a side of Greek yogurt topped with honey and nuts. As a dessert, I like to add a dusting of cinnamon sugar or a smear of mascarpone cheese, and my kids totally ask for seconds. When I want a cozy snack, I’ll just warm a slice and slather on some butter — it melts into the warm bread, making it even more irresistible. It’s become our family’s secret weapon for making afternoons feel extra special.
Top Tips for Perfecting Your Zucchini Swirl Banana Bread
After making this countless times, I’ve picked up a few tricks that really help it turn out perfect every single time. First, when grating zucchini, I always use a fine grater — the smaller shreds blend better and distribute evenly in the batter. Squeezing out excess moisture is key; I often give the zucchini a good squeeze in a clean dish towel or cheesecloth. If the zucchini is too watery, the bread might turn out dense or soggy, which nobody likes. As for mixing, I can’t emphasize enough: don’t overmix. The batter should be lumpy, almost like muffin batter. Overmixing develops gluten, which makes the loaf tough. When swirling in the zucchini, I like to sprinkle it over the batter and then do a few gentle zigzags with a toothpick — that creates a beautiful marbled effect without overworking the batter. If you want to add chocolate chips or chopped nuts, fold them gently at the end. I’ve experimented with different flour blends—almond flour, whole wheat, even oat flour—and while the texture changes a bit, the flavor is always fantastic in its own way. When baking, start checking around 50 minutes — every oven is different, and I’ve learned to stay close to avoid overbaking. And if you want to experiment with the glaze, a squeeze of lemon juice makes it zingy and fresh, while vanilla adds warmth. Once you nail the basics, you can play around with flavors and toppings so easily.
Storing and Reheating Tips
This bread stays lovely for days if stored properly. I usually keep it in an airtight container at room temperature for up to two days; after that, I pop it into the fridge. If you’re not serving it within a day or two, wrap the loaf tightly in plastic wrap and stash it in the freezer—trust me, it freezes beautifully! When I want to enjoy it after freezing, I just thaw it overnight in the fridge or microwave for about 20 seconds. To keep the freshness, I suggest adding the glaze just before serving, especially if you’re storing the bread ahead of time. If you’ve glazed it and want to keep it longer, store it unglazed and add the glaze fresh. Reheating slices in a toaster or at a low temperature in the oven makes it taste just baked. And if you’re feeling indulgent, warm a slice with a little bit of butter or honey — it’s like a hug in every bite!
Frequently Asked Questions
Final Thoughts
There’s something truly special about a loaf that’s a little bit sneaky and a lot delicious. The zucchini not only keeps it incredibly moist but also adds a subtle depth that takes this banana bread from basic to brilliant. I always say that the best baked goods are the ones made with love and a little bit of experimentation, and this recipe has definitely earned its place in my kitchen arsenal. Whether you’re making it on a quiet Sunday morning or whipping up a quick treat for unexpected guests, it’s sure to impress. Plus, it’s a wonderful way to stretch those overripe bananas and hide a bit of veggie goodness — guilt-free baking at its finest. I hope you have as much fun making and eating this as I do. Feel free to tweak it, add your own flair, and most importantly, enjoy every bite! Drop a comment or share your variations—I’d love to hear how yours turns out. Happy baking!
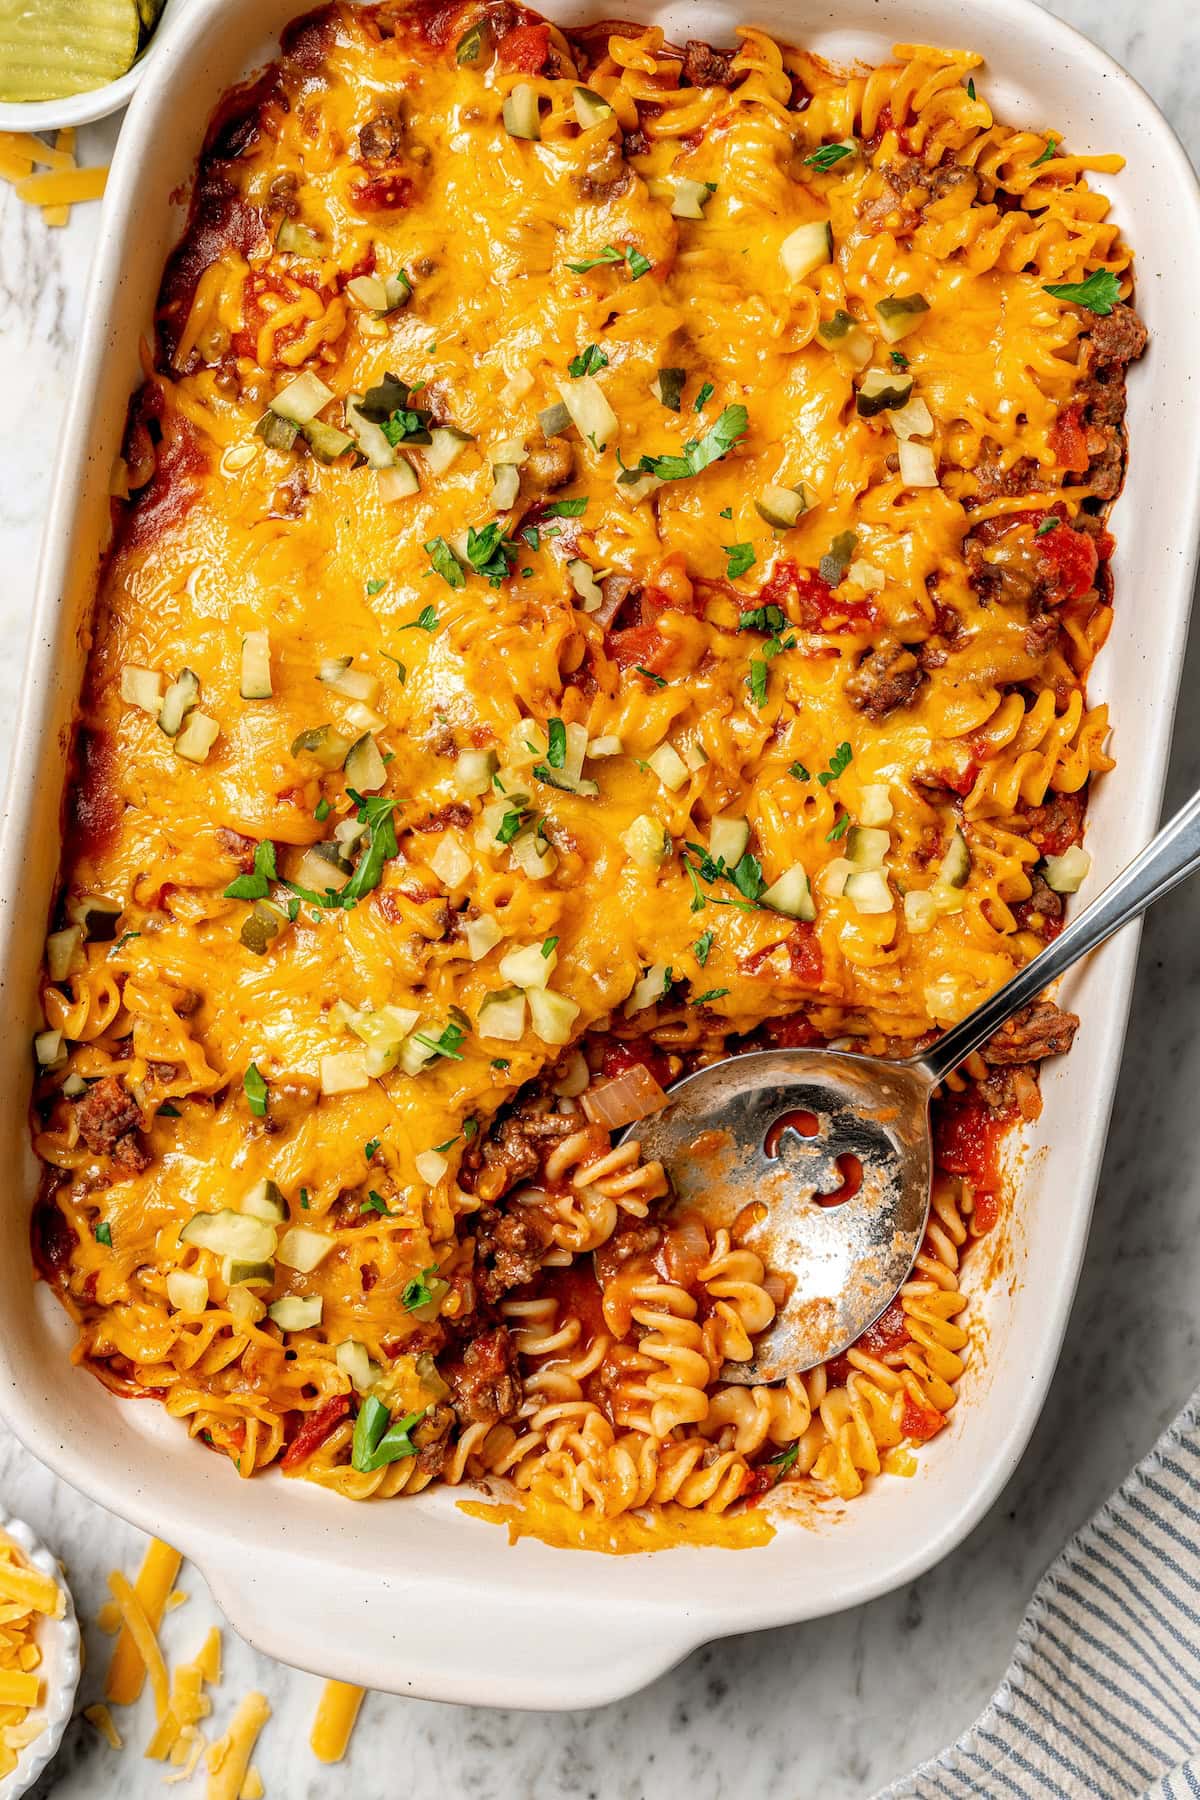
Burger Casserole
Ingredients
Method
- Preheat the oven to 350 degrees Fahrenheit. Spray a 9 x 13 inch baking dish with cooking spray.
- In a large pot of boiling salted water, cook the pasta according to package instructions until al dente and drain well.
- Meanwhile, in a large skillet, heat the olive oil over medium-low heat. Add the onions and cook until soft, about 5 minutes. Stir in the garlic and cook for 30 seconds.
- Add the ground beef to the skillet, cook until browned, and season with salt and pepper.
- Stir in the tomato paste, diced tomatoes, and Dijon mustard. Let simmer until mixture slightly thickens, about 2 minutes.
- Combine the cooked pasta with the meat mixture and spread into the prepared baking dish.
- Top with grated cheddar cheese and bake until cheese melts, about 15 minutes. Sprinkle chopped dill pickles over the top and serve.