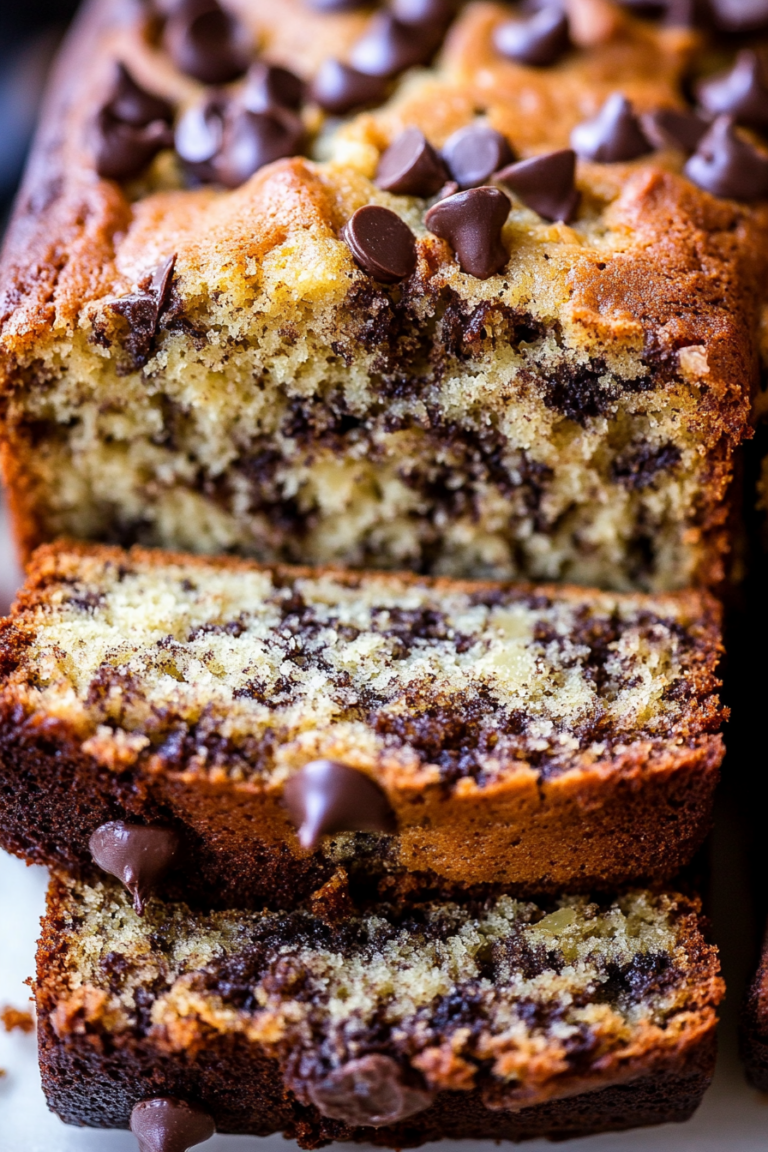
Easy Fudge Brownies with Cookie Dough Swirl
If you’re anything like me, you’ve got that one drawer — you know, the one full of zucchini that’s just begging to be used before it turns. Every summer, I find myself grabbing a mountain of those garden-fresh zucchinis, and pretty soon, I’m experimenting in the kitchen, trying to sneak vegetables into everyone’s favorite treats. This chocolate zucchini bread has become my secret weapon — it’s moist, rich, and so unbelievably good, people actually ask if I added chocolate chips when I didn’t! Trust me, I’ve tested this with different kinds of chocolate (dark, milk, even white), but the way the zucchini keeps it all super tender makes it my absolute favorite. It’s sweet, a little bit decadent, and so simple to make — this one’s a lifesaver on busy nights or when you need a quick pick-me-up. Honestly, my kids ask for this all the time, and I love how sneaky and wholesome it feels. Plus, the smell alone when it’s baking is enough to bring everyone to the kitchen — you’ll see what I mean. This bread disappeared in minutes at my house — I can’t wait for you to try it!
What is chocolate Zucchini bread?
This is basically a classic quick bread that’s been jazzed up with our friend, zucchini, and a generous helping of chocolate. Think of it as a little bit cake, little bit veggie-packed snack, and totally irresistible. It’s essentially a tender, chocolatey loaf that hides zucchini shreds — so sneaky, right? The name might make you think it’s reserved for dessert only, but honestly, I love slicing a warm piece with my morning coffee or packing it in the kids’ lunchboxes. The zucchini keeps the bread moist and adds a subtle veggie richness without overpowering the chocolate — it’s like a culinary hug. What’s funny is how versatile it is: you can snip it into squares for a snack, toast it up for breakfast, or even serve it as a last-minute dessert that feels fancy but is super straightforward. Sometimes, I toss in a handful of walnuts or go vegan with coconut oil, and it still turns out amazing every time. Think of it as a hug in loaf form, perfect for sneaking vegetables into your family’s day.
Why you’ll love this recipe?
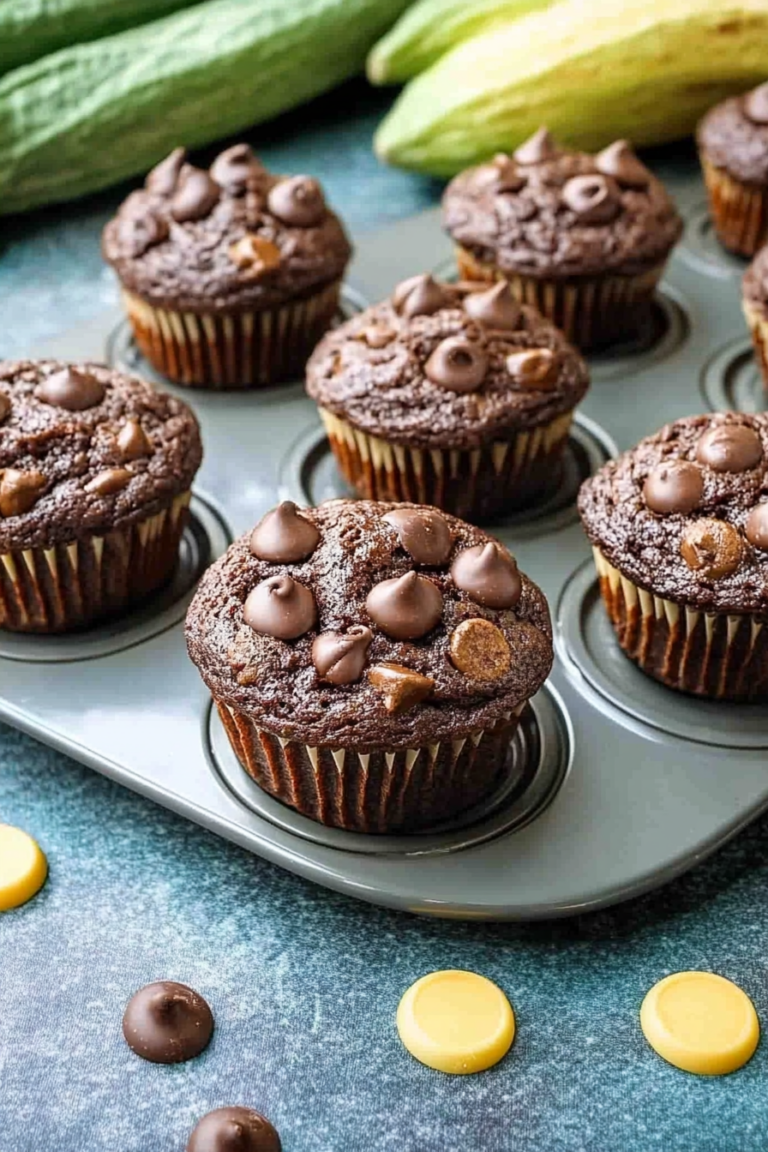
Oh, I could go on about why this chocolate zucchini bread is a staple in my kitchen. First off, the flavor? Pure chocolate happiness with just a hint of zucchini — I swear no one can tell, but everyone loves it. The smell when it’s baking? Like a warm chocolate hug that fills the whole house. Plus, it’s crazy easy to whip together, even on those nights when I’m tired but craving something sweet and comforting. I’ve made this countless times; I know the exact moment it’s done just by the smell and the way it springs back when you press lightly on top. And let me tell ya — it’s budget-friendly too! The ingredients are pantry staples most of us already have. You can tweak it to fit your mood or dietary needs—vegan, gluten-free, whatever. What I love most about this is how adaptable it is: throw in some nuts or swap the sugar for honey if you’re feeling fancy. It’s a winner for my family because it’s comforting, wholesome, and doesn’t require a complicated step. Plus, it’s perfect when you’re craving something sweet at 10 pm but don’t want to bake a whole cake. I promise, once you try this, it’ll be part of your regular rotation!
How do I make Zucchini bread?
Quick Overview
This recipe is a simple-pleasure kinda thing. You grate the zucchini, mix up the dry ingredients, stir in the wet, then swirl in your favorite chocolate chips. Pour it into a loaf pan and bake until the house smells like a chocolate dream. No fancy tools or techniques needed — just a bowl, a spoon, and a little patience while it bakes. What makes this special is how forgiving it is; even if you’re a beginner, you’ll come out with a moist, flavorful loaf that screams indulgence. Once baked, cooling is the hardest part — I always want to sneak a piece while it’s still warm!
Ingredients
For the Main Batter:
– 1 1/2 cups all-purpose flour (or almond flour if you’re feeling paleo)
– 1/2 cup cocoa powder (unsweetened, of course)
– 1 teaspoon baking soda
– 1/2 teaspoon salt
– 1 cup granulated sugar (or coconut sugar for a healthier twist)
– 1/2 cup vegetable oil (or melted coconut oil for extra flavor)
– 2 large eggs
– 1 teaspoon vanilla extract
– 1 cup finely grated zucchini (don’t forget to squeeze out excess moisture)
For the Filling:
– 1 cup chocolate chips (dark or milk, your call)
– Optional: chopped walnuts or pecans for extra crunch
For the Glaze:
– 1/2 cup powdered sugar mixed with a teaspoon of milk or lemon juice (for a quick glaze)
– Or melt some extra chocolate for drizzling — totally decadent!
Step-by-Step Instructions
Step 1: Preheat & Prep Pan
Set your oven to 350°F (175°C). Grease your loaf pan with butter or non-stick spray and lightly dust with flour, so nothing sticks. I always do this to avoid surprises when slicing later. It’s also nice to line the pan with parchment for easy removal.
Step 2: Mix Dry Ingredients
In a large bowl, whisk together the flour, cocoa powder, baking soda, salt, and sugar. This guarantees everything gets evenly distributed — trust me, it makes all the difference in the texture of your bread. It’s like laying a solid foundation for your baking masterpiece.
Step 3: Mix Wet Ingredients
In a separate bowl, whisk the eggs, oil, and vanilla. I love cracking eggs directly into the cup first to double-check I don’t get any shells lurking. Then, add the grated zucchini, stirring well. I’ve tested this with almond milk instead of eggs or oil, and surprisingly, it made the loaf a little wetter and creamier — so if you’re vegan or dairy-free, give it a shot!
Step 4: Combine
Pour your wet mixture into the dry ingredients. Gently fold with a spatula until just combined; don’t overmix or the bread can turn dense. A few lumps are totally fine — that’s how you get that nice crumb. If you overmix, it can be tough and dry, and nobody wants that.
Step 5: Prepare Filling
Stir the chocolate chips into the batter or sprinkle some on top for the perfect melty pockets. I sometimes add a handful of chopped nuts or dried cherries — it’s all about customizing to your mood.
Step 6: Layer & Swirl
Pour half the batter into your pan, add a layer of filling, then top with the remaining batter. Use a knife or skewer to swirl through the batter to create pretty marbled patterns — no two loaves are exactly alike, and that’s part of the fun.
Step 7: Bake
Pop it in the oven for about 55-60 minutes. Check with a toothpick inserted into the center — if it comes out clean, you’re done! Every oven is different, so keep an eye on it after 50 minutes. The house will smell like cocoa and chocolate; it’s almost impossible not to peek early!
Step 8: Cool & Glaze
Let the bread cool in the pan for about 15 minutes, then transfer to a wire rack. I always want to slice it warm, but patience pays off here — the texture tightens up and slices beautifully once cooled. Drizzle the glaze over the top or melt more chocolate for an extra decadent touch.
Step 9: Slice & Serve
Use a serrated knife and gentle sawing motion — I’ve learned this makes the cleanest slices. Serve with a cup of coffee, a glass of milk, or just by itself. Honestly, it’s so good you might want to keep a stash hidden away!
What to Serve It With
This bread is incredibly versatile. For breakfast, a big slab with butter and a hot cup of coffee feels like a treat. I love pairing it with a dash of whipped cream or a sprinkle of powdered sugar when I want to make it feel special. It also makes a gorgeous brunch centerpiece — think sliced and toasted with a smear of jam or cream cheese. As a dessert, I drizzle a little caramel or raspberry sauce over a slice for that balance of sweet and tangy. And on lazy weekends, a warm piece with a glass of cold milk or a dollop of Greek yogurt is pure comfort. When I’m in a hurry, I’ve even sliced cold, toasted, and spread with a bit of butter — yum! Honestly, I keep throwing in different toppings, and it’s always a hit. It’s become my go-to for making any day feel a little more cozy.
Top Tips for Perfecting Your Chocolate Zucchini Bread
I’ve learned a bunch of tricks over the years, and a few make all the difference. First, squeezing excess moisture out of the zucchini is key — too much moisture and the bread can turn dense or gummy. I do it by wrapping grated zucchini in a clean dish towel and giving it a gentle squeeze. Be careful not to overdo it though; you want just enough moisture.
When mixing the batter, fold instead of stirring vigorously — this keeps the bread tender. Overmixing is the enemy for fluffy, moist loaves. Also, for a more intense chocolate flavor, I sometimes melt some chocolate chunks into the batter before pouring it in. If you want a richer dark chocolate punch, add a handful of cocoa nibs or chopped dark chocolate chips. For a vegan option, I swap out eggs for flaxseed “eggs” and use coconut oil — the texture still works beautifully. Baking times might vary if your oven runs hot, so start checking around 50 minutes. Use a toothpick, and if it comes out with moist crumbs, give it five more minutes. Don’t forget to let it cool completely before slicing — warm bread can crumble or look greasy if cut too early.
And a quick tip on the glaze: add a splash of lemon juice or vanilla to jazz it up, or sprinkle some sea salt on top for that sweet-salty flavor contrast. I’ve even experimented with toppings like toasted coconut flakes or a drizzle of peanut butter — all delicious. Have fun with it, trust your instincts, and remember: perfecting is part of the fun in baking!
Storing and Reheating Tips
Leftovers? Totally doable! Keep your chocolate zucchini bread covered in an airtight container at room temperature for about 2 days — but honestly, it’s best enjoyed fresh because the moisture and chocolate taste just peak right out of the oven. If you want to keep it longer, wrap it tightly with plastic wrap or store in a resealable bag and pop it in the fridge. It’s good for about 4-5 days. To reheat, a quick 15-20 seconds in the microwave or a warm toaster slice works like a charm — just don’t overdo it or the bread can dry out. If you’re planning to freeze it, wrap tightly in plastic wrap, then foil, and stash it in the freezer for up to 3 months. Thaw overnight in the fridge or warm slices gently in the microwave. Keep in mind, the glaze is best added fresh, but if you want to freeze a glazed loaf, add the topping after reheating for the best taste and texture.
Frequently Asked Questions
Final Thoughts
This chocolate zucchini bread has honestly become one of my go-to recipes — it’s like comfort food with a sneaky veggie twist. Not only does it satisfy that chocolate craving, but it’s also secretly packed with nutrients, making it a win in my book. Every time I bake this, the house fills with that irresistible cocoa aroma, and I know my family’s about to dive in. I love how forgiving the recipe is; even if you’re in a rush or a newbie baker, it comes out perfect nearly every time. Plus, the flexibility of add-ins and swaps means you can make it your own — throw in berries, nuts, or your favorite chocolate variety. If you’re after a cozy, sweet, and wholesome loaf that everyone will ask for seconds of, give this a try. Happy baking, and I’d love to hear how yours turns out — leave a comment or tag me in your photos! Let’s keep sharing the love of homemade goodness.
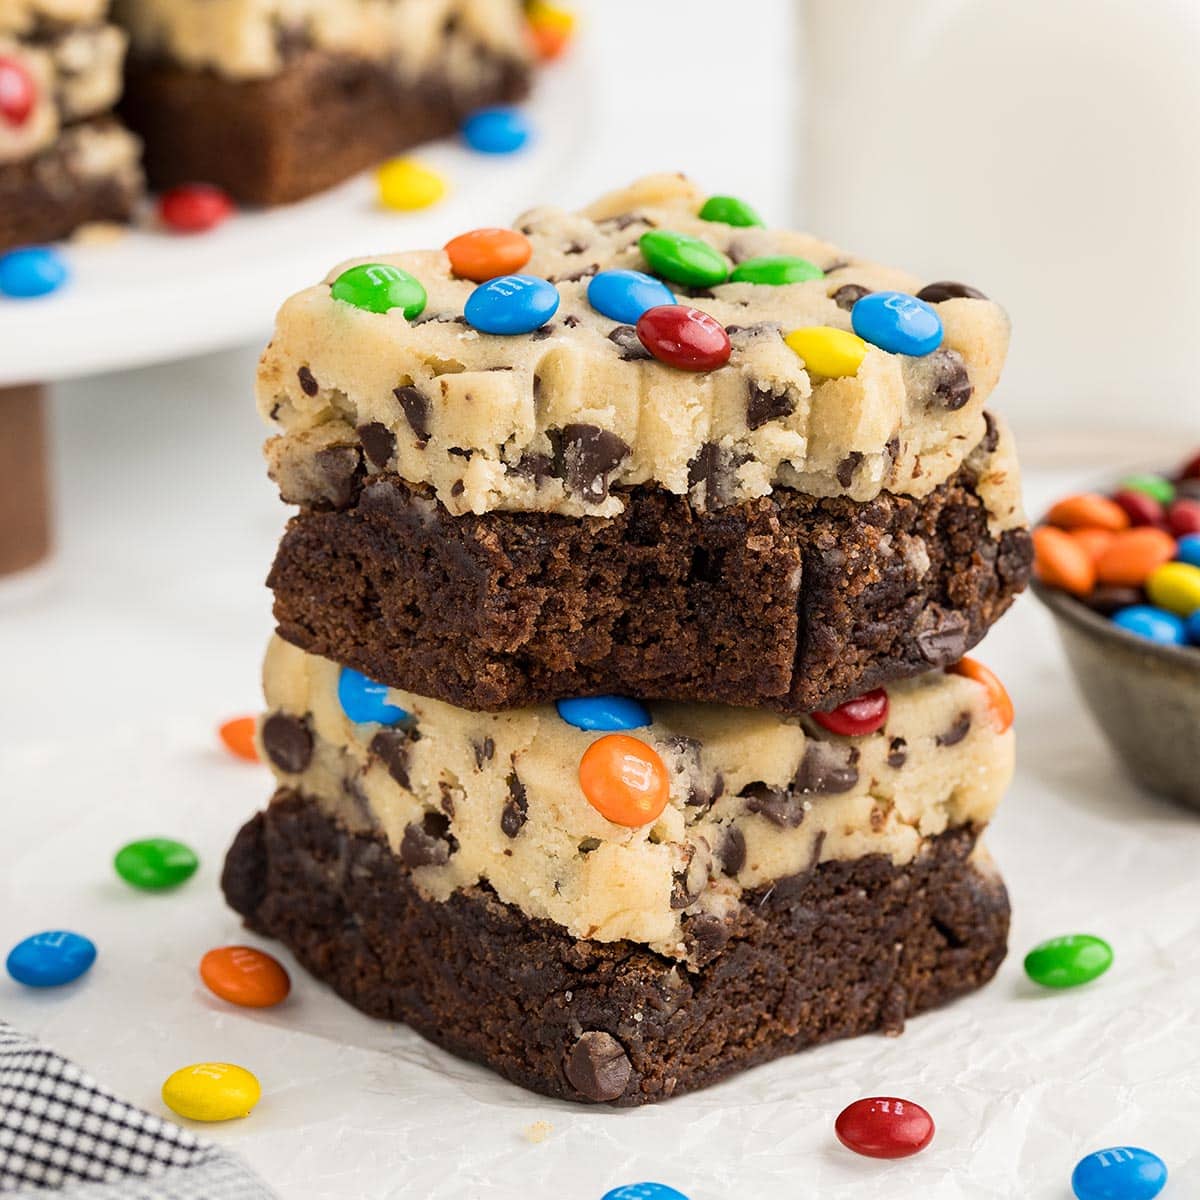
cookie dough brownies
Ingredients
Method
- Preheat oven to 350°F. Line a 9x9 metal baking pan with parchment paper and spray with baker's spray.
- In a large bowl, combine fudge brownie mix, eggs, vegetable oil, and water. Whisk until smooth.
- Spread the brownie batter evenly into the prepared pan. Bake for 30-33 minutes until a toothpick comes out with moist crumbs.
- Cool the brownies completely. Meanwhile, heat treat the flour by spreading it on a baking sheet and baking at 350°F for 5-7 minutes.
- In a mixing bowl, beat softened butter, brown sugar, granulated sugar, and vanilla until fluffy.
- Add heavy cream and salt. Mix until combined.
- Gradually add heat-treated flour, mixing just until incorporated. Fold in mini chocolate chips.
- Once the brownie layer is cooled, scoop cookie dough over the surface and spread evenly with a spatula, avoiding mixing with the brownie layer.
- Sprinkle mini M&M’s candies over the cookie dough and gently press them down.
- Refrigerate for 30 minutes. Lift out of the pan using parchment and slice to serve.