Easy Peanut Butter Cookie Dip Recipe
There’s something so nostalgic about waking up to the smell of fresh baked coffee cake, isn’t there? It’s that comforting warmth combined with just the right amount of sweetness—perfect for breakfast, brunch, or a lazy afternoon snack. I remember my grandma baking something similar, and the aroma alone could fill the entire house, making everyone gather in the kitchen like moths to a flame. Today, I want to share with you my personal favorite: a zucchini coffee cake that’s moist, tender, and bursting with cinnamon flavor, topped with a glossy glaze. It’s crazy good, and I promise, you don’t need any fancy skills to make it happen. Plus, it sneaks in some hidden veggies—because honestly, what’s better than sneaking in a little of that green goodness in dessert? Trust me on this one: this zucchini coffee cake has become a family staple at my house. My kids ask for this all the time—even in the middle of summer when zucchinis are at their peak!
What is Zucchini Coffee Cake?
Think of it as a tender, slightly crumbly cake that’s inspired by classic coffee cake recipes—soft layers, swirled with cinnamon, and topped with a sweet, sticky glaze. It’s essentially a cozy treat that’s perfect with your morning coffee or afternoon tea. The idea came from wanting to use up all those zucchinis my garden keeps producing—because let’s be honest, zucchinis are the gift that keeps on giving during summer. The interesting part? It’s not just zucchini bread. This cake is layered with cinnamon and has a slightly denser, more indulgent texture, resembling those bakery-style coffee cakes you find in cozy cafes but made at home. The name says “coffee cake,” but honestly, I also love to serve it as a dessert, maybe with a scoop of vanilla ice cream or a dollop of whipped cream. It’s simple, homey, and just downright delicious.
Why you’ll love this recipe?
What I love most about this zucchini coffee cake is how versatile and forgiving it is—perfect for bakers of all levels, really. The flavor! Oh, the flavor—it’s like a warm hug in every bite. The cinnamon swirl gives it that classic coffee cake vibe, but the zucchini keeps it surprisingly moist and tender, which means no dry crumb here. Plus, it’s budget-friendly because most of the ingredients are pantry staples—flour, sugar, eggs, and those cute little zucchinis from your garden or store. And here’s the best part: it’s a sneaky way to get kids or picky eaters to enjoy veggies without even noticing. My kids ask for this all the time, and I love watching their eyes light up when they see the shiny glaze drizzled on top.
Another thing? This one’s a lifesaver on busy nights when I want something homemade but don’t have hours to spend baking from scratch. I’ve tested this with almond milk, and it actually made it even creamier—it’s so adaptable to different dietary needs! Plus, the smell alone as it bakes fills the house with cozy autumnal vibes, even if it’s spring outside. Trust me, once you’ve tried this, it’s going to become part of your go-to baking rotation for sure.
How do I make Zucchini Coffee Cake?
Quick Overview
This zucchini coffee cake is all about easy, straightforward steps. First, grate your zucchini—don’t forget to squeeze out some excess moisture so your cake isn’t soggy. Mix up the dry ingredients, then whisk together the wet ones. The key is to combine everything gently—overmixing can make it dense. Layer the batter in a buttered pan, sprinkle with cinnamon-sugar mixture, then swirl it to create those beautiful ribbon patterns. Bake until golden and a toothpick comes out clean. While it cools, make a simple glaze, then drizzle generously over the top. The result? A soft, cinnamon-y cake with a sweet, shiny glaze that’s irresistible.
Ingredients
For the Main Batter:
– 2 cups all-purpose flour (I always use unbleached for a richer flavor)
– 1¼ cups granulated sugar
– 1 teaspoon baking powder
– ½ teaspoon baking soda
– ½ teaspoon salt
– 2 teaspoons cinnamon
– ½ teaspoon nutmeg (optional but adds warmth)
– ½ cup vegetable oil (or melted butter for richer flavor)
– 3 large eggs
– 1 teaspoon vanilla extract
– 1 cup grated zucchini (don’t forget to squeeze out excess moisture)
– ½ cup buttermilk or milk (I tested with almond milk and loved how creamy it made the batter)
For the Filling:
– ½ cup brown sugar
– 1 tablespoon ground cinnamon
– 2 tablespoons all-purpose flour (to help it stay in place)
For the Glaze:
– 1 cup powdered sugar
– 2-3 tablespoons milk or cream (add more if you want a thinner glaze)
– ½ teaspoon vanilla extract
– Optional: a dash of cinnamon or lemon zest for extra flavor
Step-by-Step Instructions
Step 1: Preheat & Prep Pan
Start by preheating your oven to 350°F (175°C). Butter a 9-inch square baking pan or line it with parchment paper—trust me, this makes cleanup much easier. I always do this first so I don’t forget later. Also, grate your zucchini now and squeeze out as much moisture as possible—this prevents your cake from becoming too wet. A clean dish towel or paper towels are great for that. While waiting on the oven, it’s helpful to gather all your ingredients so everything’s within arm’s reach once you start mixing.
Step 2: Mix Dry Ingredients
In a large bowl, whisk together the flour, sugar, baking powder, baking soda, salt, cinnamon, and nutmeg. I like to sift or whisk vigorously to combine evenly because this helps give the cake that light, airy texture. This step is crucial because it distributes the leavening agents evenly, ensuring your cake rises perfectly in the oven. Plus, it’s satisfying to see all those spices blend together into a beautiful, fragrant mixture.
Step 3: Mix Wet Ingredients
In a separate bowl, whisk together the eggs, vanilla, oil, and buttermilk until smooth. I test the temperature of the eggs to make sure they’re not too cold—room temperature eggs blend more easily and give you a softer crumb. Then, add the grated zucchini and fold gently. I’ve noticed that a quick stir here prevents your zucchini from sinking to the bottom but still distributes it evenly throughout the batter.
Step 4: Combine
Pour the wet ingredients into the dry ingredients. Use a spatula or wooden spoon to fold everything together gently—overmixing can toughen the batter, so I stop as soon as it’s just combined. You want that lovely, slightly lumpy texture. If you see pockets of unmixed flour, just give it a few more gentle folds. It’s okay if there are a few streaks—that’s where the cinnamon swirl will go later!
Step 5: Prepare Filling
Mix the brown sugar, cinnamon, and flour in a small bowl. This sweet cinnamon mixture will create that irresistible swirl in the middle of the cake. If you want to add chopped nuts or a bit of orange zest, now’s the time! I like to keep it simple, but feel free to experiment with your favorite additions.
Step 6: Layer & Swirl
Pour half of the batter into your prepared pan, then evenly sprinkle the cinnamon-sugar mixture over it. Top with the remaining batter, then use a butter knife or skewer to gently swirl the filling into the batter—creating those beautiful ribbons of cinnamon goodness. My secret tip? Do this slowly and try to keep the swirls somewhat gentle so the layers stay distinct. Seeing that marbled effect is always a thrill!
Step 7: Bake
Bake for about 35-40 minutes, or until a toothpick inserted in the center comes out clean. Every oven is a bit different—I’ve had mine take as little as 33 minutes, so start checking around then. The top should be golden brown and smell incredible. If it starts to darken too quickly, loosely cover with foil and finish baking—better to have a golden top than a burnt one!
Step 8: Cool & Glaze
Let the cake cool in the pan for about 15 minutes before transferring it to a wire rack. Patience is key here—if you glaze it when it’s still hot, the glaze might melt off. Mix the powdered sugar, vanilla, and milk until smooth and glossy. I like my glaze on the thicker side, but you can thin it out with a splash more milk if you want a drizzlier finish. Drizzle over the cooled cake, letting it drip down the sides for that bakery look.
Step 9: Slice & Serve
Wait at least 10-15 minutes for the glaze to set before slicing. Use a sharp knife dipped in hot water for clean cuts—this helps your slices look picture-perfect. Some like to serve this with a dollop of whipped cream or a scoop of vanilla ice cream, especially if you’re feeling dessert-y. But honestly, it’s best enjoyed warm with a cup of coffee or tea. I always make a little extra because this disappears in minutes at my house!
What to Serve It With
This cake pairs beautifully with a hot cup of coffee or tea. For breakfast, I like to serve it with a slice of fresh orange or a dollop of Greek yogurt—that bit of tang balances the sweetness perfectly. It’s also a show-stopper for brunch—pair it with some fresh fruit and maybe a glass of sparkling water with lemon. As a dessert, warmed-up with a scoop of vanilla ice cream or a drizzle of caramel sauce feels decadent but cozy. And for casual snacking, it’s fantastic with a mug of hot chocolate or even a glass of cold milk. I grew up with my mom slicing this up for school lunch boxes, and I still do the same for my kids—it’s comfort food in cake form, no doubt.
Top Tips for Perfecting Your Zucchini Coffee Cake
Trust me, these little tricks make all the difference:
- Zucchini Prep: Always squeeze out excess moisture—I use a clean dish towel to wring it out; wet zucchini can make your cake dense or soggy. Fresh zucchini is best, but frozen works too if thawed and drained well.
- Mixing Advice: Overmixing is the enemy here. Mix until just combined to keep the cake light and airy. The lumps are fine—think of it as a sign that you haven’t overworked the batter.
- Swirl Customization: Play with the pattern—make big swirls or tighter ones, depending on your vibe. Also, sprinkle the cinnamon-sugar generously—you want that burst of flavor in every bite.
- Ingredient Swaps: Tried coconut oil? Delicious. Swap with whole wheat flour for a slightly denser texture, but keep in mind it might need a touch more liquid. Almond flour works but be aware it can make the cake a bit crumbly.
- Baking Tips: Use an oven thermometer if you’re unsure about your oven’s accuracy. Check the cake around the 35-minute mark so it doesn’t overbake. The toothpick test is your best friend to get it just right.
- Glaze Variations: Add a splash of lemon juice or a pinch of cinnamon to the glaze for fun flavor twists. You can also swap powdered sugar for honey glaze—just mix honey with a little milk until pourable.
Over the years, I’ve learned that patience and a gentle touch are your best allies. Remember, even if it doesn’t look perfect on your first try, it still tastes amazing. Every batch is a new lesson, and that’s part of the fun—this cake always makes me smile, even after I’ve made it dozens of times.
Storing and Reheating Tips
This cake keeps surprisingly well. Once cooled, wrap it tightly in plastic wrap or store in an airtight container for up to 3 days at room temperature—you’ll want to keep it out of direct sunlight to prevent the glaze from melting off. For longer storage, pop it into the fridge for up to a week. Just be sure to bring it back to room temp before serving, or warm it gently in the microwave for about 20 seconds—the moistness really comes through with a little warm-up.
If you want to freeze it, wrap slices individually in plastic wrap, then foil, and store for up to 3 months. Thaw overnight in the fridge or at room temperature. I’ve done this before when I baked too much—because honestly, I can’t resist sneaking a slice in the morning! A quick reheat in the microwave makes it almost as fresh as when it came out of the oven.
And a note on glaze: I usually add that just before serving. If you’re freezing the cake, wait to glaze until after reheating—otherwise, the glaze might get weird in the freezer.
Frequently Asked Questions
Final Thoughts
This zucchini coffee cake has truly become a favorite in my home, especially during those cozy mornings when we need something special but don’t want to fuss too much. It’s one of those recipes that never fails to bring smiles around the table. The secret is in its simplicity; it’s like a warm hug in every bite. I love experimenting with different add-ins like chopped nuts or a splash of orange zest—it’s endlessly adaptable. If you try it, I’d love to hear how it turns out! Baking is all about fun and comfort, and what’s better than a slice of warm, cinnamon swirled cake paired with your favorite brew? Happy baking, friends—enjoy every bite, and don’t forget to share your leftover slices with loved ones. That’s what makes it all worthwhile.
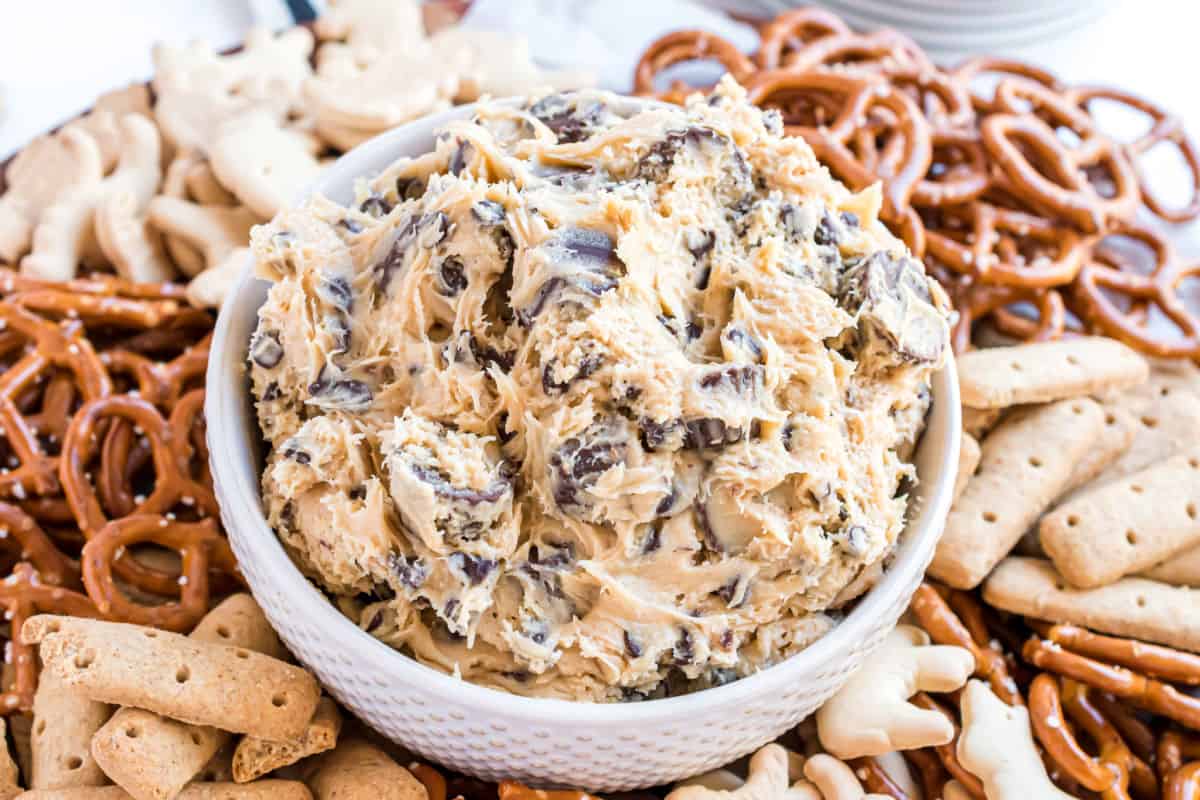
Peanut Butter Cookie Dip
Ingredients
Method
- In a small saucepan over medium heat, melt butter and whisk in the brown sugar and peanut butter. Heat until sugar dissolves (about one minute). Remove from heat immediately and allow to cool to room temperature.
- In a large mixing bowl, beat cream cheese with powdered sugar until creamy (about 3-4 minutes). On low, add in the cooled brown sugar mixture. Mix until combined.
- Fold in mini chocolate chips and chopped Reese's cups. Serve immediately or store in refrigerator until ready to serve. Enjoy with pretzels, animal crackers, or graham sticks.