Silky French Tart How to Make It Easy
I remember the first time I made this zucchini ribbon cake—my grandmother’s recipe, tucked into an old battered notebook, came to life in my tiny kitchen. The smell of melting butter, the gentle whirl of shredded zucchini, and the swirl of tangy cream cheese all melded into something that felt like a warm hug. Honestly, it’s one of those recipes that feels like a little secret—you know, the kind you keep bringing out when friends come over and they ask, “What’s that amazing smell?” It’s surprisingly simple but yields incredible flavor, with a tender crumb and delightful surprise in every bite. And you know what? It’s also a great way to sneak some veggies into dessert—my kids actually ask for seconds! This one’s a lifesaver on busy nights when you want something homemade but don’t want to spend hours in the kitchen. I’ve tested this with almond milk, coconut oil, and even different zucchinis, and it always turns out fantastic. Trust me, once you make this, it’ll be in your regular baking rotation. Let’s dive into how this cozy, delicious cake comes together—you’ll see it’s easier than you think!
What is Zucchini Ribbon Cake?
Think of zucchini ribbon cake as a lovely mash-up between a cake and a tender muffin, with a special twist—beautiful, delicate zucchini ribbons woven into every slice. It’s essentially a moist, lightly sweet bread with a hint of natural earthiness thanks to the zucchini, balanced perfectly by a tangy cream cheese swirl running through the middle. The name “ribbon” comes from the way the zucchini is sliced very thin, almost like delicate paper, and layered into the batter. It’s a playful, pretty presentation that turns humble zucchini into a show-stopping dessert or snack. I like to think of it as a cozy comfort food that feels special enough for guests, but simple enough for a treat on a weekday. The best part? It’s adaptable—toast it for breakfast, serve with tea for a lazy afternoon, or cut into little squares as a sweet snack when that craving sneaks up on you at 10 pm. No matter how you enjoy it, this cake just feels like home.
Why you’ll love this recipe?
There are so many reasons why I keep coming back to this zucchini ribbon cake—it’s honestly become a little personal favorite. First, the flavor—moist and tender, with just enough sweetness, and that little tang from the cream cheese swirl? It’s magic. My house fills with a warm, inviting smell while it bakes, and honestly, it makes any day feel a little bit cozier. What I love about this is how ridiculously simple it is to make. No complicated techniques, no fancy ingredients—just straightforward pantry staples, fresh zucchini, and a bit of love. Plus, it’s budget-friendly; zucchini are always affordable and plentiful, especially in summer. I’ve made this for brunches, after-school snacks, even a last-minute potluck—every time, people ask for seconds. And because it’s so versatile, you can jazz it up with a handful of blueberries, swap out the cream cheese for mascarpone, or sprinkle a handful of chopped nuts on top. It’s a true canvas for your creativity, and that makes it super fun to experiment with. Honestly, I think what makes this recipe stand out is its cozy, homey vibe—it’s like a slice of comfort that everyone needs right now.
How do I make Zucchini Ribbon Cake?
Quick Overview
This cake comes together faster than you’d think—almost like a little magic trick! You start by shredding the zucchini into paper-thin ribbons, then mixing a simple, moist batter with basic ingredients like flour, sugar, eggs, and butter. The trick is layering the ribbons and dollops of cream cheese swirl into the batter, then swirling gently to create pretty marbled patterns. The entire thing bakes up into a golden, tender loaf with bursts of green peek-a-booing through. I always say this is a one-bowl wonder—minimal fuss, maximum flavor—and it’s perfect when you’re craving something sweet but also a little wholesome. Once baked, a quick glaze or dusting of powdered sugar is all it needs. Serve warm or cooled—either way, it’s absolute comfort food with a touch of elegance.
Ingredients
For the Main Batter:
- 1 ½ cups all-purpose flour (I prefer unbleached for a richer flavor)
- 1 tsp baking powder
- ½ tsp baking soda
- ¼ tsp salt
- ½ cup granulated sugar
- ½ cup unsalted butter, melted (or coconut oil, if you want dairy-free)
- 2 large eggs
- ½ cup buttermilk or whole milk (almond milk works well too!)
- 1 tsp vanilla extract
For the Filling:
- 1 cup shredded zucchini (squeeze out excess moisture)
- 4 oz cream cheese, softened
- 2 tbsp powdered sugar
- ½ tsp vanilla
For the Glaze (optional):
- ½ cup powdered sugar
- 2 tbsp milk or lemon juice (adjust for desired consistency)
- Extra zest of lemon or vanilla for flavor
Step-by-Step Instructions
Step 1: Preheat & Prep Pan
First things first, turn your oven to 350°F (175°C) and grease a loaf pan or line it with parchment paper. I love using a metal loaf pan because it bakes evenly and gives a nice crust—trust me, it makes a difference in texture. You can also use a 9×9 inch square pan if you prefer a more cake-like shape. Set aside your ingredients—you’ll want everything handy because this comes together quickly.
Step 2: Mix Dry Ingredients
In a large bowl, whisk together your flour, baking powder, baking soda, salt, and sugar. I always do this first—it ensures everything is evenly distributed and prevents lumps later. Flour should look light and airy once combined, with no streaks of baking powder or baking soda lurking around.
Step 3: Mix Wet Ingredients
In another bowl, beat the eggs, then stir in the melted butter, buttermilk, and vanilla. I like to do this separately because it helps eggs blend better without overmixing the batter later. The mixture should be smooth, slightly frothy, and smell amazing—vanilla and butter together are pure comfort.
Step 4: Combine
Pour the wet mixture into the dry ingredients and fold gently—no vigorous stirring! Overmixing can lead to tough, dense cake, and nobody wants that. Just mix until just combined; little lumps are okay. Now, fold in the shredded zucchini, making sure it’s evenly dispersed—this is where the magic begins!
Step 5: Prepare Filling
In a small bowl, mix the softened cream cheese with powdered sugar and vanilla until smooth. If you want a sweeter swirl, add a pinch more powdered sugar. You can also add lemon zest or cinnamon for a flavor boost. Set aside.
Step 6: Layer & Swirl
Pour half the batter into your prepared pan. Then, dollop the cream cheese mixture over it, followed by the remaining batter. Using a butter knife or skewer, swirl gently to create beautiful marbled ribbons—don’t overdo it, or the swirl will get lost. I love seeing those tiny streaks of cream cheese peek through as the cake bakes.
Step 7: Bake
Pop it into the oven and bake for about 50-60 minutes. Start checking around 50 minutes: a toothpick inserted in the center should come out clean. If it’s browning too quickly, tent with foil. The smell alone will make your kitchen feel inviting—trust me on this!
Step 8: Cool & Glaze
Remove from the oven and let it cool in the pan for about 15 minutes, then transfer to a wire rack. This cooling step helps the structure set—don’t rush it. Once cooled, drizzle with your optional glaze or dust with powdered sugar. The glaze adds a shiny finish and a little extra sweetness, but honestly, the cake is wonderful plain too.
Step 9: Slice & Serve
Use a sharp serrated knife for neat slices, and serve at room temperature or slightly warm. I love to pair this with a hot cup of tea or a cold glass of milk. It’s also fantastic toasted in the morning—just warm it up a bit, and that cream cheese swirl becomes gooey and irresistible. My kids ask for this all the time, and I know it will become a staple in your home too!
What to Serve It With
This cake fits just about anywhere—breakfast, brunch, snacktime, or dessert. For breakfast, I love serving it alongside a strong black coffee or a gentle chai latte—this sweetness is just enough to kickstart your day without feeling overly indulgent. My family enjoys it with fresh blueberries or a smear of butter melting into every warm slice.
At brunch, try pairing it with a fruit salad or Greek yogurt, garnished with sprigs of mint. It’s casual but beautiful—perfect for family gatherings or a weekend treat. As a dessert, a dollop of whipped cream or a drizzle of dark chocolate make it feel like a fancy bakery piece. I also sometimes sprinkle chopped nuts or toasted coconut on top before baking for added crunch. Honestly, it’s so versatile that everyone can customize it to their liking—who doesn’t love that?
Top Tips for Perfecting Your Zucchini Ribbon Cake
Growing up, I learned a few tricks that make all the difference in this recipe. Zucchini prep is key—make sure to squeeze out as much moisture as possible after shredding. I dampen a clean kitchen towel and roll the shredded zucchini inside, pressing gently to drain excess water. This prevents the batter from becoming soggy and ensures a tender crumb.
When mixing, I always use a gentle folding motion—overmixing can lead to dense, chewy cake. Patience is everything. Also, don’t forget to swirl your batter after layering—it’s an art in itself! You want a pretty marbling effect, not just a jumbled mess. A toothpick or skewer is perfect for creating those delicate ribbons without ruining your beautiful layers.
For ingredient swaps, I’ve tested almond flour (just a little more moisture is needed) and coconut sugar, which adds a lovely caramel hint. When it comes to baking, oven temperatures vary, so keep an eye on the cake’s color and texture. My tip? Start checking around 50 minutes—better to underestimate than overbake and lose that moistness.
The glaze is optional but so worth it—add a splash of vanilla or lemon zest to tailor it to your mood. I learned to whisk it until smooth, adding milk gradually to avoid runny drizzle. Trust me, a pretty glaze makes this cake look shop-bought even though it’s homemade. As you bake more, you’ll develop your favorite tweaks, and before you know it, this will become your signature cozy treat.
Storing and Reheating Tips
This cake stays lovely for days—if it lasts that long! To keep it fresh, wrap it tightly with plastic wrap or store it in an airtight container at room temperature for up to 2 days. I find that a slice covered loosely prevents it from drying out, but if it’s warm outside, refrigerate it to prevent spoilage. Just take it out about 30 minutes before serving to soften back up.
Refrigeration extends the shelf life to about 4 days, but I prefer bringing it back to room temp or giving it a quick warm-up in the oven or microwave—about 10 seconds—so the flavors and texture come alive again. Freezing works well too—wrap slices in plastic and foil, and they’ll keep for up to 3 months. To thaw, leave overnight in the fridge or warm gently in the microwave.
When storing, hold off on glazing until just before serving—adding it early can make the cake soggy. If you want to make it ahead, bake, cool, and freeze without glaze. Then, glaze fresh before slicing for that bakery-worthy shine.
Frequently Asked Questions
Final Thoughts
This zucchini ribbon cake has truly become my go-to for cozy weekends, last-minute gatherings, or whenever I need that nostalgic, home-baked smell filling the house. It’s everything I love about baking—simple, comforting, and so versatile. Plus, the sneaky zucchini makes it a little healthier without sacrificing flavor. Trust me, once you try it, it’ll sneak into your regular baking lineup too. My hope is that you’ll enjoy making it as much as I do—and that it becomes a sweet little tradition in your home. So, grab some zucchinis, a mixing bowl, and get ready for a baking session that’s guaranteed to bring smiles around your table. Can’t wait to hear how yours turns out! And if you have fun variations, I’d love to hear about them in the comments. Happy baking!
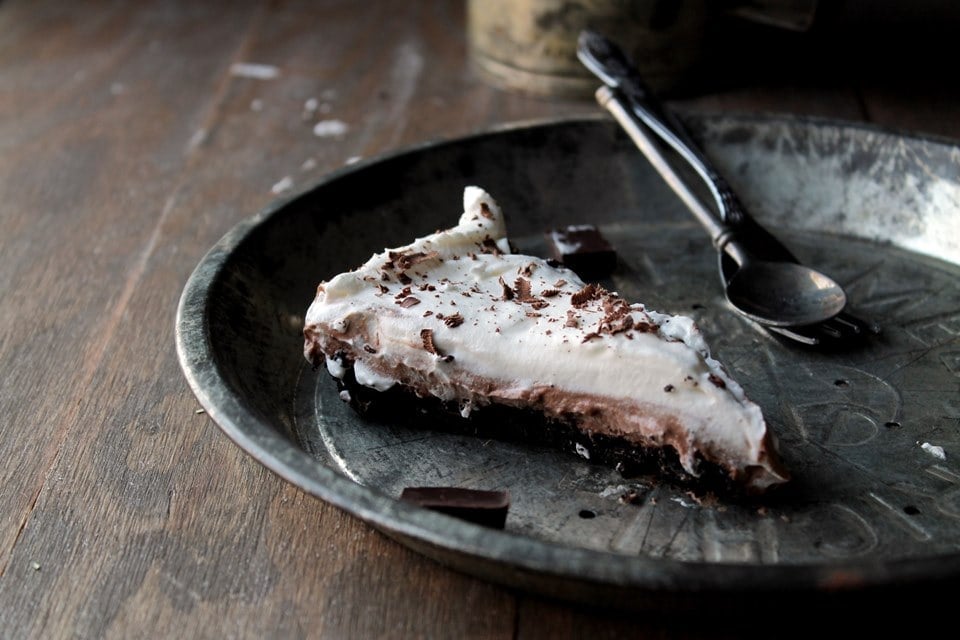
French tart
Ingredients
Method
- In a mixing bowl, combine flour and sugar. Add cold butter and blend until mixture resembles coarse crumbs.
- Add egg yolk and cold water. Mix until the dough comes together. Form into a disk, wrap in plastic, and refrigerate for 30 minutes.
- Preheat oven to 375°F. Roll out the chilled dough on a floured surface and fit into a tart pan. Prick the bottom with a fork.
- Bake the crust for 15-20 minutes until golden. Remove from oven and let cool.
- Spread the prepared pastry cream evenly over the cooled crust.
- Dust with powdered sugar and serve chilled or at room temperature.