Italian Roasted Pork Perfection How-To
If you’re like me, weekends usually mean a little extra time in the kitchen, a handful of ripe zucchinis hanging around, and a craving for something sweet but not overly indulgent. I always do this when I want a treat that’s satisfying yet sneaky enough to feel somewhat healthy—I whip up my favorite zucchini chocolate swirl cake. It’s basically like the love child between a rich chocolate cake and a moist zucchini bread. The scent alone when it’s baking—that warm, cocoa aroma mixed with that whisper of veggie freshness—never fails to bring everyone to the kitchen. This one’s a lifesaver on busy nights when my kids ask for seconds before I’ve even plated it. I’ve tested it with almond milk, and it actually made it even creamier—trust me, the family never notices the zucchini in the slightest. It’s perfect when you’re craving something sweet at 10pm but don’t want to bake a whole cake or reach for a candy bar. This recipe is my easy, cozy secret—everyone loves it, and it’s so much fun to make. Now grab your zucchinis, and let’s get baking!
What is Zucchini Chocolate Swirl Cake?
This zucchini chocolate swirl cake is a delightful, semi-healthy treat that combines the moistness of a pound cake with a luscious chocolate ribbon running through it. Think of it as a “hidden veggie” cake—kind of like a sneaky way to get your kids to eat their vegetables, but in the best way possible. The name might sound a little fancy, but it’s honestly just a straightforward, homey bake that’s perfect for those afternoons when you want something comforting with a hint of indulgence. It’s essentially a hybrid: part zucchini bread, part marble cake, with a generous dose of cocoa to make it feel like a special dessert. The best part? It’s super easy to throw together, even if you’re not a pro baker. And because of that vibrant swirl of chocolate, it looks just as beautiful as it tastes—everyone’s impressed when I cut into it!
Why you’ll love this recipe?
What I love most about this zucchini chocolate swirl cake is how it manages to be both cozy and satisfying without feeling heavy. The flavor combo—just the right amount of sweetness with that deep, rich chocolate—hits all the right notes. The zucchini keeps it incredibly moist; you know the kind of cake that gets even better the next day? Yeah, it’s one of those. Plus, the ingredients are simple; you probably already have most of them sitting in your pantry and fridge. That makes this recipe budget-friendly and perfect for weeknights when time’s tight but you still want to whip up something special. I also love how versatile it is—you can switch things up by adding nuts, vanilla, or even a splash of espresso for an extra kick. This cake is a total crowd-pleaser, and my kids ask for it all the time—they genuinely think it’s a fancy dessert! What makes it stand out from plain old zucchini bread or basic chocolate cake? The swirl, my friend. That beautiful marbling with a burst of chocolate makes every slice look like it’s straight out of a bakery. Honestly, I’ve made this countless times, and it never fails to make my kitchen smell amazing.
How do I make Zucchini Chocolate Swirl Cake?
Quick Overview
This zucchini chocolate swirl cake is surprisingly straightforward—you mix the batter, prepare a chocolate swirl, layer them in a pan, and bake. The secret to that beautiful marbling? Just a gentle swirl with a knife or skewer after layering the chocolate and zucchini batter. I like to keep it simple: grate the zucchini, fold it into the cake batter, spread it into the pan, then add dollops of melted chocolate or cocoa mixture on top before swirling. The result is moist, with an incredible flavor balance—vegetable hidden but the cake’s texture is pure indulgence. Whether you’re a seasoned baker or just starting out, this recipe’s flexibility and forgiving nature make it a guaranteed hit every time.
Ingredients
For the Main Batter:
– 2 cups grated zucchini (washed, and I always squeeze out excess moisture with a paper towel—trust me, it makes a difference!)
– 1 ½ cups all-purpose flour (or almond flour for a gluten-free version)
– 1 teaspoon baking powder
– ½ teaspoon baking soda
– ½ teaspoon salt
– ¾ cup granulated sugar (or coconut sugar for a slightly healthier twist)
– ½ cup vegetable oil or melted coconut oil
– 3 large eggs (or flax eggs for vegan swaps)
– 1 teaspoon vanilla extract
For the Filling (Chocolate Swirl):
– ½ cup cocoa powder
– ¼ cup hot water or brewed espresso
– ¼ cup chocolate chips or chopped dark chocolate (optional, but SO good!)
For the Glaze:
– ½ cup powdered sugar
– 2-3 teaspoons milk or plant milk
– A splash of vanilla
– Optional: a sprinkle of cocoa powder or shredded coconut for garnish
Step-by-Step Instructions
Step 1: Preheat & Prep Pan
Set your oven to 350°F (175°C). Grease your loaf or cake pan with butter or cooking spray, and line it with parchment paper if you like for easy removal. I always do this because nothing’s sadder than a cake stuck in the pan! Having your oven nice and hot while you prep makes sure your cake bakes evenly. Plus, I like to have my ingredients measured and ready to go—it’s the secret to a smooth bake and helps prevent last-minute mistakes.
Step 2: Mix Dry Ingredients
In a medium bowl, whisk together the flour, baking powder, baking soda, salt, and sugar. Sifting or whisking thoroughly at this stage ensures everything’s evenly distributed—no dense spots or clumps. I learned this the hard way—overmixing dry ingredients leads to a tougher texture, so I just give it a few gentle whirls and set it aside.
Step 3: Mix Wet Ingredients
In a large bowl, beat the eggs, then add the oil and vanilla. Mix well until combined, then fold in the grated zucchini. I like to grate the zucchini finely (a box grater works perfectly). I’ve tested this with frozen zucchini too—just make sure to thaw and squeeze out the water first. It helps keep the batter from becoming watery or separating during baking. The smell of the zucchini and vanilla together? Pure comfort.
Step 4: Combine
Add the dry mixture to the wet ingredients gradually, folding gently just until combined. Overmixing here can make the cake dense—I learned that from a baking mishap or two. It’s okay if the batter looks a little lumpy; that’s part of the charm. The zucchini bits will add little surprises of moistness in every bite.
Step 5: Prepare Filling
Mix the cocoa powder with hot water or espresso until smooth—this gives you a glossy, rich chocolate mixture. If you want it extra decadent, toss in the chocolate chips. I like to keep some aside to sprinkle on top or fold in for pockets of melty goodness.
Step 6: Layer & Swirl
Pour half of the batter into your prepared pan. Dollop spoonfuls of the chocolate mixture over it, then pour the remaining batter on top. Using a toothpick or skewer, swirl the two gently together to create that beautiful marbled pattern—I do slow, figure-eight motions to get an even swirl without overmixing. It’s a little messy but worth it for the visual impact.
Step 7: Bake
Pop it into the oven and bake for about 45-55 minutes. I always start checking at 45 minutes—insert a toothpick into the center; if it comes out clean, you’re good! Ovens vary, so just keep an eye on it. The house will fill with that irresistible chocolatey smell—my favorite part. If you notice the top browning too quickly, cover loosely with foil for the last 10 minutes.
Step 8: Cool & Glaze
Let the cake cool in the pan for about 15 minutes, then transfer to a wire rack. Patience is key here—to get that glossy glaze, stir powdered sugar with milk and vanilla until smooth, then drizzle over the cooled cake. The glaze sets quickly, so work swiftly to cover the surface evenly. If you prefer a less sweet touch, skip the glaze or dust it with cocoa powder instead.
Step 9: Slice & Serve
Slice when fully cooled—warm cakes tend to fall apart. I like using a serrated knife and wiping it clean between cuts. Serve it as is, or with a dollop of whipped cream or a scoop of vanilla ice cream. It’s perfect for mornings, casual afternoons, or even as a fancy-looking dessert. Whatever you do, enjoy those first bites with a hot cup of coffee or tea, and watch how quickly this disappears!
What to Serve It With
This cake is so versatile, I’ve served it in all kinds of ways over the years. For breakfast, a warm slice with a drizzle of honey and a cup of strong coffee is my go-to—trust me, the zucchini keeps it moist and not too sweet. When friends come over for brunch, I like to plate slices with some fresh berries and a dusting of powdered sugar; it feels fancy yet totally doable. As an after-dinner treat, a big scoop of vanilla ice cream or a dollop of mascarpone turns it into a decadent dessert. And when I need a cozy snack on a chilly afternoon, I just warm a slice and sip on tea. I’ve also experimented by adding chopped nuts or a splash of orange zest to the batter—my family loved those little twists. Honestly, this cake’s forgiving nature makes it a perfect canvas for all your flavor ideas. I’ve made it gluten-free, vegan, you name it—it always turns out amazing, and that’s what makes it a family favorite.
Top Tips for Perfecting Your Zucchini Chocolate Swirl Cake
After making this countless times, I’ve picked up a few tricks that make all the difference.
- Zucchini Prep: Always squeeze out excess moisture—wet zucchini will make your batter too runny and can cause uneven baking. Grate finely or in small chunks for the best distribution.
- Mixing Advice: When combining wet and dry, fold gently to avoid toughening the cake. Overmixing is the enemy—trust me, I’ve been there with a dense crumb!
- Swirl Customization: Use a skewer or chopstick to create a beautiful marbling pattern—think of it like painting with chocolate. A gentle swirl gives a more refined look, while a bigger spiral creates a more rustic effect.
- Ingredient Swaps: Coconut oil works beautifully here if you want a subtler flavor, and maple syrup can replace sugar if you’re looking to cut processed sugars. Just remember that substitutions might change the baking time slightly.
- Baking Tips: Check doneness early—every oven is different, and you don’t want a dry cake. If the top is browning too fast, tent it with foil. Don’t forget to insert a toothpick in the center to test for doneness.
- Glaze Variations: For a richer flavor, add a splash of espresso or vanilla to your glaze. You can also mix in a little almond butter or cream cheese for extra creaminess. Make sure the glaze isn’t too thick or thin—just pourable but not runny.
This cake has become a part of my weekend routine, and I’ve learned that the secret to perfection is patience—don’t rush it, and let it cool thoroughly before slicing. Sometimes, I swap out the cocoa for caramel or swirl in peanut butter instead—play around and make it your own! Every time I do, it turns out a little different, but always delicious. The key is embracing the imperfections and enjoying every bite.
Storing and Reheating Tips
This cake keeps beautifully for a couple of days in an airtight container at room temperature. I recommend covering it loosely with a towel or plastic wrap; this keeps the top from drying out but still lets it breathe. For longer storage, pop it into the fridge—just know that it firms up a bit when cold, but warms up wonderfully in the microwave. I like to warm individual slices for about 15 seconds—they become irresistibly moist again. To freeze, wrap the entire cake tightly with plastic wrap and then foil; it’ll keep well for up to three months. Thaw at room temp or in the fridge overnight before serving. If you’ve added a glaze, wait until just before serving to drizzle it on—this keeps it glossy and fresh. Honestly, the cake is almost better the next day since the flavors meld and the moisture soaks in. Just be careful not to over-reheat or it may lose its tender crumb.
Frequently Asked Questions
Final Thoughts
This zucchini chocolate swirl cake has become a family favorite around here because it’s almost impossible to screw up and always impresses. The secret is how moist it stays, thanks to the zucchini, and that lovely chocolate swirl adds just enough indulgence. It’s a wonderful reminder that baking can be cozy and creative at the same time. Whether you’re baking for a quick weeknight treat or a small gathering, I seriously recommend trying this out—you’ll love how it looks, tastes, and makes your house smell. Plus, I guarantee you’ll find yourself sneaking bites for days, convinced that it can’t be as good as it smells, but it always is. Anyway, I hope you love this as much as my family does! Let me know what variations you try or any tips you’ve picked up along the way. Happy baking, and enjoy sharing this little slice of happiness with your loved ones!
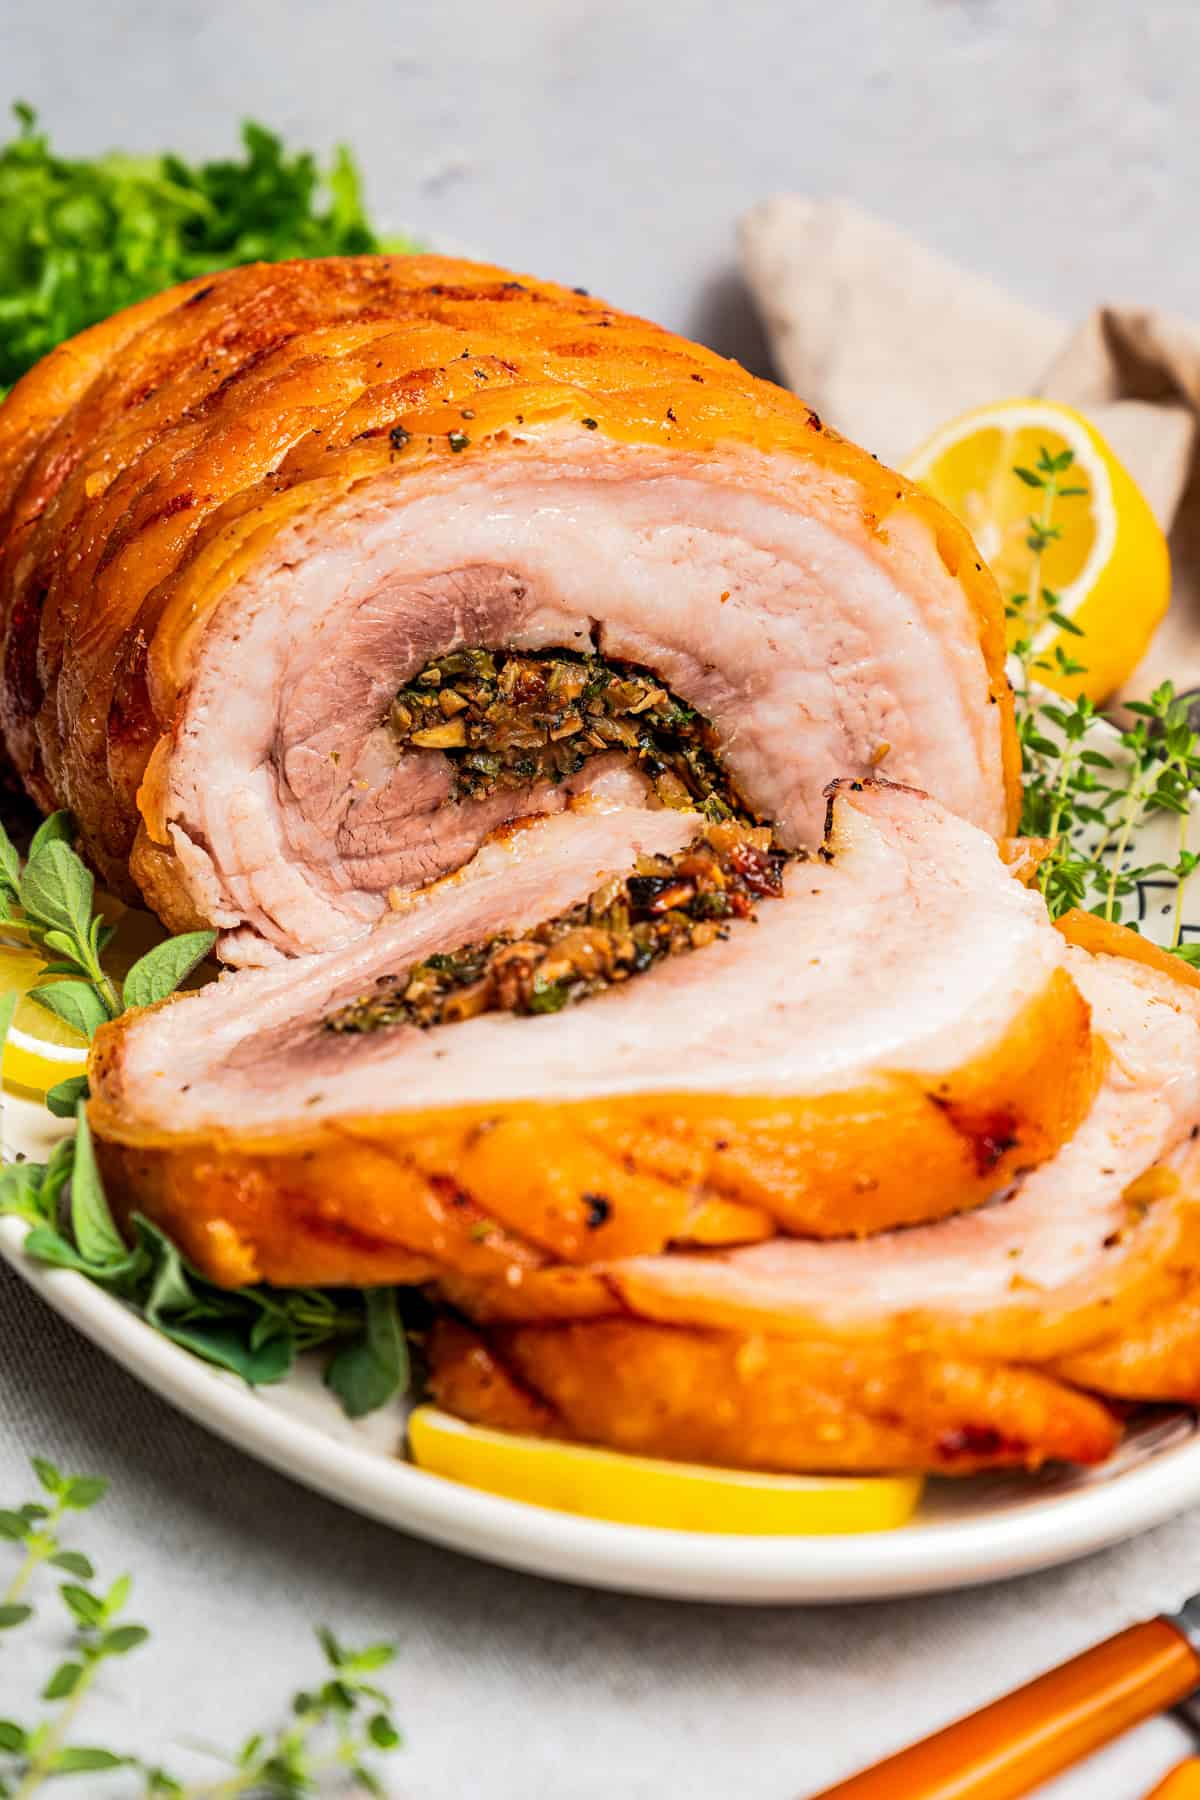
roasted pork
Ingredients
Method
- Preheat the oven to 300°F. Score the pork and tie with butcher's string for even roasting.
- Heat 2 tablespoons of olive oil in a large skillet and sauté fennel and onions until lightly caramelized.
- Mix salt, pepper, rosemary, parsley, oregano, fennel pollen, lemon zest, orange zest, and minced garlic to make seasoning.
- Rub the seasoning evenly over the pork, then wrap tightly with butcher's string.
- Chill the pork uncovered for at least 24 hours for skin to dry out for crispiness.
- Place the pork on a roasting rack and bake for 220 minutes, baste occasionally.
- Increase oven temperature to 450°F and roast for an additional 25 minutes until skin is crispy.
- Let rest for 20 minutes before slicing and serving.