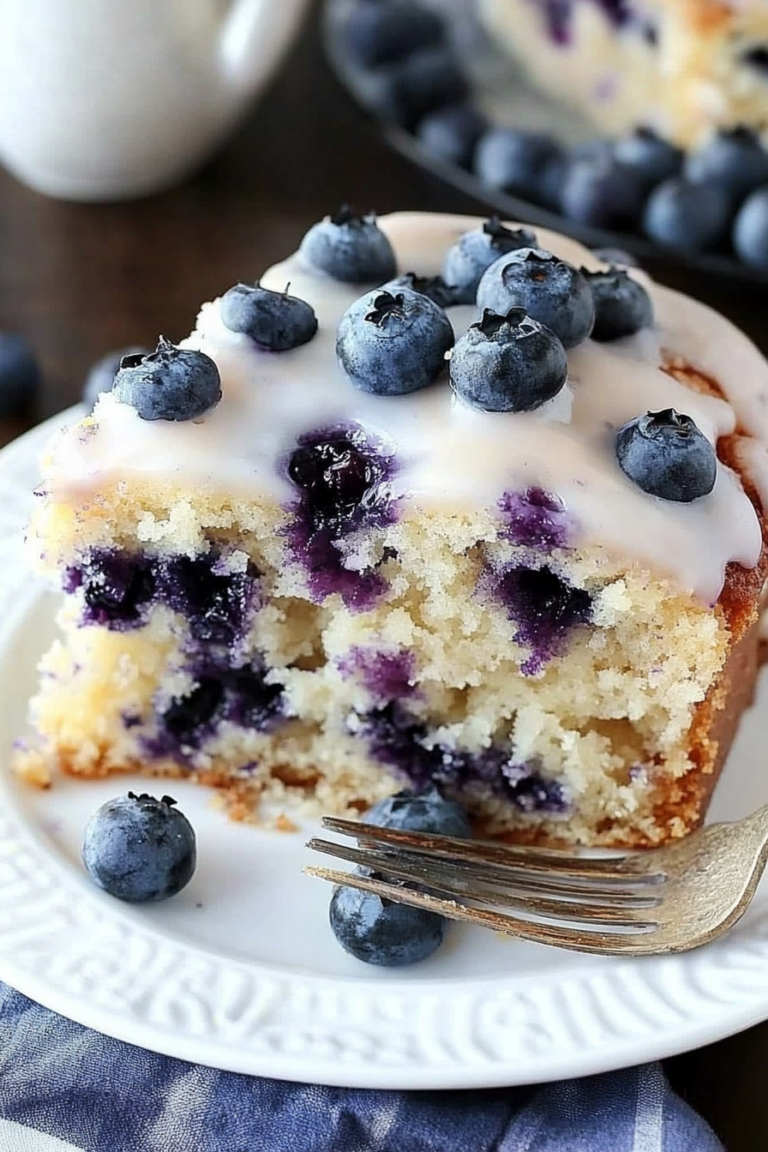
Easy Blueberry Scones for a Lighter Treat
There’s something about the smell of baking zucchini cake that instantly takes me back to childhood summers at grandma’s house. I still remember sneaking a little extra zucchini into my mom’s recipe one year—it was a total accident, but the end result was so moist, so flavorful, and honestly addictive that I’ve been hooked ever since. My kids ask for this all the time, especially when I tell them it’s secretly healthy. This zucchini cake is one of those recipes that feels like a warm hug—easy, forgiving, and packed with genuine flavor—and I promise, it’s way better than just “cake with vegetables” because it’s so much more than that. It’s moist, tender, and just sweet enough to satisfy that craving without feeling overly indulgent. Plus, it disappears in minutes at my house—often with a glass of milk or a cup of coffee in hand. If you’re looking for a recipe that’s like a comforting secret handshake and a little bit of nostalgia all in one, trust me on this one—this zucchini bliss cake is going to be your new favorite.
What is Zucchini Bliss Cake?
Think of zucchini bliss cake as a cross between a loaf and a quick bread—soft, moist, and bursting with flavor. It’s essentially a lightly sweetened, fluffy cake that hides grated zucchini inside, making it feel almost sneaky how healthy it is! The name “bliss” is my way of describing just how happy this cake makes me—every bite feels like a little slice of summer, with a hint of cinnamon, vanilla, and those tender bits of zucchini. It’s a forgiving recipe; you don’t need fancy ingredients or a perfect oven. Just good-quality zucchinis, pantry staples, and a little love. The best part? It’s perfect for breakfast, snack time, or even dessert. I like to keep it simple, but if you want to dress it up with cream cheese frosting or a drizzle of chocolate, go for it. Basically, it’s like a cozy blanket you can eat, and once you’ve tried it, it’ll become a staple in your baking repertoire.
Why you’ll love this recipe?
What I love most about this zucchini bliss cake is how versatile and foolproof it is. It’s a total lifesaver on busy nights when I need something sweet but don’t have the energy to tackle complicated baking. This cake is forgiving if you overmix or forget a teaspoon of vanilla—that’s part of the charm! The flavor profile is simple yet addictive: warm cinnamon, a hint of vanilla, and that lovely, tender zucchini texture. Plus, it’s budget-friendly—most ingredients are staples I always keep in the pantry. And let’s be honest, it’s a sneaky way to get kids (and adults!) to eat their veggies without fuss. If you’ve ever made a carrot or banana bread, this is kind of like that, but with zucchinis that bring moisture and a subtle sweetness. I’ve tested this with different kinds of zucchinis, even throwing in a little apple sauce for extra moisture, and it’s always turned out a little bit magic. The best part? It doubles as a healthful snack or a comforting dessert, depending on how you slice and serve. Honestly, I have failed to make it taste bad—that’s how easy and forgiving this recipe is. It’s like baking a warm hug—you won’t be able to stop at just one piece.
How do I make Zucchini Bliss Cake?
Quick Overview
This recipe is all about keeping it simple. You start by preheating your oven and prepping a loaf pan—seriously, no fancy equipment needed. Next, mix your dry ingredients like flour, cinnamon, baking powder, and a pinch of salt. Then, whisk together your wet ingredients: eggs, sugar, oil, vanilla—until smooth and fragrant. Fold in the grated zucchini, combine everything carefully, and pour the batter into your prepared pan. While it bakes, prepare a quick glaze or dust it with powdered sugar, or keep it plain, and trust me, it’s still a hit. In about 45 minutes, you’ll have a gorgeous, golden cake that smells like happiness. Cool it a little before slicing, and enjoy that first warm bite—the texture is always moist, showcasing the zucchini’s tender goodness. This method is so straightforward, I’ve made it in a rush, and it still turns out just right—trust me, it’s practically foolproof.
Ingredients
For the Main Batter:
– 1 ½ cups all-purpose flour (or gluten-free blend, see tips below)
– 1 teaspoon baking powder
– ½ teaspoon baking soda
– 1 teaspoon ground cinnamon
– ½ teaspoon salt
– ¾ cup granulated sugar (or coconut sugar for a slightly richer flavor)
– ⅓ cup vegetable oil or melted coconut oil
– 2 large eggs
– 1 teaspoon vanilla extract
– 1 ½ cups grated zucchini (about 1 medium zucchini, squeezed to remove excess moisture)
For the Filling (Optional):
– ½ cup chopped walnuts or pecans (to add crunch)
– A handful of mini chocolate chips (for a decadent touch)
– Spices like nutmeg or ginger if you want a bit more warmth
For the Glaze:
– ½ cup powdered sugar
– 1-2 teaspoons milk or lemon juice (to get that perfect drizzle consistency)
– A splash of vanilla or citrus zest for extra flavor
Step-by-Step Instructions
Step 1: Preheat & Prep Pan
Set your oven to 350°F (175°C). Grease your loaf pan with butter or non-stick spray and line it with parchment if you like—this makes removal a snap. I always do this because I hate fighting with a stubborn cake sticking to the pan, especially when it’s still slightly warm. While the oven heats, grated zucchini rounds out the moisture, so give it a good squeeze to remove excess water—trust me, it’s worth the extra step to prevent a watery batter.
Step 2: Mix Dry Ingredients
In a medium bowl, whisk together your flour, baking powder, baking soda, cinnamon, and salt. This helps everything combine evenly, preventing clumps and ensuring the spices are evenly dispersed. It’s a simple step but makes a big difference in how evenly your cake rises and tastes.
Step 3: Mix Wet Ingredients
In a larger bowl, beat the eggs, sugar, and vanilla until the mixture looks a little frothy and fragrant. Then, pour in the oil and mix until smooth. A quick tip: if your eggs are straight from the fridge, cracking them into a warm bowl first helps everything blend more easily. The smell alone should be sweet and inviting!
Step 4: Combine
Gradually fold your dry ingredients into the wet mixture—be gentle here. Overmixing can lead to dense cakes, and nobody wants that. It’s okay if there are a few small lumps; just stop mixing once it looks combined. Now, fold in your grated zucchini, making sure it’s evenly distributed. This is the moment where the magic happens—those tiny green flecks give a sneak peek of the goodness inside.
Step 5: Prepare Filling (Optional)
If you’re feeling fancy, mix nuts or chocolate chips into the batter or sprinkle them on top before baking. I love adding walnuts—they add a little crunch and balance the sweetness. You can also keep it plain, or swirl in a dab of fruit jam for extra flavor. This flexibility makes it “human”—no strict rules, just what you love.
Step 6: Layer & Swirl
Pour the batter into your prepared pan, smoothing the top gently. If you’re adding swirls like a cream cheese or fruit jam, now’s the time. Use a toothpick or skewer to gently swirl it through the batter—just a few gentle loops to get that marbled effect. It’s like hidden treasure for your taste buds!
Step 7: Bake
Pop it into the oven for about 45-50 minutes. Check doneness with a toothpick inserted in the center—if it comes out clean, it’s ready. Ovens do vary, so keep an eye on it after the 40-minute mark. The top should be golden, and your house will smell like cinnamon heaven.
Step 8: Cool & Glaze
Let the cake rest in the pan for about 10 minutes, then transfer it to a wire rack to cool completely. Pour your glaze over slightly cooled cake—the warmth helps it seep in just right, but I find it’s best to wait until it’s not scorching hot so the glaze doesn’t run off. If you’re short on time, dust with powdered sugar instead. Either way, the simplicity of the final touch is what makes this so human and cozy.
Step 9: Slice & Serve
Use a serrated knife for those tender slices, and try to slice just after it’s cooled completely—everyone loves a neat, even piece. Serve with a cup of coffee or a glass of milk. If you want to get fancy, a dollop of whipped cream or a sprinkle of extra cinnamon makes it extra special. But honestly, plain is just as wonderful—my kids ask for seconds even plain because of how moist and flavorful it is.
What to Serve It With
Oh, the possibilities! For breakfast, I love pairing it with a nice black coffee or a frothy cappuccino. The cinnamon and zucchini give it a comforting warmth that’s just right in the morning haze. My family often eats slices cold or slightly toasted for a quick snack on busy days—definitely a crowd-pleaser. For brunch, a spread of fresh fruit, yogurt, and a pot of tea turns this into a dash of elegance. And as a dessert, it’s lovely on its own—maybe with a scoop of vanilla ice cream or a drizzle of chocolate sauce if you’re feeling indulgent. I’ve also served it with some ricotta cheese or a smear of mascarpone on the side, which adds a lovely creamy contrast. Amy, my sister-in-law, swears she’s improved her health since discovering how sneaky this cake is—she says it feels like a treat but actually keeps her satisfied longer. Truly, this cake is an all-rounder—warm, comforting, and just the right amount of sweet. It’s one of those recipes everyone should have in their back pocket.
Top Tips for Perfecting Your Zucchini Bliss Cake
If you’ve ever had a baking flop, don’t worry—me too! My biggest tip is always to squeeze out as much moisture from the zucchini as possible. I learned this trick after too many watery cakes: roll the grated zucchini in a clean kitchen towel and give it a good squeeze. It makes all the difference—your cake won’t be soggy, and it’ll hold together beautifully. Also, don’t overmix the batter once you add the dry ingredients—mix just until combined. Overmixing tends to create dense, chewy textures, and nobody wants that in a delicate cake. When adding the swirl for marbling, use a gentle hand—if you overdo it, the pattern gets muddy, and you lose that beautiful contrast. One thing I tested last week was replacing half the sugar with honey—that added a depth of flavor and kept it super moist. If you’re gluten-free, I recommend almond flour or a gluten-free baking blend—just reduce the baking powder slightly because lighter flours don’t rise quite the same. Also, keep an eye on the oven—if your oven runs hot, reduce the temperature by 25°F to prevent over-browning. Oh, and don’t forget to let the cake cool completely before glazing or slicing; it helps everything set perfectly.
Storing and Reheating Tips
This cake stays fresh for a few days if stored properly. Once cooled, wrap it tightly with plastic wrap or store in an airtight container. Room temperature is fine for a day or two, especially if your house isn’t too warm—anything longer than that, and I toss it in the fridge. Reheat slices gently in the microwave for about 15-20 seconds if you want the warm, gooey feeling—trust me, it’s just as good reheated. To freeze, wrap individual slices in plastic wrap and then place them in a freezer-safe bag—these will keep for up to three months. Thaw overnight in the fridge or at room temperature; the moisture remains intact. If I plan to glaze later, I only add the glaze just before serving so it stays fresh and shiny. I also recommend keeping the cake unglazed if you’re making it ahead—add the glaze fresh for that perfect shiny finish. Overall, this cake is resilient and forgiving—reheat, store, and enjoy at your own pace. It’s like a little slice of sunshine whenever you need it.
Frequently Asked Questions
Final Thoughts
This zucchini bliss cake is one of those recipes that feels incredibly warm and human to me. It’s a mix of memories, imperfect perfection, and genuine love for baking something that everyone will enjoy. It’s forgiving enough for rookie bakers and versatile enough to make your own—add chocolate chips, swap in applesauce, or sprinkle nuts on top. I love how it’s essentially a sneaky way of eating veggies disguised as dessert—my kids ask for seconds before they even realize there’s zucchini inside. You don’t need fancy gadgets or exotic ingredients; just a spoon, a bowl, and your good ol’ oven. It’s the kind of recipe that makes your house smell cozy and invites everyone to the table. I really hope you try it—I’d love to hear how yours turns out and what tweaks you make. Happy baking, friend—and don’t forget to enjoy every bite!
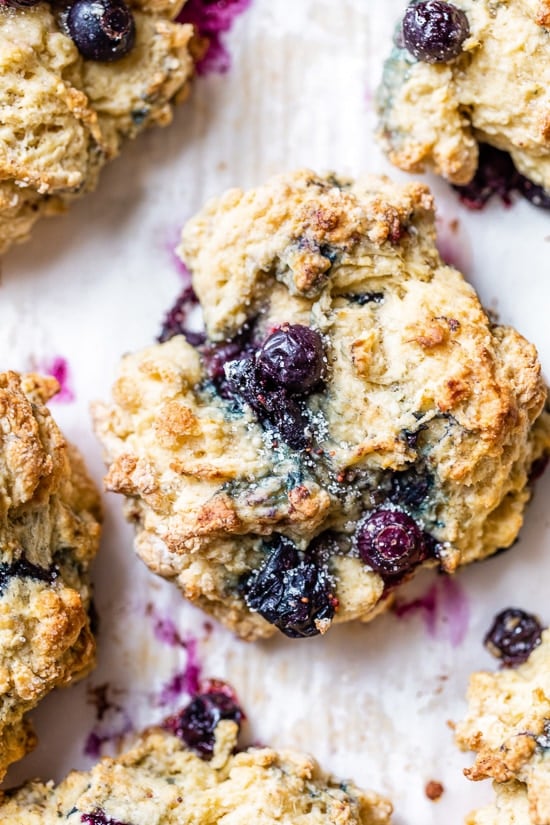
blueberry scones
Ingredients
Method
- Preheat the oven to 400°F.
- In a large bowl, mix all the dry ingredients: flour, sugar, salt, baking soda, and baking powder.
- Using a grater, grate the frozen butter into the flour mixture. Mix well until evenly distributed.
- In a medium bowl, whisk together the buttermilk, egg, and vanilla.
- Gradually pour the wet mixture into the dry ingredients, stirring gently until just combined. Do not overmix.
- Fold in the blueberries gently.
- Line a baking sheet with parchment paper or a silicone baking mat. Drop spoonfuls of dough onto the sheet, forming each into a round shape.
- Bake for 18 minutes until golden brown. Let cool for 5 minutes before serving.