Autumn Spice Butter Recipe: Simple & Delicious
There’s something so nostalgic about pulling a warm slice of cake out of the oven. Maybe it’s the way the scent of lemon and baked batter fill the room, or how my kids’ eyes light up when I cut through that slightly crusty top to reveal its tender, moist inside. I always do this when I want something a little sweet but not overly indulgent — and honestly, it’s a lifesaver on busy nights when I need a quick dessert that feels special without fussing over complicated ingredients. The best part? It’s got zucchini, which I used to think was only good for savory dishes, but this cake totally changed my mind. My friends ask for this all the time — it’s become a little family tradition that I secretly hope never goes out of style.
What is Zucchini Swirl Cake?
Think of this as a cozy, homemade cake that feels like a warm hug — moist, with a gentle sweetness and bursts of citrus from fresh lemon zest. It’s essentially a simple garden-inspired treat, where shredded zucchini keeps everything beautifully tender and adds a touch of moisture you don’t even need butter for. The swirl of extra batter with a touch of cinnamon or nuts gives it a visual appeal that’s almost too pretty to cut into. It’s named for that lovely marbling effect you get when you layer the batter, kind of like a cinnamon roll but way easier. Plus, it’s perfect for breakfast, brunch, or an afternoon pick-me-up — and it’s every bit as special as a fancy bakery loaf but way more forgiving for us home cooks.
Why you’ll love this recipe?
What I love most about this zucchini swirl cake is its natural balance of flavor and ease. The zucchini’s mild flavor lets that lemon glaze shine, offering a bright, tangy sweetness that’s just the right pick-me-up, no matter the time of day. The scent of citrus and warm spices will fill your kitchen faster than you can say “dessert,” and I promise, this comes together quickly — no complicated steps or fancy equipment needed. It’s budget-friendly, too, since you probably already have most ingredients stocked in your pantry and fridge: eggs, flour, sugar, zucchini, and a lemon or two. And because it’s so adaptable, you can easily swap in some nuts, blueberries, or even a dash of vanilla if you’re feeling adventurous. Trust me, once you try this, it’ll become part of your regular rotation, just like it is mine.
How do I make Zucchini Swirl Cake?
Quick Overview
This cake is all about simple mixing, layering, and baking. You start by shredding zucchini and squeezing out some moisture — a step that keeps the batter from becoming too dense. Then, you mix dry ingredients separately, fold in wet ingredients, and swirl a portion of batter with cinnamon or nuts for extra texture. Layer everything in your pan, swirl it gently, pop it into the oven, and wave goodbye until it’s golden and fragrant. Finish with a quick lemon glaze once cooled — easy but impressive! It’s a process I’ve tested dozens of times, and I promise, it’s foolproof once you get the hang of it.
Ingredients
For the Main Batter:
– 2 cups grated zucchini (about 2 medium zucchinis, washed and shredded)
– 1 1/2 cups all-purpose flour
– 1 teaspoon baking soda
– 1/2 teaspoon baking powder
– 1/2 teaspoon salt
– 1 teaspoon ground cinnamon (optional but adds a lovely warmth)
– 1 cup granulated sugar
– 1/2 cup neutral oil, like sunflower or canola
– 3 large eggs
– Zest of 1 lemon
– 2 tablespoons lemon juice
For the Filling (Swirl):
– 1/2 cup more batter (set aside for swirls)
– 1 teaspoon cinnamon or a handful of chopped nuts (optional but adds a nice crunch and warmth)
For the Glaze:
– 1 cup powdered sugar
– 2-3 tablespoons lemon juice
– A splash of milk or water (optional, for desired consistency)
Step-by-Step Instructions
Step 1: Preheat & Prep Pan
Set your oven to 350°F (175°C). Grease a 9-inch loaf pan or line it with parchment paper. If you want that lovely crust, I like to lightly butter the pan and dust it with a little flour or sugar. Trust me, it helps with clean slices later and adds just a hint of crunch.
Step 2: Mix Dry Ingredients
In a big bowl, whisk together the flour, baking soda, baking powder, salt, and cinnamon. Doing this first ensures everything’s evenly distributed — no weird pockets of baking powder or salt that can mess with your cake’s rise.
Step 3: Mix Wet Ingredients
In another bowl, whisk the eggs, sugar, oil, lemon zest, and lemon juice until smooth. I always do this first because it helps the sugar dissolve and the ingredients blend better. The scent of lemon combined with that sweet batter is already making my kitchen smell like springtime!
Step 4: Combine
Pour the wet ingredients into the dry, folding gently with a spatula until just combined. Be careful not to overmix — a few lumps are okay. Overmixing can make the cake dense, and we want it light and fluffy. If you notice a few dry patches, just fold a little more until everything’s incorporated.
Step 5: Prepare Filling
Take about 1/2 cup of the batter and mix it with cinnamon or chopped nuts if you like. This part adds that beautiful swirl and extra flavor. If you’re feeling extra indulgent, try swirling in a spoonful of nut butter or fruit preserves — totally optional, but fun to experiment with.
Step 6: Layer & Swirl
Pour half of the plain batter into the pan, then spread the cinnamon-infused batter over it in dollops. Using a skewer or butter knife, swirl gently to create a marbled effect. I’ve learned that slow, gentle swirling gives the prettiest marbling — no need to go crazy. It’s like painting with batter!
Step 7: Bake
Pop it into the oven and bake for about 40-45 minutes. Check it around 40 minutes; if the top is golden and a skewer inserted into the center comes out clean, you’re good. If it’s still gooey, give it a few more minutes. Every oven behaves a little differently, so don’t be discouraged if it takes a bit longer — I’ve had mine that needed an extra 5 minutes.
Step 8: Cool & Glaze
Let the cake cool in the pan for about 15 minutes, then transfer to a wire rack. Once cooled, drizzle with your lemon glaze — it melts into the warm cake, making each bite extra bright and citrusy. I usually mix the powdered sugar and lemon juice until smooth; if it’s too thick, add a splash of water or milk.
Step 9: Slice & Serve
Slice it up when fully cooled (preferably after a little patience, but honestly, I’ve snatched a piece sooner and it’s still delicious). Serve alone or with a dollop of whipped cream or a scoop of vanilla ice cream. It’s amazing warm, but honestly, leftovers taste just as good the next day — if there are any left, that is!
What to Serve It With
This zucchini swirl cake is versatile enough to shine in so many situations. For breakfast, I love a slice with my morning coffee — the lemon tang wakes me right up. At brunch, serve it alongside some fresh berries and a pot of herbal tea; the citrus makes it feel fancy but it’s really easy to whip up. As a dessert, I adore it after a hearty meal — the light sweetness and bright glaze make it a refreshing finale. And honestly, it’s my go-to snack when I need a pick-me-up — warm, crumbly, sweet, with a little zing from the lemon. My family thinks I’ve uncovered a secret treasure, and I just smile while secretly feeling proud I came up with such a simple winner. It’s perfect with a glass of milk or a cup of tea — just the way to wind down and enjoy that cozy, homemade taste.
Top Tips for Perfecting Your Zucchini Swirl Cake
Over the years, I’ve learned a few tricks that make this cake turn out perfect every time. First, zucchini moisture can be tricky — I always squeeze out excess water after shredding and pressing with a paper towel. Nothing ruins a light texture more than watery batter. I’ve tested this with different zucchinis, and fresh, young zucchinis work best; older ones can be a bit watery or bitter, so taste the ends first.
When mixing, I always fold gently to keep the batter airy — overmixing can turn it dense, and nobody wants a heavy, chewy cake. As for the swirl, patience is key — don’t rush the layering or the gently dragging of batter through the other; it’ll give you that beautiful marbling and a lovely texture contrast.
If you don’t have lemon, orange zest works wonderfully, or even a splash of vanilla extract for a different flavor profile. I’ve also experimented with adding chopped walnuts or blueberries — both are delightful additions that blend naturally into the batter.
For baking, oven placement matters. I usually position the rack in the center and rotate the pan halfway through baking if your oven tends to cook unevenly. The toothpick test is my best friend — always poke the center, not just the edges. And if the top starts to brown too fast, you can tent it with foil for the last 10 minutes.
The glaze is optional but really elevates the cake — I’ve tried just dusting with powdered sugar, but the lemon glaze is unbeatable. For a richer flavor, add a splash of vanilla or a pinch of ginger. And don’t forget, after glazing, it’s best to let the cake sit for at least 30 minutes so the glaze sets and you get that perfect melt-in-your-mouth balance.
Storing and Reheating Tips
This cake keeps well for a couple of days if stored properly. I usually cover it with a clean towel or keep it in an airtight container on the counter for up to two days — honestly, it’s so moist, it’s still delicious then. If you want it to stay fresh longer, refrigeration is fine, but the texture might change slightly — just bring it to room temperature before serving for maximum softness.
Freeze leftovers wrapped tightly in plastic wrap and then foil; it’ll stay good for up to three months. I usually let it thaw overnight in the fridge and then warm it gently in the oven or microwave before serving. If you added the glaze, wait until it’s fully defrosted to add the finishing touch again. Sometimes, I like to reheat slices briefly and then drizzle extra lemon glaze — it tastes just as fresh as when it first came out of the oven.
Frequently Asked Questions
Final Thoughts
This zucchini swirl cake with lemon glaze has truly become a staple in my house — it’s light, bright, and somehow comforting all at once. I love that it’s straightforward enough for a busy weekday but feels special enough for weekend brunch or a cozy evening treat. The addition of zucchini keeps it moist and wholesome, making it a sneaky vegetable lovers’ secret. Every time I bake it, I remember when I first discovered how much that humble zucchini could do — transforming from something I used in savory dishes to the star of a tender, flavorful cake. Trust me on this one: it’s addictive. My family asks for seconds, thirds, and sometimes even gets mad when I don’t cut enough slices! If you give it a try, I’d love to hear your tweaks and your favorite way to serve it. Happy baking – and don’t forget that lemon glaze!
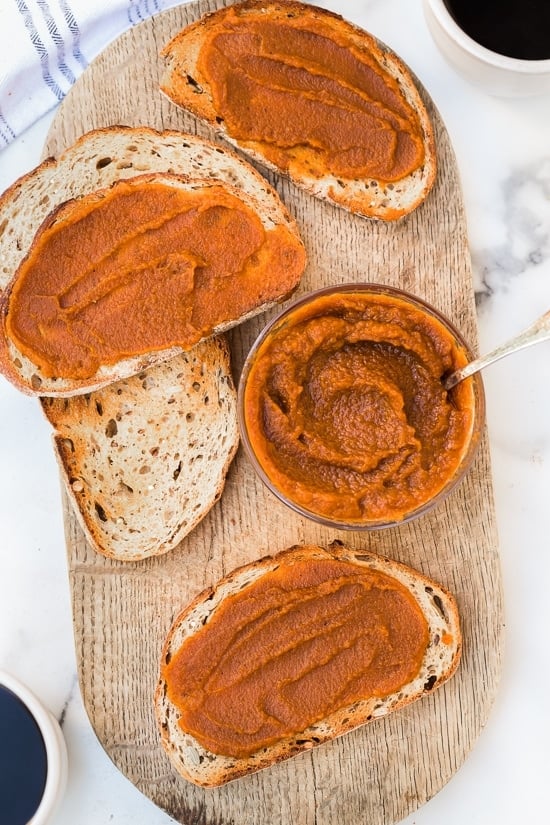
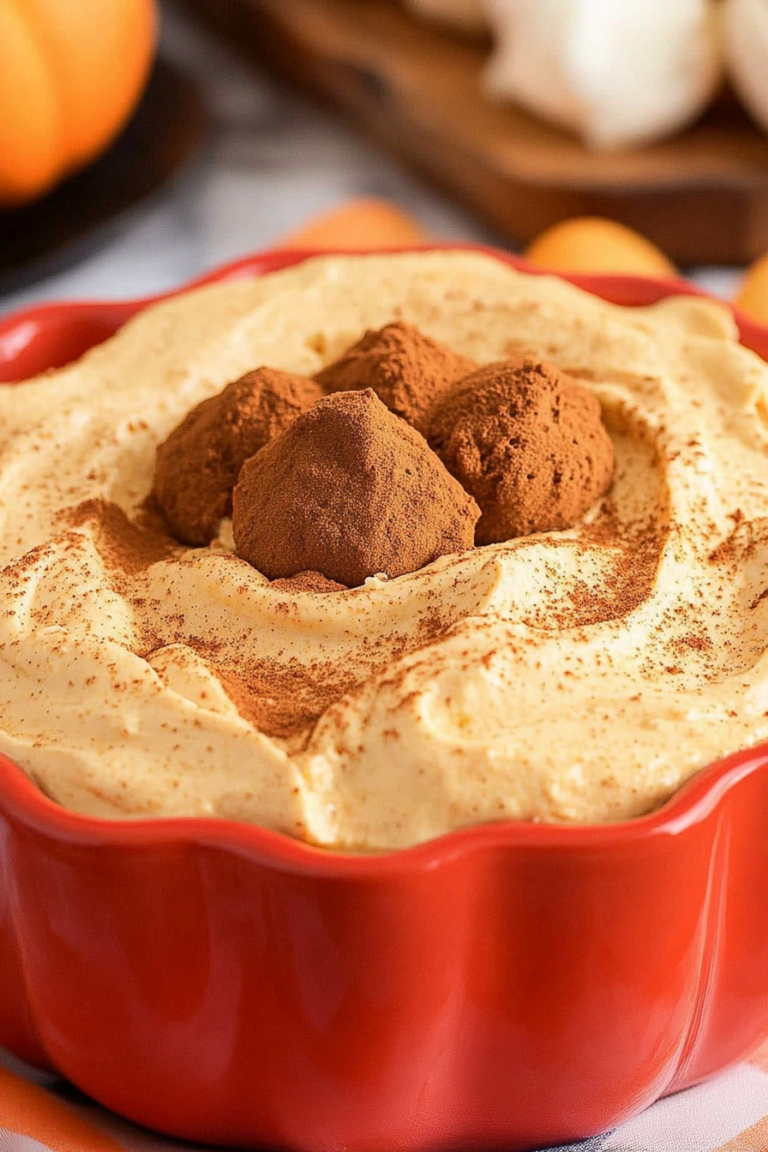
pumpkin butter
Ingredients
Method
- Combine pureed pumpkin, vanilla, apple cider, spices, cinnamon sticks, and sugar in a large saucepan; stir well.
- Bring mixture to a boil. Reduce heat, and simmer for 30 to 40 minutes or until thickened. Stir frequently.
- Adjust spices to your taste and store in sterilized jars.