Crispy Bacon Brussels Sprouts Recipe
There’s nothing quite like the smell of fresh zucchini baking in the oven. My Kitchen fills with a warm, comforting aroma that instantly takes me back to lazy Sunday mornings at my grandma’s house. I remember helping her grate zucchini with a little smile on my face, listening to stories from her childhood. Fast forward years later, I still turn to this zucchini walnut loaf as my go-to treat — whether it’s a quick breakfast, a cozy afternoon snack, or a last-minute gift for friends. It’s incredible how something so simple can taste so wonderful. Honestly, I always do this when I want a little bit of sweetness with a lot of character—think of it as a grown-up, nutty cousin to those classic zucchini bread recipes everyone’s obsessed with. Plus, it’s surprisingly easy to make, even on those busy nights when I need something homemade in a flash. Trust me, once you try this, it’ll become a part of your regular baking repertoire. My kids ask for this all the time, and I swear, it disappears in minutes at my house!
What is Zucchini Walnut Loaf?
This zucchini walnut loaf is essentially a tender, moist bread that’s packed with shredded zucchini, crunchy walnuts, and a touch of sweetness. Think of it as a hybrid between bread and a muffin — a little bit indulgent but totally wholesome. The name “loaf” kind of says it all; it’s baked in a simple loaf pan, perfect for slicing and sharing. It’s inspired by those rustic, no-fuss loaves that you find at bakery counters but made for everyday convenience. The zucchini keeps this bread super moist, almost like a quickbread, but it’s the combination of nuts and a hint of cinnamon that makes it stand out. It’s a little bit healthful, a little bit decadent, and totally versatile. Plus, it’s the kind of recipe that gets better every time because I’ve tweaked it over the years to get just the right texture and flavor. Think of it as your new kitchen staple—delicious, easy, and comforting all in one.
Why you’ll love this recipe?
What I love most about this zucchini walnut loaf is how effortlessly it combines flavor and texture. The moistness from the zucchini paired with the crunch of walnuts is just unbeatable. It’s like a little slice of Autumn right out of the oven, but honestly, I make it all year round because I can’t resist. Plus, it’s incredibly simple — you barely need fancy ingredients, and it’s very forgiving if you’re short on time or ingredients. I’ve tested this with different types of flour, even almond flour when I was feeling a bit healthier, and it turned out just as good — maybe even better, in some cases! And here’s a bonus: it’s budget-friendly. The ingredients are staples I always keep in my pantry and fridge. This recipe is versatile, too—I’ve added chocolate chips, swapped walnuts for pecans, or even topped it with a simple icing for a dessert twist. The best part? It’s a crowd-pleaser, whether I serve it at breakfast with coffee, pack it in my kids’ lunchboxes, or bring it to family gatherings. Honestly, what’s not to love?
This loaf has a rustic charm that makes it feel special but totally doable for a weekday. The flavor is subtle but rich — warm cinnamon, nutty walnuts, and that irresistible zucchini moisture. It’s what I turn to when I want something cozy but don’t want to fuss in the kitchen. And trust me, the first time you bake it, your house will smell like a bakery. That’s my favorite part—the way everyone suddenly appears in the kitchen, drawn by that sweet, nutty scent. It’s a recipe that brings comfort, happiness, and a little bit of nostalgia all at once.
How do you make Zucchini Walnut Loaf?
Quick Overview
This zucchini walnut loaf comes together faster than you’d think — a quick mixing of ingredients, layered with a bit of love, then baked until golden. The secret is shredding the zucchini very finely and squeezing out excess moisture, so the bread stays tender and not soggy. The batter is super forgiving, so even if you’re not a pro baker, you’ll nail it. Baking time is around 45 minutes, give or take — but you’ll want to keep an eye on it. It’s great because you can add a handful of chocolate chips or dried fruit if you’re feeling fancy, but honestly, the classic version is just enough. Once baked, I let it cool a bit, then drizzle with a quick glaze or just dust with powdered sugar. This loaf keeps well for a few days and actually gets better as it sits — the flavors meld, and the texture softens just enough.
Ingredients
For the Main Batter:
– 2 cups grated zucchini (about 2 medium zucchinis, make sure to squeeze out as much moisture as you can)
– 1 1/2 cups all-purpose flour (I’ve also tested whole wheat and it works beautifully)
– 1 teaspoon baking powder
– 1/2 teaspoon baking soda
– 1 teaspoon ground cinnamon
– 1/2 teaspoon salt
– 1/2 cup packed brown sugar (or coconut sugar for a healthier twist)
– 1/4 cup coconut oil or melted butter
– 2 large eggs
– 1 teaspoon vanilla extract
– Optional: 1/2 cup chopped walnuts or pecans
For the Filling:
– 1/2 cup chopped walnuts (extra crunch and flavor)
– A handful of chocolate chips or dried cranberries (optional but highly recommended)
For the Glaze:
– 1/2 cup powdered sugar
– 1-2 teaspoons milk or lemon juice
– A splash of vanilla or almond extract (for extra flavor)
Step-by-Step Instructions
Step 1: Preheat & Prep Pan
Set your oven to 350°F (180°C). Grease a loaf pan with butter or line it with parchment paper — trust me, this keeps the loaf from sticking and makes clean-up a breeze. If you want a super pretty loaf, sprinkle a little flour or almond meal over the buttered pan before pouring in the batter. I always do this when I want it to look extra professional, but parchment works perfectly too.
Step 2: Mix Dry Ingredients
In a bowl, whisk together flour, baking powder, baking soda, cinnamon, and salt. This step ensures even distribution of leavening agents and spices — nobody wants clumps of baking soda in their slice! I like to do this first so all the dry stuff is ready to go when I’m mixing the wet ingredients.
Step 3: Mix Wet Ingredients
In a large bowl, whisk eggs, brown sugar, vanilla, and melted coconut oil (or butter). I always do this until it’s nice and smooth — the smell of vanilla and sweet sugar is just divine. Then, grate the zucchini, squeeze out the excess water with a clean dish towel or paper towels, and fold it into the wet mixture. That moisture is key to keeping everything moist and tender.
Step 4: Combine
Pour the dry ingredients into the wet and gently fold until just combined. Be careful not to overmix — I’ve learned the hard way that overmixing can make the loaf dense and tough. A few streaks of flour are fine; what matters is not overworking the batter.
Step 5: Prepare Filling
Stir in the chopped walnuts and optional chocolate chips. I love sprinkling a few extra walnuts on top before baking for a pretty crunch. If you want to add flavors like coconut or orange zest, now’s the time!
Step 6: Layer & Swirl
Pour half of the batter into your prepared pan, then sprinkle some of the filling mixture, followed by the rest of the batter. Use a skewer or toothpick to swirl the layers gently. That marbled effect makes it look as tempting as it tastes. If you’re lazy or pressed for time, just layer everything straightforward — it’s still delicious.
Step 7: Bake
Pop it into your preheated oven and bake for about 45 minutes. Keep an eye on it — if the top gets too dark, cover loosely with foil. The loaf is done when a toothpick inserted into the center comes out clean or with just a few moist crumbs. Every oven is different, so start checking at 40 minutes to be safe.
Step 8: Cool & Glaze
Let the loaf cool in the pan for about 10 minutes, then transfer to a wire rack. I like to drizzle the glaze over slightly warm bread so it soaks in just a bit, but I also enjoy it with the glaze firmed up. Mix powdered sugar with milk and a splash of vanilla, then pour or spread over the top. It’s the finishing touch that makes it feel special.
Step 9: Slice & Serve
Once completely cooled, slice with a serrated knife for clean cuts. Serve with breakfast, coffee, or just as a snack. I love presenting these slices on my pretty cake stand with a sprig of mint or a dusting of extra sugar. It looks fancy but is so simple to make!
What to Serve It With
This zucchini walnut loaf really shines in several setups. For a lazy weekend brunch, serve it with a batch of fresh berries and a pot of coffee or tea. It’s fantastic toasted with a smear of butter or cream cheese—my kids actually ask for seconds when I do this on school mornings. When I’m feeling extra special, I pair it with a dollop of Greek yogurt mixed with honey and lemon zest — bright, creamy, and perfectly balanced. This loaf also makes sweet little gift boxes for friends or neighbors — I wrap slices in wax paper and tie them with string for a cozy touch.
At dinner parties, I often serve it as a casual dessert with a drizzle of caramel or a scoop of vanilla ice cream. The subtle sweetness and nutty crunch make it a crowd-pleaser no matter the occasion. Honestly, I’ve lost count of how many times I’ve made this for everything from quick breakfasts to fancy brunches. It’s one of those recipes that just feels good to feed your family or guests — honestly, it’s comfort food disguised as a fancy loaf.
Top Tips for Perfecting Your Zucchini Walnut Loaf
Every time I make this, I find little tricks that help it turn out just right. Here are my top tips:
- Zucchini Prep: Squeezing out moisture is my secret to avoiding soggy bread. After shredding, I press the zucchini against a fine-mesh sieve or wrap it in a clean dish towel before squeezing out excess water. Thanks to this step, the loaf stays beautifully tender without getting mushy.
- Mixing Advice: Do it gently! Overmixing leads to dense bread; I typically fold until the batter just comes together. When I get lazy, sometimes my mix is a little streaky, but it still tastes amazing!
- Swirl Customization: For prettier marbling, I alternate spoonfuls of batter and filling and use a skewer to swirl in circles or figure-eights. Take your time and don’t overdo it—less is more for layered beauty.
- Ingredient Swaps: I’ve substituted honey or maple syrup for the sugar, and coconut oil for butter. Each variation gives the loaf a slightly different vibe. Also, try adding a handful of shredded coconut or dried fruits for extra flavor.
- Baking Tips: Position your oven rack in the middle, and start checking at 40 minutes. If you see the top browning too fast, tent it with foil. Use a toothpick test for doneness — no wet batter, but don’t overbake or it’ll dry out.
- Glaze Variations: For an extra kick, stir in lemon juice or a splash of amaretto into your glaze. Or skip the glaze entirely and dust with powdered sugar for a more casual vibe. I like adding a little vanilla bean paste here for depth.
Over the years, I’ve learned that patience is key. Letting the loaf cool fully before slicing prevents it from crumbling — and makes the experience much more enjoyable. Trust me, a little extra love and attention pays off in every moist, flavorful, and beautifully swirled slice.
Storing and Reheating Tips
This loaf keeps nicely for several days, which is perfect for busy mornings or brown-bag lunches. I store slices in an airtight container at room temperature for up to 2 days, and they’re still moist and delicious. After that, I keep it in the fridge for 4-5 days; just be sure to wrap it well or keep it in a food-safe zip-top bag to prevent it from drying out.
If I want to enjoy a warm slice later, I just pop it in the microwave for about 15-20 seconds or wrap a slice in foil and reheat in the oven at 350°F for 5-7 minutes. Adding a quick drizzle of glaze after reheating makes it taste fresh for hours. Freezing works beautifully, too: wrap slices tightly, pop in a zip-top freezer bag, and they stay good for up to 3 months. Thaw at room temp or in the fridge, then warm slightly before serving for the best experience.
When to add the glaze? I usually wait until the loaf is completely cooled. That way, the glaze doesn’t melt away—it just adds a sweet, glossy finish that makes the slices look extra tempting. If you’re in a rush, skip the glaze; the loaf tastes just as good plain — but I swear, that little extra shine makes all the difference.
Frequently Asked Questions
Final Thoughts
This zucchini walnut loaf is more than just a recipe — it’s a little piece of my kitchen where I’ve spent countless cozy mornings, shared laughs with my family, and gathered over coffee with friends. It’s surprisingly forgiving, endlessly customizable, and absolutely delicious. Whether you’re a seasoned baker or a beginner looking for a rewarding project, I promise this will become a staple in your home, just like it is in mine. Plus, it’s the kind of food that makes you feel good—moist, nutty, just the right amount of sweetness, and infused with love. I hope you give it a try and enjoy every crumb. Happy baking! Don’t forget to leave a comment below with your favorite variations or tips — I love hearing from fellow bakers. And remember, the best part of cooking is sharing your creations with loved ones. Enjoy!
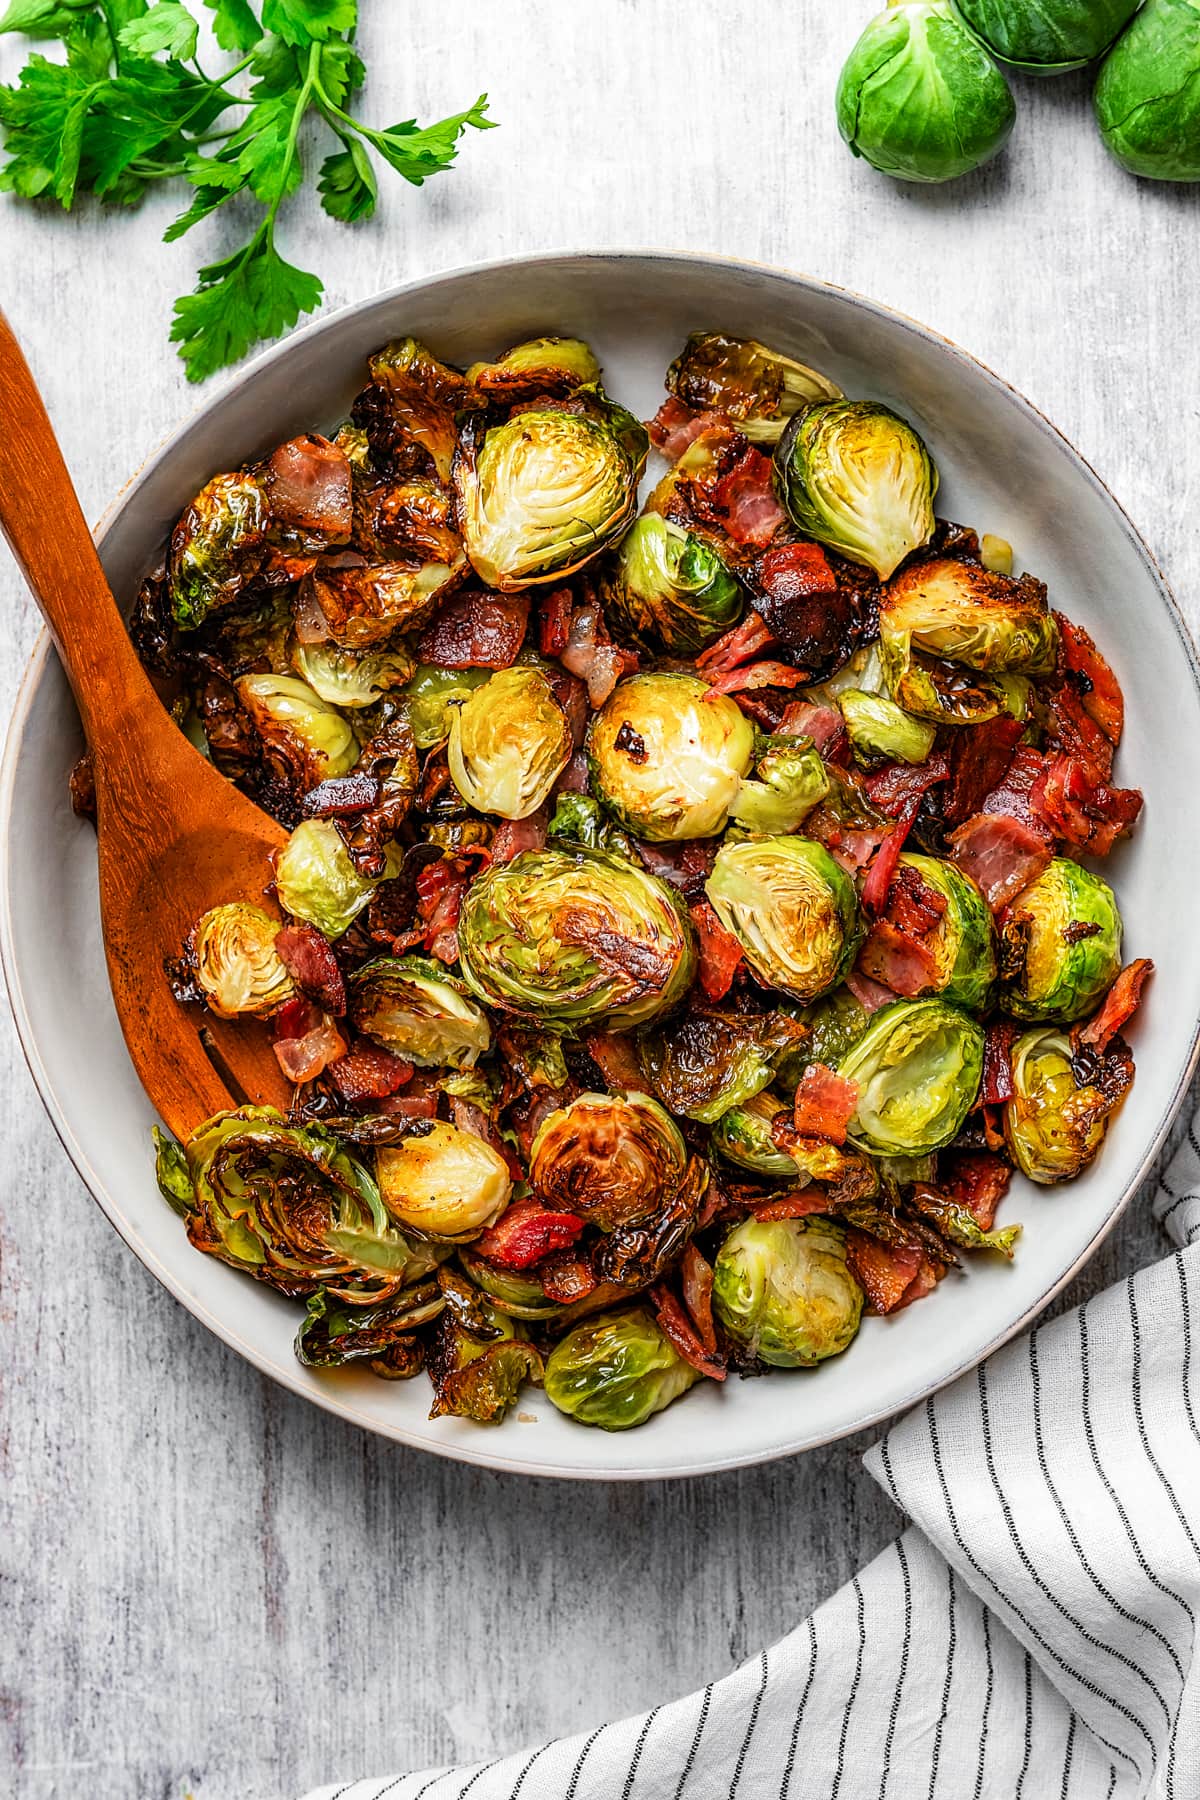
Brussels sprouts
Ingredients
Method
- Preheat the oven to 400°F and line a baking sheet with foil.
- In a large bowl, toss Brussels sprouts, bacon, olive oil, salt, and black pepper until evenly coated.
- Spread the mixture evenly on the prepared baking sheet.
- Bake for 30 minutes, stirring occasionally, until the Brussels sprouts are tender and crispy.
- Remove from oven, taste and adjust salt and pepper if needed. Serve hot.