Easy Baguette Pizza Recipe
Oh, I’ve got to tell you about these zucchini brownies I’ve been obsessed with lately—they’re basically my secret weapon when I want something sweet but also crave a little bit of sneaky greenery. They remind me of those decadent, fudge-y brownies you’d pick up at a bakery, but the best part? They’re secretly healthy enough that I don’t feel guilty giving a slice to my kids (who, I swear, can smell the sugar from across the house!). I first made these out of curiosity—because let’s be honest, who ever thought zucchini and brownies belonged in the same sentence?—but I ended up falling in love with how moist, rich, and kind of sneaky delicious they are. Plus, they come together faster than you can say “double chocolate,” which makes them a lifesaver on busy nights when sweet tooth cravings hit hard. Trust me, once you give these a try, they’ll be your new go-to for everything from after-school treats to weekend indulgences. And yes, my kids ask for seconds every single time!
What is Zucchini Brownies?
Think of zucchini brownies as the lovechild of fudgy chocolate cake and a veggie-packed surprise. It’s essentially a brownie batter infused with shredded zucchini, which keeps the texture incredibly tender and moist. The name might sound a little unusual, but once you taste them, you’ll see why I love them so much — they’re a perfect way to sneak some extra greens into dessert. Originally, this recipe is inspired by the idea of making use of those summertime zucchinis that seem to multiply faster than rabbits, but now I make it all year round. The zucchini melts into the batter, adding moisture and a tiny boost of nutrition without ever overwhelming the chocolate flavor. It’s the kind of treat that makes you feel good about indulging just a little. Think of it as a cozy hug for your taste buds—rich, fudgy, and secretly good for you.
Why you’ll love this recipe?
What I love most about these zucchini brownies is how uncomplicated they are to make—no fancy ingredients or complicated steps, just simple pantry staples. They’re incredibly budget-friendly, especially if you already have zucchini sitting on your countertop or in the fridge. Plus, the flavor? Out of this world. The chocolate is intensely rich, and the zucchini doesn’t just add moisture—it also keeps the brownies perfectly fudgy without being greasy or dry. I’ve tested this recipe with different types of chocolate chips, and honestly, I find that the darker the chocolate, the more indulgent they taste. My kids go nuts for these—they actually ask for seconds (which is a miracle in my house). And because they’re flexible, you can add nuts, berries, or even a sprinkle of sea salt on top for an extra flavor punch. This recipe is one of those that can adapt to whatever mood or dietary need—gluten-free, extra gooey, or even vegan if you swap a few ingredients. It’s honestly become my go-to for a quick, feel-good dessert that never fails to impress.
How do I make Zucchini Brownies?
Quick Overview
This recipe is as straightforward as it gets. Whisk together your dry ingredients, blend your wet ones, fold everything together, add your grated zucchini, and then swirl in some chocolate for good measure. Bake it all in a preheated oven, let it cool slightly, top with a drizzle of glaze (or don’t!), and voila—you’re holding the most irresistible brownies that secretly hide some greens. It’s the kind of baking that feels practically effortless but delivers the wow-factor. The secret to super fudgy brownies? Don’t overbake them. You want a toothpick inserted in the center to come out with moist crumbs—not dry. Once out of the oven, let them cool just enough to handle, and then you’re good to slice and serve. These brownies are perfect when you need something quick, satisfying, and just a tiny bit sneaky.
Ingredients
For the Main Batter:
– 1 cup all-purpose flour (or almond flour for a nutty twist)
– 1/2 cup cocoa powder (preferably unsweetened, for maximum richness)
– 1 teaspoon baking powder
– 1/2 teaspoon salt
– 1 cup granulated sugar (or coconut sugar for a healthier touch)
– 1/2 cup vegetable oil or melted coconut oil
– 2 large eggs (or flax eggs for vegan version)
– 1 teaspoon vanilla extract
For the Filling:
– 1 1/2 cups freshly grated zucchini (squeeze out excess moisture, trust me on this one)
– Optional: mini chocolate chips or chopped nuts for extra texture and flavor
For the Glaze:
– 1/2 cup powdered sugar
– 1-2 teaspoons milk or plant-based milk
– A tiny pinch of salt or vanilla (if you like)
Step-by-Step Instructions
Step 1: Preheat & Prep Pan
Crank your oven up to 350°F (175°C). Line a square baking pan (8×8 or 9×9) with parchment paper or spray it lightly with non-stick spray. This helps lots when you’re eager to get the brownies out without a mess. Also, grate your zucchini right now—aim for about 1 1/2 cups, squeeze out all the excess moisture, and set aside. Moist zucchini is the sneaky hero here, but too much water can make the brownies soggy, so don’t skip that step.
Step 2: Mix Dry Ingredients
In a large bowl, whisk together the flour, cocoa powder, baking powder, salt, and sugar. This helps distribute everything evenly—trust me, you don’t want clumps of cocoa or uneven salt bites. Keep it light and airy, like you’re giving the dry ingredients a little spa day.
Step 3: Mix Wet Ingredients
In a separate bowl, beat your eggs, then stir in the oil and vanilla. Make sure everything’s well combined—sometimes I do this quickly with a fork instead of a whisk; it works just fine. The mixture should look glossy and smooth, kind of like chocolate pudding. If you’re using flax eggs, just mix your ground flaxseed with water and let it rest for a few minutes until thickened.
Step 4: Combine
Pour your wet mixture into the dry ingredients. Gently fold everything together — don’t overmix, or you risk tough brownies. Just stir until it’s mostly combined, then add your grated zucchini and stir gently. It might seem thick, but that’s exactly what you want. You can fold in some mini chocolate chips here, if you like—because, honestly, more chocolate is never wrong.
Step 5: Prepare Filling
If you’re adding extras like chopped nuts or more chocolate chips, sprinkle them into the batter now and give it a gentle swirl. You want the filling to be evenly distributed without losing that beautiful marbled effect later on.
Step 6: Layer & Swirl
If you want that gorgeous swirl effect, pour half the batter into your pan. Spoon in some additional dollops of the remaining batter and use a skewer or knife to swirl in circles. It looks fancy, but it’s super easy—trust me. You want a marbled pattern that hints at the delicious chaos inside.
Step 7: Bake
Pop the pan into your preheated oven and bake for about 25-30 minutes. You’ll know they’re done when a toothpick inserted in the center comes out with moist crumbs—no dry batter, no wet goo. Every oven is a little different, so start checking around the 25-minute mark. I always set my timer and keep a close eye, especially since I hate overbaked brownies that turn crumbly.
Step 8: Cool & Glaze
Once baked, let the brownies cool in the pan for about 15 minutes. If you’re adding a glaze, whisk together powdered sugar and milk until smooth—thick but pourable. Drizzle it over the slightly warm brownies, and let it set for another 10 minutes. The smell alone during this step makes the house smell like a chocolate dream come true.
Step 9: Slice & Serve
Use a sharp knife to cut neat squares—clean cuts make everything look more tempting. Serve them warm with a scoop of vanilla ice cream or just alone with a cup of coffee on lazy weekend mornings. These brownies are best enjoyed within a day or two, but I usually find they disappear in minutes in my house.
What to Serve It With
This brownie recipe is versatile enough to shine during different occasions. For breakfast, pair a warm slice with a mug of coffee or a glass of cold milk—trust me, the rich chocolate and tender zucchini melt perfectly together and turn a humble breakfast into something special. For brunch, add some fresh berries on top or a dollop of Greek yogurt for a balanced, indulgent start to your day. As dessert, these brownies are divine on their own, but you can also serve them with whipped cream or a scoop of vanilla ice cream, especially when they’re still slightly warm and gooey. If you’re craving a cozy snack, they’re perfect with a hot cup of tea or a glass of cold almond milk. My family loves to serve these at picnics or parties—they’re a sure crowd-pleaser, and everyone always asks for the recipe. The best part? They’re just fancy enough to impress guests but simple enough to whip up on a weekday evening. I love making a big batch, then slicing them up for school lunches or popping a few into the freezer for when those unexpected sweet cravings strike.
Top Tips for Perfecting Your Zucchini Brownies
Over the years, I’ve learned a few tricks that make these brownies turn out perfect every time. First, don’t skimp on squeezing out that excess moisture from the zucchini—it’s the secret to keeping them moist but not soggy. I’ve tested this with different zucchinis, and honestly, fresh is best; frozen zucchini can be a little watery. When mixing the batter, avoid overmixing—this is true for nearly all baked goods—because it can develop gluten and make the brownies tough. Instead, fold gently until just combined. For the swirl pattern, I like to use a toothpick or skewer to create lines and circles—looks pretty and makes each slice extra special. As for ingredient swaps, I’ve tried swapping coconut oil and even applesauce, which results in a lighter, slightly different texture but still delicious. You can swap out the sugar for honey or maple syrup if you prefer a more natural sweetness. Baking-wise, always check your brownies a few minutes early if your oven runs hot—it’s better to underbake slightly than to overbake and lose that fudgy texture. For the glaze, I sometimes add a splash of bourbon or espresso powder to deepen the flavor—trust me, those little extras bring out the richness even more. It took me a couple of tries to get the perfect consistency and swirl pattern, but now I guarantee my brownies look just as inviting as they taste.
Storing and Reheating Tips
These brownies store surprisingly well, which makes them even more appealing. The best way to keep them fresh is to store them in an airtight container at room temperature for up to two days—cover with foil or a lid to prevent drying out. If you’re planning to hold onto them a bit longer, pop them into the fridge for up to a week. Just make sure to keep them in a sealed container to prevent them from absorbing fridge odors. For even longer storage, these brownies freeze like a dream. Wrap individual slices tightly in plastic wrap, then place in a freezer-safe bag or container. They should stay good for up to three months. When you’re ready to indulge, simply let them thaw at room temperature for about 20-30 minutes or warm them gently in the microwave for about 15 seconds per slice. If you’ve added the glaze, I recommend waiting until they’re just about to serve—re-glaze if needed for an extra glossy, decadent finish. You can also reheat in a low oven (around 300°F) if you want that fresh-baked warmth, but honestly, I love them at room temp, with the chocolate slightly melted and gooey.
Frequently Asked Questions
Final Thoughts
Honestly, these zucchini brownies have become my little secret recipe for combining indulgence with a tiny guilt trip — and I say tiny because they’re secretly packed with veggies! Every time I bake them, the house fills with the warm, chocolatey aroma that’s just impossible to resist. The fact that I can make these in under 40 minutes and have everyone asking for seconds? That’s what keeps me coming back to the oven. Plus, the versatility of swapping ingredients or adding extras makes it feel like my own personalized treat every time. If you try these, I’d love to hear how they turn out—your tweaks, your tricks, whatever makes them feel like yours. Happy baking, friends—go ahead and indulge a little—you deserve it!
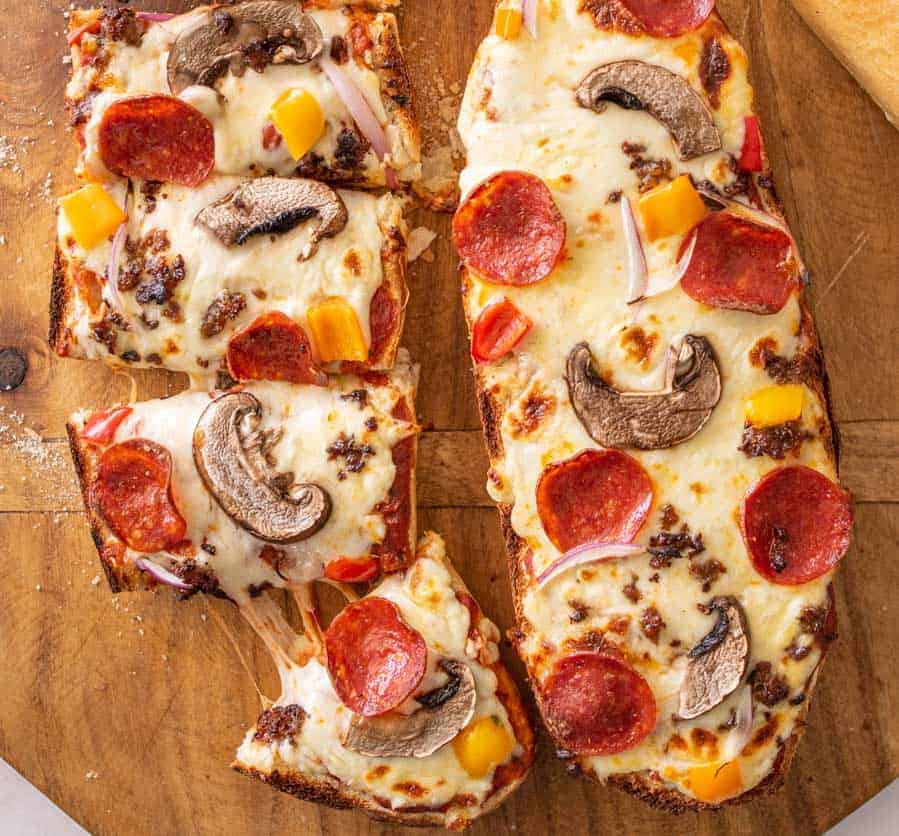
French bread pizza
Ingredients
Method
- Preheat your oven to 425 degrees F.
- Slice the French bread in half lengthwise to create two long pieces.
- Place the bread halves on a parchment-lined baking sheet, cut sides up.
- Bake in the oven for 5 minutes to lightly toast the bread, preventing sogginess.
- Remove from oven and spread 1/2 cup of pizza sauce over each slice. Top with 1 cup shredded cheese and additional toppings as desired.
- Bake for an additional 8-12 minutes or until the cheese is melted and bubbly.
- Remove from oven, let rest for 3 minutes, then slice into 2-inch pieces and serve hot.