Easy Rolled Oats Chocolate Chip Cookies
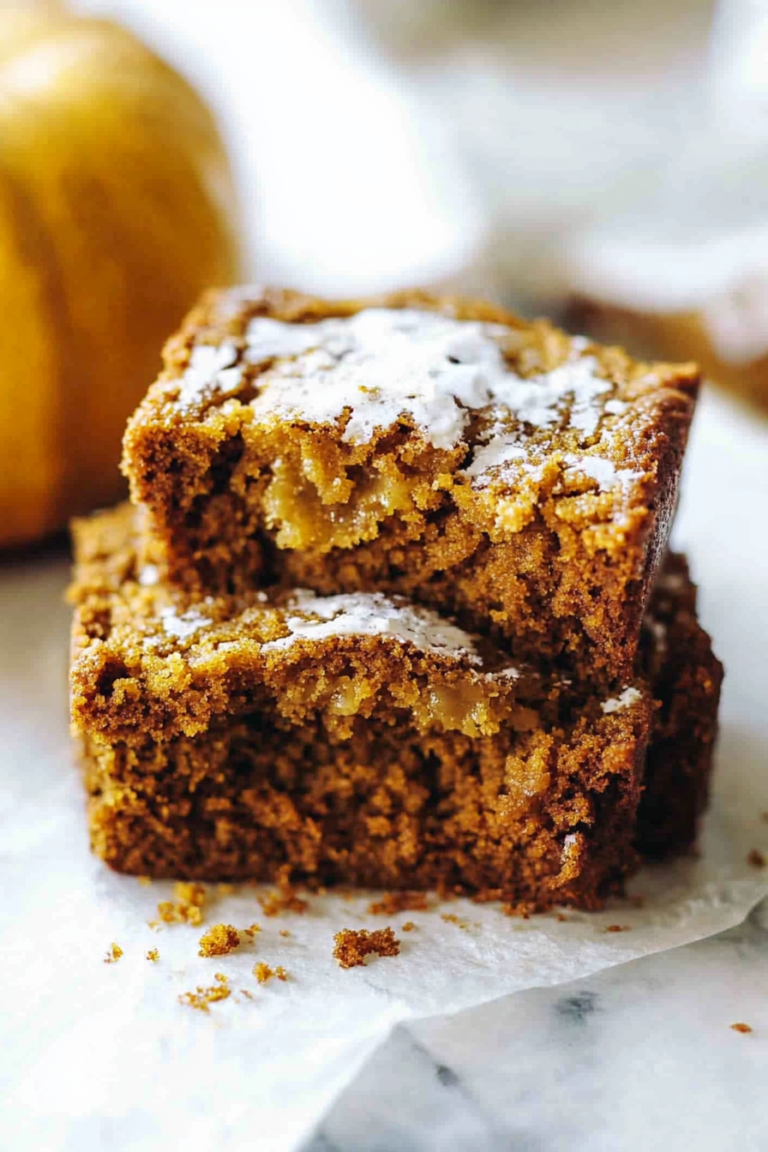
Oh, I remember the first time I baked this zucchini banana bread—my kitchen was filled with the irresistible aroma of warm bananas and just a hint of zucchini. It’s one of those recipes that feels like a warm hug, especially when you need a quick pick-me-up or a little bit of sweetness after a hectic day. My kids ask for this all the time, and I swear, it disappears in minutes at my house! Honestly, I love how it’s such a sneaky way to get some veggies into the kids without any fuss. And the best part? It’s so easy to whip up, I do it whenever I want something comforting but don’t want to spend forever in the kitchen. If you’ve ever wanted a moist, flavorful bread that balances sweet, fruity, and veggie goodness, trust me—you’re gonna want to keep reading. This is my go-to recipe when I want something cozy, sweet, and honestly, a little healthier than regular cake. Plus, that sweet glaze? It’s the perfect finishing touch that makes it feel extra special. I promise, once you try this, it’ll be on your weekly baking list too!
What is Zucchini Banana Bread?
Think of zucchini banana bread as a delightful hybrid—it’s essentially a cozy loaf that combines the tender earthiness of zucchini with the sweet, caramelized flavor of ripe bananas. The name might sound a little funny—like, why zucchini? But don’t worry, the zucchini practically melts into the batter, keeping the bread super moist while adding a subtle, healthy twist. It’s kinda like those classic zucchini muffins your grandma used to make, but with an extra layer of sweetness and that comforting banana aroma. Sometimes I call it “secret veggie bread” because, honestly, it’s a sneaky way to get the kids to eat something green without a fuss. Think of it as a story of sweet meets savory, but in the best way possible! The name’s kind of simple, but what you get is a loaf that’s soft, moist, and totally addictive. Whether it’s breakfast, a snack, or a dessert, this bread fits the bill—plus, it’s flexible enough to dress up or down depending on your mood.
Why you’ll love this recipe?
What I love most about this zucchini banana bread is how unbelievably forgiving it is. I’ve made it a thousand times, tweaking ingredients here and there, and it never fails to turn out delicious. The flavor? Oh, it’s just heavenly—ripe bananas bring a natural sweetness, balanced by the subtle earthiness of zucchini. The smell alone brings everyone to the kitchen—my kids come running at the first whiff, asking, “Is it ready yet?” And trust me, it’s so simple you’ll want to whip it up on busy weeknights or lazy weekends. It’s budget-friendly, too—just pantry staples, and the fresh produce is minimal. My favorite part? The glaze. It’s like that cherry on top of a sundae—making each slice look fancy while adding a little extra sweetness. This bread is versatile enough for breakfast with your coffee, brunch with friends, or a cozy snack on a rainy day. Plus, it’s a great way to use up those overripe bananas cluttering your counter—I swear, they make the batter so much better! I’ve also tested this with almond milk, and it actually made it even creamier, which was a lovely surprise. Honestly, this recipe is pure comfort food that’s surprisingly good for you too—what’s not to love?
How do you make Zucchini Banana Bread?
Quick Overview
This zucchini banana bread is a fuss-free bake that comes together in just about an hour. Basically, you grate the zucchini, mash the bananas, mix everything together, layer in a loaf pan, and bake. It’s the perfect mix of moist, tender, and just sweet enough. The process is straightforward—no fancy equipment needed—and you can even prep it ahead of time. After the initial ingredients are mixed, the batter goes into a greased loaf pan, and then you wait just long enough to get those wonderful oven smells—oh, the smell! Once it’s baked to golden perfection and cooled a bit, you slather on the sweet glaze, slice, and dig in. It’s honestly that simple. What makes it special is how forgiving the batter is—you can overmix a tiny bit, and it still turns out fabulous. Trust me, once you get the hang of it, it’ll be your new favorite way to zap some healthy ingredients into a cozy, sweet treat.
Ingredients
For the Main Batter:
- 3 ripe bananas, mashed — the sweeter, the better
- 1 cup grated zucchini (about one medium zucchini) — squeeze out excess moisture, trust me!
- 2 large eggs — for richness and binding
- 1/3 cup honey or maple syrup — natural sweetness, adjust to your taste
- 1/4 cup melted butter or neutral oil — I love using butter for flavor, but oil works too
- 1 teaspoon vanilla extract — because extra flavor never hurts
- 2 cups all-purpose flour — or try a gluten-free blend if you prefer
- 1 teaspoon baking soda
- 1 teaspoon baking powder
- 1/2 teaspoon cinnamon — optional but adds warmth
- Pinch of salt
For the Filling (Optional):
- ½ cup chopped walnuts or pecans — for crunch
- ½ cup mini chocolate chips — because who can resist?
For the Glaze:
- 1 cup powdered sugar
- 2-3 tablespoons milk or cream — adjust for consistency
- ½ teaspoon vanilla extract
- Optional: a sprinkle of cinnamon or lemon zest for extra flair
Step-by-Step Instructions
Step 1: Preheat & Prep Pan
Warm your oven to 350°F (175°C). Grease a standard loaf pan well with butter or non-stick spray and lightly dust with flour—trust me, this helps it come out beautifully. I always do this first so I’m ready to go when the batter is mixed. It takes just a few minutes, but it saves so much hassle in the end. I also like to set out all my ingredients because everything comes together faster when you’re not running around searching.
Step 2: Mix Dry Ingredients
In a medium bowl, whisk together the flour, baking soda, baking powder, cinnamon, and salt. This guarantees even distribution of your leavening agents and spices, so your bread rises nicely and tastes balanced. I’ve learned the hard way that skipping this step can lead to uneven texture—trust me, it’s worth the extra stir!
Step 3: Mix Wet Ingredients
In a large mixing bowl, mash the bananas thoroughly until smooth. Add in the eggs, honey, melted butter, and vanilla. Whisk everything until combined and a little frothy—this is your flavor base. If your bananas aren’t super ripe, just give them a little extra mashing; it’s worth it for that rich banana taste.
Step 4: Combine
Gradually add the dry ingredients into the wet, folding gently with a spatula. I always do this in parts—that way, I avoid overmixing, which can make the bread dense. The batter should be just combined, lumpy is okay! Next, fold in the grated zucchini—squeeze out as much moisture as possible after grating, or the bread might turn out too wet.
Step 5: Prepare Filling
If you’re using nuts or chocolate chips, stir them into the batter now. I love chopping the nuts coarsely—adds a lovely crunch. For a lighter option, leave them out or use dried fruit instead. Sometimes I sprinkle a few extra nuts on the top before baking for a pretty finish.
Step 6: Layer & Swirl
Pour half of the batter into the prepared pan. Dollop half of your filling on top—if using nuts or chips. Then add the remaining batter over the top, spreading gently. For a pretty swirl, use a toothpick or skewer to gently drag through the batter, creating beautiful marbled patterns. Don’t overdo it, or the swirl won’t be visible—just a gentle zigzag works wonders! I love seeing the layers peek through as it bakes.
Step 7: Bake
Pop the loaf in the oven and bake for about 50-60 minutes. Keep an eye on it—if your oven runs hot, start checking at around 45 minutes. It’s ready when a toothpick inserted in the center comes out clean. The top should be golden, and the smell—oh, the smell—is enough to make everyone impatient!
Step 8: Cool & Glaze
Let the bread cool in the pan for about 10 minutes before transferring it to a wire rack. I know, it’s tempting to cut into it right away, but cooling helps keep it moist and makes slicing easier. Once cooled, drizzle with your prepared glaze—simply mix powdered sugar, milk, and vanilla until smooth. If it feels too runny, add more sugar; too thick, just a splash of milk. Spread it with a spoon, swirl it for a pretty finish, and let it set for 10-15 minutes.
Step 9: Slice & Serve
A sharp bread knife is your best friend here. Slice it thick or thin—whatever you prefer—and serve with a mug of coffee or tea. This bread tastes just as good warm as it does at room temperature, so don’t stress if it cools. I love having a slice with a little butter or a smear of nut butter. And remember, it keeps wonderfully wrapped in foil or stored in a bread box for a few days, but honestly, it never lasts that long at my house!
What to Serve It With
This zucchini banana bread is so versatile, I usually have it at hand for nearly any occasion. For breakfast, I just slice it warm and add a pat of butter—nothing beats that melt-in-your-mouth feel. Pair it with a cup of strong coffee or a hot chai latte, and you’re all set. It also doubles as a beautiful brunch centerpiece, especially with a dusting of powdered sugar or extra glaze drizzled artfully over the slices. My family loves to serve it as a dessert, maybe topped with a dollop of whipped cream or a handful of fresh berries. For casual afternoons, I love keeping a loaf in the fridge and just toasting slices for an easy snack. Bonus: I’ve even made mini muffins from the same batter, baking them for about 15-20 minutes—perfect for on-the-go mornings. The trick is, this bread is a blank canvas: you can add chocolate, nuts, dried fruit, or simply enjoy it plain. My tradition is to keep a loaf ready when friends visit—you’ll get compliments every time!
Top Tips for Perfecting Your Zucchini Banana Bread
Over the years, I’ve picked up a few tricks to always ensure success with this recipe. For example, I always squeeze out excess moisture from the grated zucchini—if it’s too wet, your bread might turn out gummy or dense. A little salt on the zucchini before grating can also help draw out extra moisture, but don’t overdo it. I’ve learned to start checking the loaf around 50 minutes—each oven differs, and you don’t want it to overbake and dry out. Using very ripe bananas is key—they bring a rich, nearly caramelized flavor that screams comfort. If your bananas aren’t quite ripe enough, just give them a few extra days or microwave them for 20 seconds—they soften up and release their sweet aroma. When it comes to mixing, I always fold rather than stir vigorously; overmixing can make dense bread. For the swirl pattern, don’t overdo the toothpick technique—it’s more for visual charm than precise layering, so just a gentle zigzag makes it pretty. Regarding substitutions, I’ve tested swapping out almond flour, but I’ve found the texture gets a bit denser—so if you try it, just expect a slightly different crumb. The glaze is flexible, too—try adding a splash of lemon juice or a sprinkle of cinnamon for extra flavor. Honestly, this recipe’s a little like me—trust an experienced hand, and it’ll turn out just perfect every time. Plus, I’ve learned that some extra nuts or chocolate chips sprinkled on top before baking make it even better—more texture, more flavor! If I forget to add the glaze, it’s not the end of the world, but it definitely elevates the final look and taste. Remember, baking is a little like life—sometimes, it’s about the imperfect little touches that make it special.
Storing and Reheating Tips
This bread is just as good on day two as it is fresh out of the oven. To keep it moist and flavorful, I usually wrap it tightly in plastic wrap or store it in an airtight container at room temperature. It’s best eaten within 2-3 days—after that, I pop the slices in the fridge if I want it to stay fresh longer, and they’re still soft and delicious. Just keep an eye on the glaze—if you plan to store the loaf, wait until it’s completely cooled before adding the glaze, or it can get gooey and muddy. If you want to enjoy it after a few days, a quick toast or warming in the microwave for 20 seconds makes it taste almost fresh again. For freezing, I wrap individual slices tightly with plastic wrap, then place them in a freezer bag. They keep beautifully for up to a month. When thawing, just leave them at room temperature or warm briefly in the microwave. If you’ve added the glaze, I recommend waiting until just before serving to add it—freezing can sometimes cause it to crack or lose its gloss. Trust me, a little planning makes all the difference, and your loaf will taste just as delightful as the day you baked it.
Frequently Asked Questions
Final Thoughts
This zucchini banana bread has become a staple in my kitchen because it’s like that warm blanket you never want to take off. It’s moist, flavorful, and adaptable—plus, it feels nourishing without sacrificing that indulgent feel. Over the years, I’ve learned how forgiving it is—sometimes I forget the zucchini or throw in extra chocolate chips, and it’s still perfect. It’s one of those recipes that feels like a secret weapon: you can serve it on a casual weekday or make it look fancy with a drizzle of glaze and a dusting of powder sugar for brunch. And honestly? It’s a big hit with everyone who tastes it. I hope you’ll give it a try and make it your own—maybe with a splash of lemon zest or a handful of dried cranberries. Whatever you do, I promise this loaf will become a favorite in your house. Happy baking! And don’t forget to leave a comment below sharing how yours turned out—I’d love to hear!
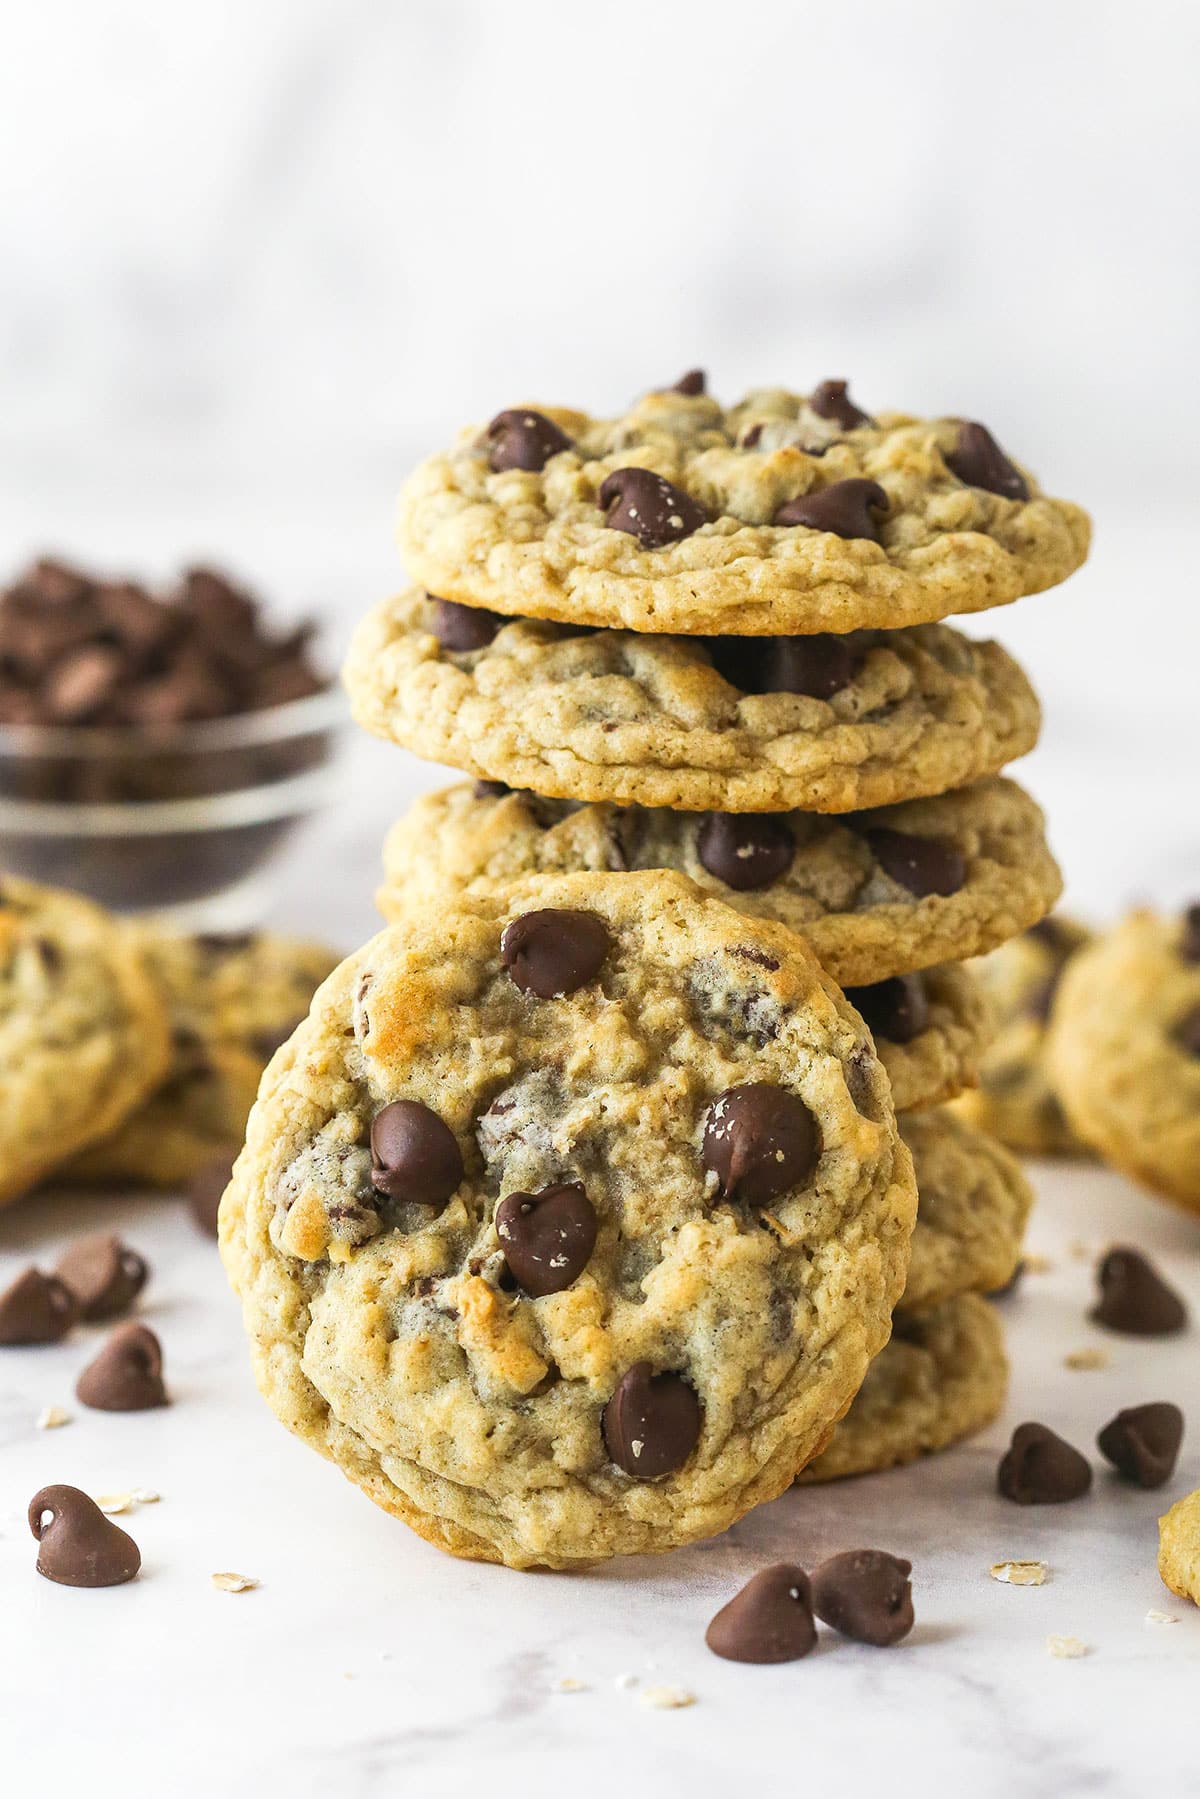
oatmeal cookies
Ingredients
Method
- Combine the flour, baking soda, and salt in a bowl and set aside.
- Cream the butter and sugars until light and fluffy.
- Add eggs one at a time, then mix in vanilla.
- Gradually add dry ingredients to wet and mix until combined.
- Stir in oats and chocolate chips.
- Form dough into 2 tablespoon-sized balls and refrigerate for 20 minutes.
- Preheat oven to 350°F and prepare baking sheets.
- Bake for 10 minutes or until edges are golden.
- Cool on baking sheets for 5 minutes, then transfer to racks.