Sweet Valentine Blondies A Simple Treat
Ever since I can remember, zucchini bread has been that cozy, nostalgic treat that makes the whole house smell like warm memories. But honestly, I used to think it was just a good way to use up those giant zucchinis from my garden—until I discovered adding that melty, gooey mozzarella right in the middle. It’s like the secret ingredient that takes this from simple to absolutely irresistible. I always do this when I want something comforting but don’t want to mess around too much in the kitchen. My kids ask for this all the time, especially when I tell them it’s basically zucchini cake with cheese—what’s not to love? This one’s a lifesaver on busy nights when I need something quickly that everyone will devour. The best part? It’s crazy versatile, and you can tweak the fillings or toppings to suit your mood. Trust me, once you try this, it’ll become a regular in your baking rotation—brace yourself for happy faces and lots of “Mom, this is seriously the best.”
What is a Mozzarella-stuffed Zucchini Bread?
This dish is kind of like a cross between zucchini bread and a savory stuffed loaf. Think of it as a tender, moist loaf—similar to traditional zucchini bread—but with a cheesy surprise swirled inside. The name might sound fancy or confusing at first, but once you see how it’s made, you’ll realize it’s just a simple, hearty bread with a cheesy center that’s perfect for snacking, breakfast, or even brunch. The genius here is mixing grated zucchini into the batter, which keeps it moist and adds a veggie boost, then filling it with slices of creamy mozzarella that melt during baking. It’s essentially a savory, cheesy bread that walks the line between breakfast and a snack, and because it’s made with everyday ingredients, it’s nothing fancy but totally delicious. I love that it’s forgiving too—perfect for bakers of all skill levels who want that cozy, “I made this” vibe.
Why you’ll love this recipe?
What I love most about this is how effortlessly it satisfies that craving for something cheesy and warm. The flavor? Oh, it’s a perfect combination of buttery, cheesy, and just a hint of sweetness from the zucchini. Plus, the mozzarella melts into gooey pockets that surprise your taste buds with every bite. It’s also super simple to throw together—no complicated techniques or fancy gadgets needed. Honestly, I’ve made this recipe countless times, and it never fails to impress. It’s budget-friendly too; the ingredients come straight from the fridge or pantry, making it a real lifesaver when I want a comforting homemade treat without running to the store. And versatility? Absolutely. You can swap out the mozzarella for feta, cheddar, or even a mixture of cheeses, depending on what you have. I love how this bread can adapt to whatever’s in season or whatever cheese I’ve got lying around. It’s honestly one of those recipes that tastes like a hug, and every time I bake it, I end up sneaking a second slice—don’t judge me!
How do you make Mozzarella-Stuffed Zucchini Bread?
Quick Overview
This bread is a breeze to make — start by grating the zucchini and squeezing out excess moisture (important for that perfect texture). Mix up your dry ingredients: flour, baking powder, a pinch of salt, some herbs if you’re feeling fancy. In another bowl, whisk together the wet ingredients—eggs, melted butter, a touch of honey or sugar, and vanilla. Combine the wet and dry just until they’re just integrated, then fold in the grated zucchini. Pour half the batter into your prepared loaf pan, layer mozzarella slices in the center, then top with the remaining batter. Bake until the top is golden and a toothpick comes out clean. The smell when this is baking? Pure heaven. Once out of the oven, I love to let it cool just a bit before slicing—warm, cheesy bites that simply melt in your mouth. For an extra special touch, I sometimes brush the top with a little olive oil and sprinkle with flaky sea salt right after baking. It’s honestly hard to wait to dig in! This bread is perfect fresh out of the oven, but leftovers? Still fantastic the next day, just warmed up or toasted.
Ingredients
For the Main Batter:
– 2 cups grated zucchini (about 2 medium zucchinis)
– 2 ½ cups all-purpose flour (or a mix of whole wheat for a healthier twist)
– 1 tablespoon baking powder
– ½ teaspoon salt
– 1 teaspoon dried thyme or basil (optional but adds flavor)
– 3 large eggs
– ½ cup melted unsalted butter or olive oil
– ¼ cup honey or maple syrup (for just a touch of sweetness)
– 1 teaspoon vanilla extract
For the Filling:
– 1 cup mozzarella cheese, sliced (or shredded if preferred)
– Optional: chopped herbs, sun-dried tomatoes, or cooked bacon bits for extra flavor
For the Glaze:
– A drizzle of olive oil and a sprinkle of flaky sea salt or poppy seeds, if desired. You can also skip the glaze and just enjoy it plain!
Step-by-Step Instructions
Step 1: Preheat & Prep Pan
Heat your oven to 350°F (175°C). Grease a standard loaf pan with butter or line it with parchment paper. Set aside. I always find that a nicely greased pan makes sure my bread comes out smoothly without sticking — trust me on this one.
Step 2: Mix Dry Ingredients
In a big bowl, whisk together the flour, baking powder, salt, and herbs. This stage is important because you want even distribution of your leavening and seasonings. I usually do this before I start on the wet ingredients, so everything’s ready for quick mixing.
Step 3: Mix Wet Ingredients
In a separate bowl, beat the eggs, then stir in the melted butter or oil, honey, and vanilla. Whisk until smooth. I like doing this in a warm kitchen — the melted butter mixes better and helps everything incorporate smoothly. I’ve tested this with almond milk once when I ran out of dairy—surprisingly, it made the bread even creamier! Not that I recommend skipping the zucchini—it’s what keeps this bread moist and fresh-tasting.
Step 4: Combine
Pour the wet into the dry ingredients, mixing just until combined. Overmixing is the enemy here — it makes the bread dense. Fold in the grated zucchini gently, making sure it’s evenly distributed. You’ll notice that the batter is thicker than your typical bread, but that’s perfect — it holds all the goodies inside.
Step 5: Prepare Filling
Lay out your mozzarella slices or shredded cheese. If you want to add herbs or other fillings, this is the time to prepare them. I like slices because they create nice cheesy pockets, but shredded works well too. Just be gentle when stacking the filling, so it doesn’t all sink to the bottom.
Step 6: Layer & Swirl
Pour half of the batter into your loaf pan. Spread evenly. Layer the mozzarella slices or sprinkle the shredded cheese in the middle. Then top with the remaining batter, carefully spreading it over the cheese layer. If you want a pretty marbled effect, take a butter knife and gently swirl it through the top layer — it’s a simple trick that looks fancy!
Step 7: Bake
Pop it into the oven and bake for about 50-60 minutes. You’ll know it’s ready when the top is golden-brown and a toothpick inserted in the center comes out mostly clean. Keep an eye on it after 50 minutes; ovens can vary, so don’t be surprised if it’s done a little earlier or later. When I first made this, I learned the hard way not to open the oven too often—the center can sink if the oven door is too bumpy.
Step 8: Cool & Glaze
Let the bread cool in the pan for about 10 minutes, then transfer to a wire rack. For extra flavor, I brush the top with a little olive oil and sprinkle flaky salt once it’s cool enough to handle. This step isn’t necessary but adds a nice touch of richness and crunch.
Step 9: Slice & Serve
Use a serrated knife to slice gently—hot cheese can make it tricky. I prefer serving it warm, maybe with a side of fresh greens or simply on its own with a dollop of sour cream or yogurt. It’s honestly just as good chilled, especially for a quick snack the next day. The slices hold together beautifully if you let it cool completely, making it perfect for picnic boxes or packed lunches.
What to Serve It With
This bread is so versatile, I can’t help but get excited about how many ways you can serve it. For breakfast, a simple spread of butter or almond butter and a hot cup of coffee. It’s also fantastic as part of a brunch spread alongside scrambled eggs and fresh fruit. I sometimes add a few slices to a salad for a filling lunch or scarf down a piece when the craving hits at 10 PM—let’s be honest, it’s that good.
And don’t forget, it pairs beautifully with a glass of chilled white wine or a mug of herbal tea. My family loves it warm with a smear of cream cheese, but it’s just as delightful cold, sliced thin and served as a snack. I’ve even toasted it to make cheesy croutons, which are seriously addictive. Honestly, whatever way you serve it, this bread makes every meal a little more special.
Top Tips for Perfecting Your Mozzarella-Stuffed Zucchini Bread
After making this countless times, I’ve picked up a few tricks. First, squeeze out as much moisture from the zucchini as possible — it keeps the bread from becoming soggy. I use a clean kitchen towel to wring out the zucchini after grating; it’s an extra step that’s totally worth it. Also, don’t overmix once you add the wet and dry ingredients — the batter should be just combined to stay light and fluffy.
When layering your cheese, try to make thinner slices or shredded cheese that’s evenly distributed. This helps prevent the cheese from sinking or burning before the bread is fully baked. About the swirl — go slow and use a butter knife to create a beautiful marbled look. It adds charm, plus you get those beautiful cheesy pockets in every bite. If you’re feeling adventurous, streusel topping or a sprinkle of parmesan on top before baking adds a nice crunch.
In terms of ingredient swaps, I’ve tested using gluten-free flour blends — just keep in mind the texture might be slightly different, but still delicious. For a dairy-free version, I’d recommend vegan cheese, but note it won’t melt as smoothly. Baking temperature can vary depending on your oven; I usually rotate my loaf halfway through for even browning. And finally, don’t skip the cooling stage — patience here makes slicing much neater and presentation more beautiful.
Storing and Reheating Tips
This bread is best eaten within a day or two, but if you have leftovers, here’s how I store and reheat:
Room Temperature: Wrap it tightly in foil or store in an airtight container for up to 24 hours. Just know it’s best enjoyed fresh—the zucchini can start to release moisture otherwise.
Refrigerator Storage: Keep it in an airtight container or wrapped well in plastic wrap, and it’ll stay good for about 3 days. To keep it moist, I sometimes sprinkle a tiny bit of water on the slices before reheating.
Freezer Instructions: Wrap slices individually in plastic wrap, then place in a freezer-safe bag. Properly stored, it’ll last up to 3 months. To reheat, warm slices in the microwave or toast in a skillet until warm and cheesy again.
If you’re planning to add a glaze or toppings, I recommend doing so right before serving, especially if you want that fresh crunch or drizzled look. For leftovers stored in the fridge, I like to heat slices for about 15-20 seconds in the microwave—just enough to make the cheese melty again.
Frequently Asked Questions
Final Thoughts
This mozzarella-stuffed zucchini bread is hands down one of my favorite “go-to” recipes. It’s simple, wholesome, yet feels like a little special treat every time I bake it. The cheese surprise inside gets everyone talking, and it’s just so satisfying to bite into a loaf that’s moist, cheesy, and packed with veggies. I love how adaptable it is—I’ve tested it with various cheeses, herbs, and even gluten-free flours. It’s a nice reminder that good comfort food doesn’t have to be complicated or laden with ingredients you can’t pronounce. Plus, the smell alone has everyone rushing into the kitchen, asking, “Is it ready yet?” My hope is that you’ll have as much fun making this as I do—and that it’s one of those recipes your family keeps requesting. Happy baking! I can’t wait to hear how yours turns out. Drop a comment or share your tweaks—I love hearing your stories too.
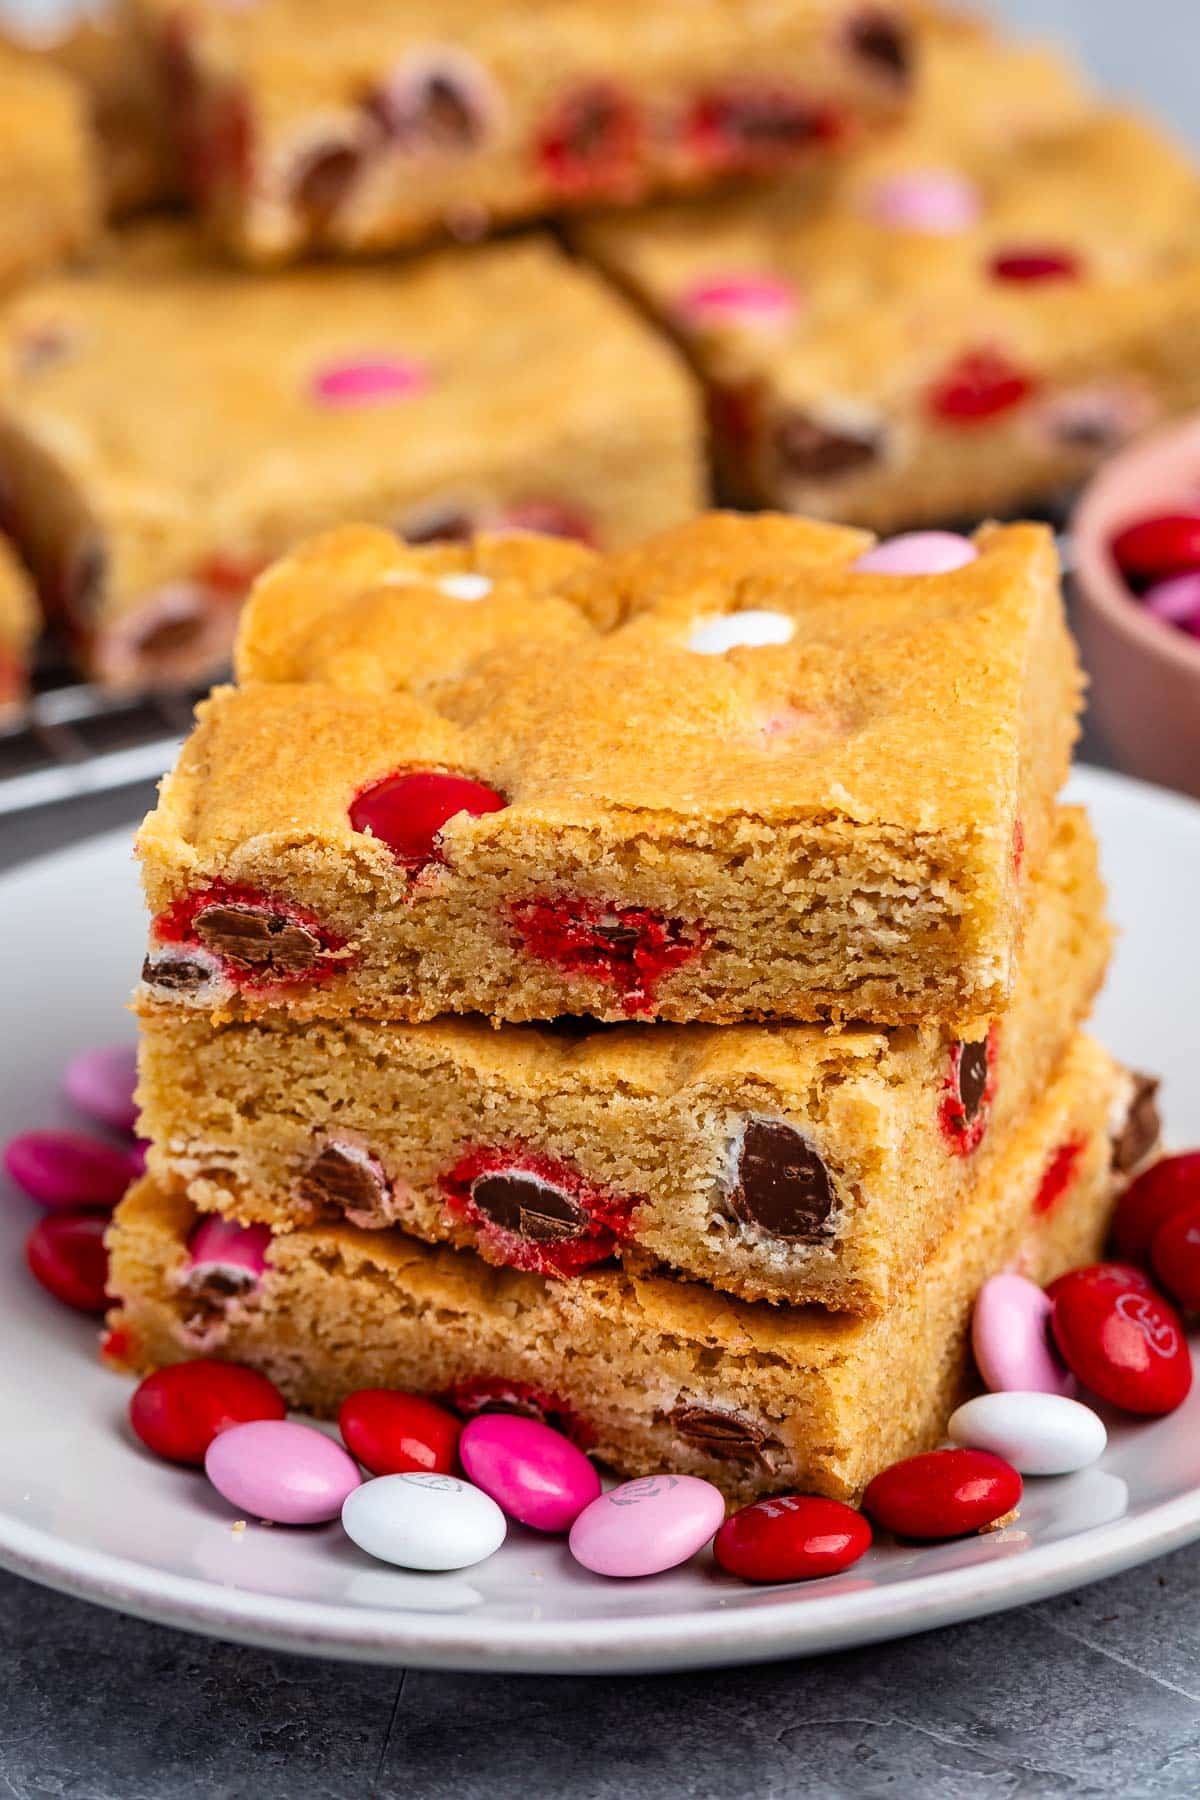
Valentine Blondies
Ingredients
Method
- Preheat oven to 350°F. Line a 9x13-inch pan with foil and spray with nonstick spray.
- Cream butter and brown sugar until fluffy, about 1-2 minutes. Add eggs, baking powder, vanilla, and salt; beat until smooth. Gradually add flour and mix well. Fold in Valentine M&Ms.
- Spread batter evenly into prepared pan. Bake for 20-25 minutes until golden and set. Cool completely before cutting into bars.
- Store in an airtight container for up to 3 days or freeze for up to 3 months.